
If you’ve ever struggled with your Ryobi drill press running too fast or too slow, you know how frustrating it can be. Getting the belt speed just right is key to making clean, precise holes and protecting your tools.
Luckily, adjusting the belt speed on your Ryobi drill press is easier than you might think. In this guide, you’ll learn exactly how to change the speed step-by-step, so your drill press works perfectly for every project. Keep reading, and you’ll master this simple tweak that can make a big difference in your work.
Credit: www.youtube.com
Ryobi Drill Press Belt System
The Ryobi drill press uses a belt system to control the speed of the drill. This system lets you change how fast or slow the drill spins. Adjusting the belt speed helps match the drill speed to the material you work on.
Understanding the belt system can make your work easier and safer. The system is simple but effective. Knowing its parts and function helps you adjust the speed quickly.
Components Involved
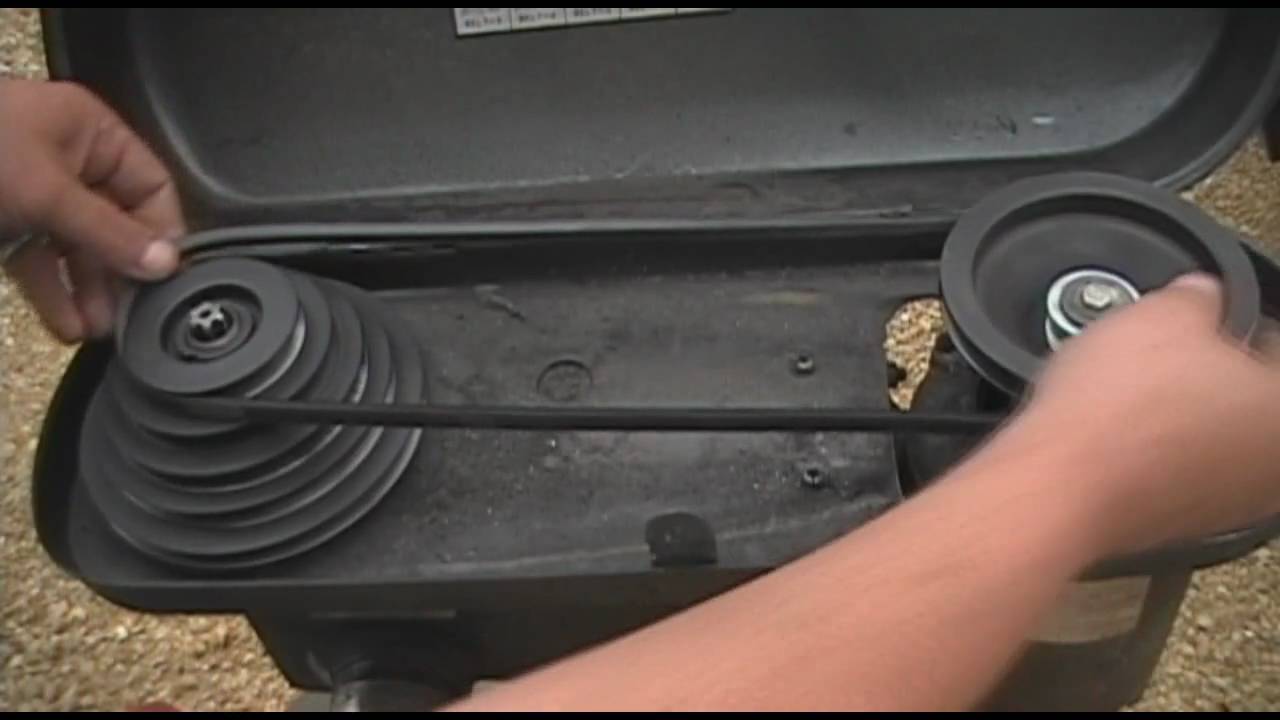
The belt system has a few key parts. The motor pulley drives the belt. The belt connects the motor pulley to the spindle pulley. The spindle pulley turns the drill chuck.
The belt sits on the pulleys and moves when the motor runs. You can move the belt between different pulley steps. This changes the speed of the spindle pulley.
Role Of Belt Speed
Belt speed controls how fast the drill spins. Different materials need different speeds. Soft materials use higher speeds. Hard materials need slower speeds.
Adjusting belt speed helps avoid damage to the drill or material. It also improves drilling accuracy. Proper speed extends the life of your drill press.
Tools Needed For Adjustment
Adjusting the belt speed on a Ryobi drill press requires the right tools. These tools help you work safely and make precise changes. Having them ready saves time and avoids frustration.
Each tool has a specific role in the adjustment process. Knowing which tool to use makes the task easier and faster.
Wrench Or Socket Set
A wrench or socket set helps loosen and tighten bolts on the drill press. These bolts hold the belt cover and pulleys in place. Use the correct size to avoid damaging the bolts.
Flathead Or Phillips Screwdriver
You need a flathead or Phillips screwdriver to remove screws from the belt guard. This lets you access the pulleys and belt easily. Check the screw type before starting.
Replacement Belt (optional)
Sometimes the belt needs replacement during adjustment. A new belt ensures smooth operation and correct speed. Keep a spare belt ready if the old one is worn out.
Gloves
Wear gloves to protect your hands from sharp edges and dirt. Gloves also improve grip on tools and parts. Safety first during any machine adjustment.
Flashlight Or Work Light
Good lighting helps you see the belt and pulleys clearly. A flashlight or work light makes the area bright. This reduces mistakes and speeds up the process.
Safety Precautions
Always unplug the drill press before adjusting the belt speed. Wear safety glasses to protect your eyes from dust or debris. Keep fingers clear of moving parts during the adjustment process.
Wear Proper Safety Gear
Always wear safety glasses to protect your eyes from dust and debris. Use ear protection if the drill press is loud. Avoid loose clothing and keep long hair tied back. Gloves can protect your hands but avoid loose gloves that can catch in moving parts.
Disconnect Power Before Adjusting
Unplug the drill press or switch off the power before making any adjustments. This step prevents accidental starts that can cause injury. Double-check the machine is completely off before touching the belt or pulleys.
Use The Right Tools
Use proper tools like wrenches or screwdrivers designed for your Ryobi drill press. Avoid using makeshift tools that can slip or damage parts. Correct tools help you adjust the belt speed safely and quickly.
Check Belt Condition
Inspect the belt for cracks, frays, or wear before adjusting. A damaged belt can break during use and cause harm. Replace the belt if you see any damage to ensure safe operation.
Keep Hands Clear Of Moving Parts
Never place your hands near the belt or pulleys while the machine is running. Wait until the belt fully stops before making changes. Stay focused and avoid distractions during the adjustment process.
Step-by-step Belt Speed Adjustment
Adjusting the belt speed on a Ryobi drill press is simple. Follow these clear steps to change the speed safely and quickly. This helps you work on different materials with the right power and control. Keep your workspace clean and tools ready before starting.
Loosening The Belt Tension
First, turn off the drill press and unplug it. Locate the motor mount and loosen the tension bolt or lever. This step makes the belt slack and easy to move. Do not remove the belt yet, just loosen it enough to shift position.
Selecting The Desired Speed
Check the speed chart on your drill press. It shows different pulley positions for each speed. Decide the speed you need for your project. Remember, low speeds suit hard materials; high speeds work for soft ones.
Repositioning The Belt
Move the belt off the current pulleys carefully. Place it on the new pulley steps according to the speed chosen. Ensure the belt sits fully in the grooves to avoid slipping. Keep the belt straight and not twisted.
Tightening The Belt
Push the motor mount back to tighten the belt. Tighten the tension bolt or lever firmly but not too tight. Check the belt tension by pressing it; it should feel firm but flexible. Plug in the drill press and test the new speed with the machine off the workpiece.
Testing The New Speed
Testing the new speed on your Ryobi drill press is important. It helps you confirm the belt speed fits your task. This step ensures safety and efficiency during work. Without testing, you might damage materials or tools.
Start by running the drill press at the new speed without any load. Listen for unusual sounds or vibrations. A smooth, steady sound shows proper belt tension and alignment.
Check The Speed Settings Visually
Look at the belt position on the pulleys. Make sure it sits firmly in the grooves. The belt should not slip or jump during operation. This visual check prevents belt wear and speed loss.
Test Drilling On Scrap Material
Use a piece of scrap wood or metal to test the drill press. Drill a small hole to see how the speed performs. The drill bit should cut smoothly without overheating or stalling.
Adjust Speed If Necessary
If the drill bit struggles or the motor sounds stressed, reduce the speed. Raise the speed if the drill bit spins too slow for the material. Repeat the test until the speed feels right.
Safety First During Testing
Wear safety glasses and keep hands away from moving parts. Stand clear of the drill press during speed tests. Proper safety helps avoid accidents and injuries.
Common Issues And Fixes
Adjusting the belt speed on a Ryobi drill press is not always smooth. Some common problems might slow you down. Knowing these issues helps you fix the drill press quickly. This section covers common problems and easy fixes.
Belt Slippage
Belt slippage happens when the belt moves over the pulleys without grip. This causes the drill to lose power. Check if the belt is loose or worn out. Tighten the belt or replace it if needed. Clean the pulleys to remove dust or oil. A tight, clean belt stops slipping and keeps the drill steady.
Unusual Noises
Strange sounds can mean a problem with the belt or pulleys. Squeaking or grinding noises often come from a dry or damaged belt. Apply a small amount of lubricant to the pulleys. Inspect the belt for cracks or frays. Replace the belt if it looks bad. Quiet operation means the belt and pulleys work well together.
Inconsistent Speeds
Speed changes without adjusting the belt may signal a problem. The belt might be on the wrong pulley step. Check the belt position and move it to the correct groove. Worn pulleys can cause speed issues. Replace pulleys if they are damaged. Proper belt placement ensures smooth, steady drill speeds.
Maintenance Tips For Belt Longevity
Maintaining the belt on your Ryobi drill press helps it last longer. Proper care saves money and keeps your tool working well. Small habits prevent big problems with the belt. Follow these simple tips to extend belt life and keep your drill press running smoothly.
Regularly Inspect The Belt For Wear
Check the belt often for cracks, frays, or stretching. Replace it if you see any damage. A worn belt can slip or break during use. Early detection prevents unexpected breakdowns and keeps work safe.
Keep The Belt Clean And Dry
Dirt and oil can cause the belt to slip. Wipe the belt with a dry cloth after each use. Avoid water or harsh cleaners on the belt. Clean belts grip better and last longer.
Adjust Belt Tension Properly
Too tight or too loose tension wears the belt quickly. Follow the drill press manual for correct tension settings. Test the tension by pressing the belt lightly. It should have a little give but not sag.
Store The Drill Press In A Dry Place
Moisture damages the belt and metal parts. Keep the drill press in a dry area to avoid rust and belt decay. Cover the machine if stored for a long time. Dry storage keeps belts flexible and strong.

Credit: forum.toolsinaction.com

Credit: forum.toolsinaction.com
Frequently Asked Questions
How Do I Change The Belt Speed On A Ryobi Drill Press?
To change belt speed, open the drill press cover. Loosen the belt tension lever. Move the belt to different pulleys for desired speed. Tighten the tension lever and close the cover. Always unplug the drill press before adjusting for safety.
What Belt Speed Settings Are Available On Ryobi Drill Presses?
Ryobi drill presses typically offer multiple speed settings. These range from low to high RPMs. Different pulleys control the belt position. Select the speed based on your drilling material and bit size for optimal performance.
Why Is Adjusting Belt Speed Important For Drilling?
Proper belt speed ensures efficient drilling and longer tool life. Too high speed can damage the drill bit or material. Too low speed causes poor cutting and overheating. Adjusting speed improves accuracy and safety during drilling tasks.
How Often Should I Check Belt Tension On My Drill Press?
Check belt tension regularly, especially before heavy use. Proper tension prevents slipping and maintains consistent speed. Inspect for wear or cracks to avoid sudden failures. Adjust tension if the belt feels loose or slips during operation.
Conclusion
Adjusting the belt speed on your Ryobi drill press is simple and safe. Always unplug the machine before making changes. Use the tension lever to release the belt, then move it to the right pulley for the speed you want.
Tighten the belt and check it spins smoothly. Correct speed helps your drill work better and last longer. Practice these steps to get comfortable with the process. Soon, adjusting belt speed will feel easy and quick every time. Keep your drill press ready for any project.