
Removing tile can feel like a tough job, especially if you don’t have the right tools or know where to start. But what if you could make the process faster, cleaner, and less tiring?
Using a hammer drill might be the secret weapon you need. You’ll learn simple, step-by-step tips to remove tile safely and effectively with a hammer drill. By the end, you’ll have the confidence to tackle your tile removal project like a pro.
Ready to save time and effort? Let’s dive in.

Credit: www.youtube.com
Tools Needed
Removing tile with a hammer drill requires the right tools. Having the proper equipment makes the task easier and safer. This section covers the tools you need for a smooth tile removal process.
Choosing The Right Hammer Drill
Select a hammer drill that offers good power and control. A drill with adjustable speed helps prevent damage to the surface beneath the tile. Look for models with a hammer function, as it provides extra impact for breaking tiles. Corded drills usually offer more power, but cordless drills give better mobility.
Choose a drill with a comfortable grip. This reduces hand fatigue during long work sessions. Also, check for variable speed settings to match different tile types.
Additional Tools And Safety Gear
Besides the hammer drill, use a chisel or a scraper to help lift tiles. A putty knife works well for smaller tiles or tight spots. A sturdy dust mask protects your lungs from dust particles.
Wear safety goggles to shield your eyes from flying debris. Gloves protect your hands from sharp tile edges. Knee pads are useful if you work on the floor for long periods. Keep a bucket nearby to collect broken tile pieces.
Preparing The Area
Preparing the area is the first step before removing tiles with a hammer drill. This step makes the job safer and easier. Taking time to prepare helps avoid damage and mess. Clear space and protect surfaces to keep everything clean and safe.
Clearing The Work Space
Remove all furniture and objects near the tile area. Clear the floor to avoid tripping hazards. Keep children and pets away from the work zone. A clean space helps you move freely and work faster. It also reduces the risk of accidents.
Protecting Surrounding Surfaces
Cover walls, cabinets, and floors near the tiles with plastic sheets. Use painter’s tape to hold covers in place. Protecting surfaces prevents scratches and dust damage. Wear old clothes and safety glasses for extra protection. This step keeps your home safe during tile removal.
Setting Up The Hammer Drill
Setting up the hammer drill properly is key to removing tiles safely and effectively. Preparing the tool the right way makes the job easier and helps avoid damage. Follow these steps carefully to get your hammer drill ready.
Selecting The Proper Drill Bit
Choose a drill bit designed for masonry or tile removal. A carbide-tipped bit works best on hard surfaces. Avoid using regular drill bits; they wear out fast and can break. Pick a size that fits the drill and matches the tile thickness. This ensures better control and efficiency.
Adjusting Drill Settings
Set the hammer drill to the hammer mode for tile removal. Use a low to medium speed setting to prevent tile cracking. High speed can cause the bit to slip or break the tile unevenly. Check the drill’s manual for guidance on settings. Proper adjustment reduces effort and improves results.

Credit: www.youtube.com
Removing Tiles Step-by-step
Removing tiles with a hammer drill is easier when done step-by-step. Follow clear instructions to avoid damage and work safely. Start by preparing your tools and workspace. Protect yourself with safety glasses and gloves. The process involves scoring grout lines, breaking tiles, and removing pieces carefully. This method saves time and effort.
Scoring The Grout Lines
Begin by scoring the grout lines around the tiles. Use the hammer drill with a grout removal bit. Apply light pressure and move slowly along the grout lines. This weakens the grout and helps separate tiles. Take your time for clean cuts. Avoid damaging the wall or floor underneath.
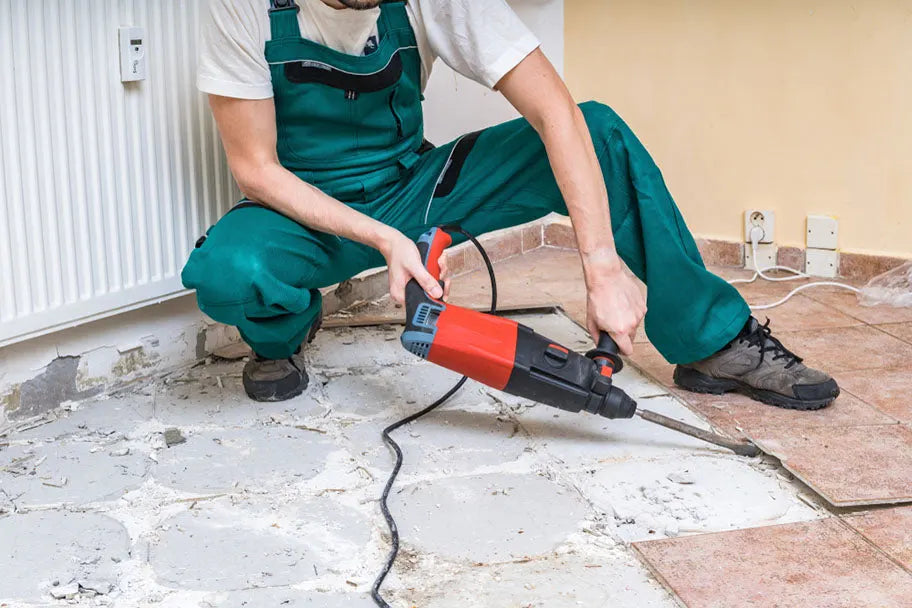
Breaking The Tiles
After scoring, use the hammer drill with a chisel bit to break the tiles. Start at the tile center and work outward. Tap gently at first, then increase force as needed. Break tiles into smaller pieces. Keep the drill steady to prevent slips. Always wear safety gear to protect from flying debris.
Removing Tile Pieces
Remove tile pieces carefully using the drill or a flat tool. Pry up loose fragments without harming the surface below. Clear away dust and small bits often to see progress. Dispose of tile pieces safely. Inspect the surface for leftover adhesive or grout. Clean thoroughly before installing new tiles.
Cleaning Up After Removal
Cleaning up after removing tiles with a hammer drill is important. It keeps the workspace safe and ready for the next steps. Proper cleanup helps avoid accidents and damage to the floor or walls. It also makes the area look neat and tidy.
Disposing Of Debris
Collect all broken tiles and dust carefully. Use a strong broom and dustpan to sweep the floor. Place debris into heavy-duty trash bags or a container. Avoid leaving sharp tile pieces on the floor. Dispose of debris according to local waste rules. This keeps the area safe and clean.
Surface Preparation For New Tiles
Check the surface for leftover glue or mortar. Use a scraper or sanding tool to remove any residue. Clean the area with a damp cloth to remove dust. Ensure the surface is dry before starting new tile work. A smooth, clean surface helps new tiles stick better. This step improves the final look and durability.
Troubleshooting Common Issues
Removing tile with a hammer drill can be tricky. Problems often arise that slow down the process. Knowing how to fix these common issues saves time and effort. The right approach protects your work area and tools.
Dealing With Stubborn Tiles
Some tiles resist removal. They stick tightly to the surface beneath. Try increasing the drill’s power slightly. Use a chisel bit for better grip. Work slowly to avoid breaking the tile unevenly. Tap gently with a hammer if needed. Patience helps prevent damage and injury.
Avoiding Damage To Substrate
The surface under the tile must stay intact. Use the drill carefully near edges. Keep the drill bit flat against the tile surface. Avoid digging too deep or applying too much force. Check progress often to protect the base. Cover the area with a protective sheet if possible.
Credit: www.contractorsdirect.com
Frequently Asked Questions
How Do I Remove Tile Using A Hammer Drill?
To remove tile with a hammer drill, use a chisel bit attachment. Position the bit under the tile edge and gently hammer. Work slowly to avoid damaging the substrate. Wear safety gear to protect eyes and hands during the process.
What Drill Bit Is Best For Tile Removal?
A chisel or masonry bit works best for tile removal with a hammer drill. These bits break up tile and grout effectively. Avoid using standard drill bits, as they can damage tiles or drill inefficiently.
Can I Remove Tile Without Damaging The Wall?
Yes, by using the correct drill bit and gentle pressure, you can minimize wall damage. Start at tile edges and work carefully. Use protective gear and remove adhesive residue afterward to keep the wall intact.
Is A Hammer Drill Better Than A Manual Hammer For Tile Removal?
A hammer drill is more efficient and requires less physical effort than a manual hammer. It breaks tiles faster and reduces the risk of uneven removal. However, it needs proper technique to avoid damaging the wall.
Conclusion
Removing tile with a hammer drill takes patience and care. Always wear safety gear to protect yourself. Work slowly to avoid damaging the surface below. Clean the area well after removing tiles. This method saves time and effort compared to manual tools.
Practice on a small spot first to gain confidence. With the right steps, tile removal becomes manageable and less stressful. Keep these tips in mind for a smooth project. Your space will be ready for new tiles soon.