
Are you ready to tackle a project that can transform your kitchen? Drilling into a quartz countertop might sound tricky, but with the right approach, you can do it yourself without cracking or damaging the surface.
Imagine the satisfaction of customizing your space exactly how you want it—whether it’s adding a new faucet, installing a soap dispenser, or mounting accessories. In this guide, you’ll discover simple, step-by-step tips that make drilling into quartz safe and easy.
Keep reading to unlock the secrets to a flawless finish and gain the confidence to handle your countertop like a pro.
Credit: mysouthernstone.com
Choosing The Right Tools
Choosing the right tools is key for drilling a quartz countertop safely and cleanly. Quartz is a very hard material. Using the correct tools helps prevent damage and makes the job easier. Below are important tools to prepare before you start drilling.
Selecting A Diamond Drill Bit
Pick a diamond drill bit designed for hard stones. These bits cut through quartz smoothly. Regular bits can crack or chip the surface. Diamond bits last longer and keep the hole neat. Choose the right size for your project.
Using A Drill With Variable Speed
Use a drill that lets you control the speed. Low speed reduces heat and prevents cracks. High speed can damage the quartz. Start slow and increase speed carefully. Keep the drill steady and straight for clean holes.
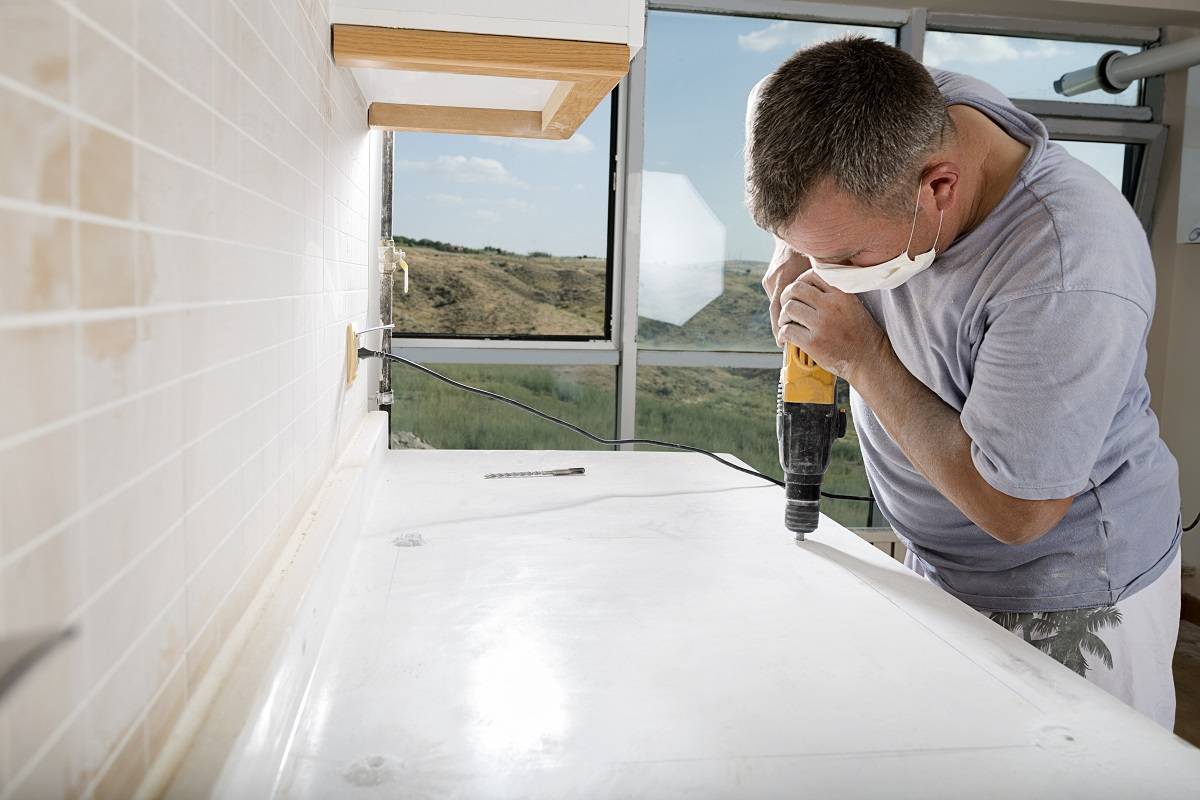
Safety Gear Essentials
Wear safety glasses to protect your eyes from dust and chips. Use gloves to protect your hands from sharp edges. A mask helps avoid breathing in dust particles. Ear protection reduces noise from the drill. Safety gear keeps you safe during the job.
Preparing The Countertop
Preparing a quartz countertop for drilling is a key step. It helps avoid damage and ensures clean holes. Proper preparation makes drilling easier and safer. Follow these steps carefully before starting the drill.
Cleaning The Surface
Remove all dirt, dust, and grease from the countertop. Use a soft cloth and mild soap with water. Clean the area where you plan to drill. A clean surface helps the drill stay steady and accurate.
Marking Drill Points Accurately
Use a pencil or a marker made for stone surfaces. Mark the exact points where you will drill. Double-check measurements to avoid mistakes. Accurate marks help create precise holes without cracks.
Securing The Countertop
Make sure the countertop does not move during drilling. Use clamps or heavy objects to hold it steady. A stable surface prevents slips and reduces the risk of damage. Safety first for a smooth drilling process.
Drilling Techniques
Drilling a quartz countertop requires care and the right techniques. Quartz is a hard material. It can crack or chip if drilled incorrectly. Using proper drilling methods helps protect your countertop and drill bit. Follow these steps for a clean, precise hole.
Starting With A Pilot Hole
Begin by marking the spot for drilling. Use a small drill bit to create a pilot hole. This hole guides the larger bit and prevents slipping. Drill slowly and gently. The pilot hole makes the final drilling easier and more accurate.
Maintaining Steady Pressure
Apply steady, even pressure while drilling. Avoid pushing too hard. Too much force can crack the quartz. Let the drill bit do the work. Keep the drill straight and steady to ensure a clean hole.
Cooling The Drill Bit
Heat builds up during drilling. This can damage the bit and countertop. Use water or a spray bottle to cool the drill bit. Keep the bit wet while drilling. Cooling prevents overheating and extends the life of your tools.
Avoiding Common Mistakes
Drilling a quartz countertop requires care and the right approach. Many beginners make common mistakes that cause damage. Avoid these errors to keep your countertop safe and looking great. Simple steps can prevent costly cracks and chips.
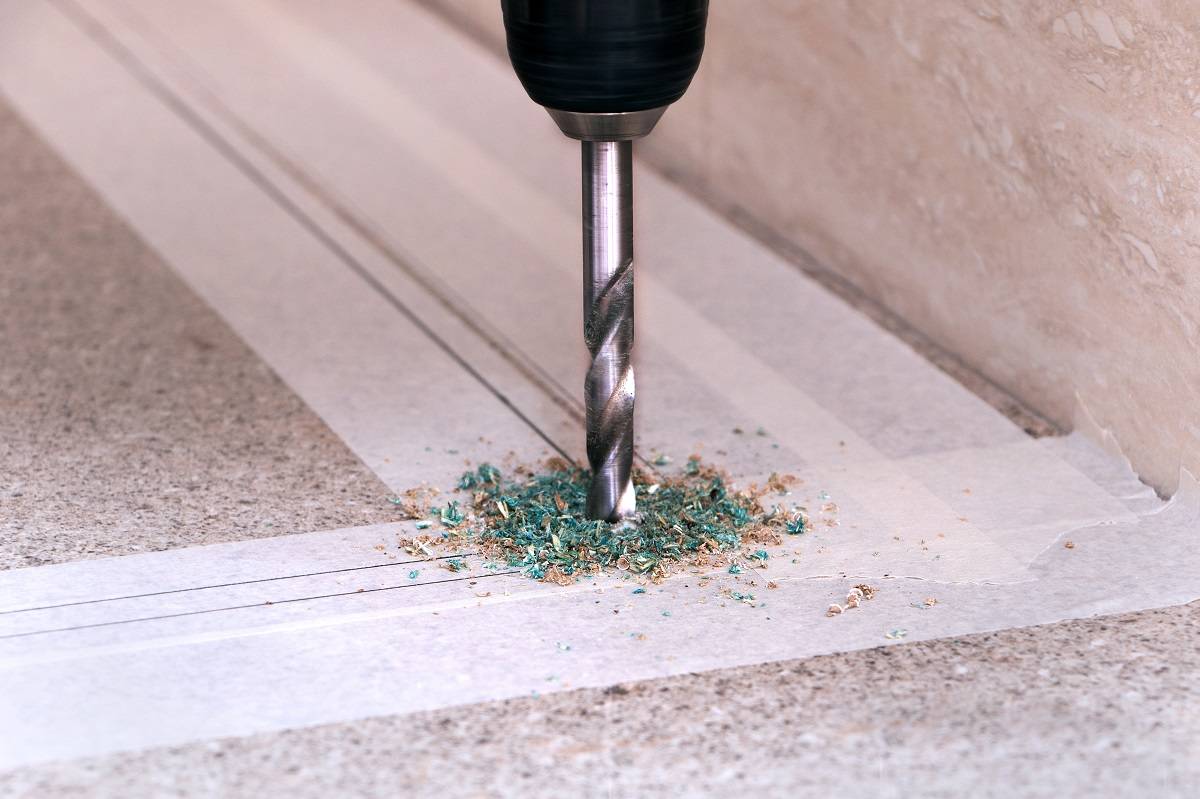
Preventing Cracks And Chips
Quartz is strong but not unbreakable. Use a drill bit made for stone or tile. Start drilling slowly to avoid sudden pressure. Place painter’s tape on the drilling spot. It helps protect the surface and stops the drill from slipping. Keep the drill steady and straight to reduce stress on the quartz.
Dealing With Overheating
Drilling creates heat that can crack quartz. Use water to cool the drill bit and countertop. Spray water or use a wet sponge while drilling. Take breaks to let the drill and surface cool down. Overheating weakens the stone and dulls the drill bit quickly.
Handling Slip And Drill Wandering
The drill bit can slip and ruin the countertop surface. Mark the spot clearly before starting. Use a center punch or nail to make a small dent. This dent helps keep the drill bit in place. Hold the drill firmly and start slowly. Steady hands prevent wandering and protect your quartz.
Finishing Touches
After drilling a quartz countertop, the job is not quite done. The finishing touches make a big difference. They protect the surface and keep it looking great. Taking time with these steps ensures your countertop stays strong and beautiful. Focus on cleaning, smoothing, and sealing the drilled hole.
Cleaning Drill Residue
Remove dust and debris from the drilled hole carefully. Use a soft brush or a vacuum to clear out particles. Avoid using water immediately to prevent damage. Clean surfaces help the sealant stick better and last longer. This step prepares the area for the next process.
Smoothing Rough Edges
Check the hole edges for any rough or sharp spots. Use fine-grit sandpaper or a diamond file to smooth them out gently. This prevents cracks and chips around the hole. Smooth edges also improve the look of the countertop. Take your time to ensure a clean finish.
Sealing The Hole
Apply a suitable sealant around the drilled hole. This protects the quartz from moisture and stains. Use a clear, waterproof sealant designed for stone surfaces. Apply it evenly and remove any excess with a cloth. Proper sealing extends the life of your quartz countertop.

Credit: www.youtube.com
When To Call A Professional
Drilling a quartz countertop requires care and skill. Some tasks are easy, but others need expert help. Knowing when to call a professional can save you time and money. It also protects your countertop from damage. Below are key moments when hiring a pro is the best choice.
Complex Drilling Jobs
Complex drilling jobs need special tools and experience. Large holes or angled drilling may cause cracks. Professionals know how to handle these challenges safely. They use the right drill bits and techniques. This helps keep your quartz countertop intact and looking great.
Repairing Mistakes
Drilling mistakes happen, even to careful people. A wrong hole or crack can ruin the surface. Professionals can fix these errors without more damage. They have the tools to fill or smooth the area. Calling a pro can restore your countertop’s beauty quickly.
Ensuring Warranty Compliance
Many quartz countertops come with warranties. DIY drilling might void these warranties. Professionals follow manufacturer rules to protect your coverage. They document the work done with proper care. Hiring a pro keeps your warranty valid and your countertop safe.
Credit: mysouthernstone.com
Frequently Asked Questions
How Do You Safely Drill A Quartz Countertop?
Use a diamond-tipped drill bit and water for cooling. Drill slowly at low speed to avoid cracking. Always wear safety goggles and gloves to protect yourself.
What Tools Are Needed To Drill Quartz Countertops?
You need a drill with a diamond-tipped bit, water source for cooling, masking tape, and safety gear. These tools ensure precise and safe drilling without damaging the countertop.
Can I Drill Quartz Countertops Myself?
Yes, with the right tools and precautions, you can drill quartz countertops. Take your time, keep the drill cool, and follow safety guidelines to avoid damage or injury.
How To Prevent Cracking When Drilling Quartz Countertops?
Drill at low speed and keep the bit wet with water. Use masking tape to reduce surface damage. Avoid applying too much pressure while drilling.
Conclusion
Drilling a quartz countertop takes patience and the right tools. Use a diamond drill bit and keep the drill slow. Always wear safety gear to protect your eyes and hands. Take breaks to avoid overheating the drill bit. Clean the area after drilling to remove dust.
With care, you can make clean holes without damage. This simple process saves you time and money. Now, you can add fixtures or fittings with confidence. Ready to try your project? Just follow these easy steps carefully.