

If you’ve ever tried drilling into tough concrete or brick, you know it’s no easy task. That’s where the SDS rotary hammer drill comes in—a powerful tool designed to make your job faster and easier.
But if you’re not sure how to use it right, you could waste time or even damage your materials. In this guide, you’ll learn simple, step-by-step tips to master your SDS rotary hammer drill and get professional results every time.
Ready to make your next project smoother and more efficient? Let’s dive in.
Choosing The Right Sds Rotary Hammer
Choosing the right SDS rotary hammer is important for effective drilling. The right tool makes your job easier and faster. It also saves your energy and protects the drill from damage. Knowing what type and features suit your work is key. This guide helps you pick the best SDS rotary hammer for your needs.
Types Of Sds Rotary Hammers
SDS rotary hammers come in different types. The main ones are small, medium, and heavy-duty models. Small models are good for light jobs, like drilling into wood or soft concrete. Medium models handle tougher tasks like brick and concrete walls. Heavy-duty models are for large projects, breaking hard concrete or stone. Choose based on how much power and size you need.
Key Features To Consider
Look for features that improve performance and comfort. Check the hammer’s power, usually measured in volts or amps. A higher number means more strength. Look for adjustable speed settings to control drilling speed. A vibration control system helps reduce hand fatigue. Consider the weight; lighter tools are easier to hold for long periods. Also, check for a good grip and easy-to-use controls.
Matching Drill To Task
Match your drill to the job. Small drills work well for light tasks and small holes. Medium drills handle general construction and renovation work. Heavy-duty drills suit demolition and large holes. Use the right drill bit for the material. SDS bits fit the rotary hammer and provide better grip. Using the correct drill saves time and prevents tool damage.
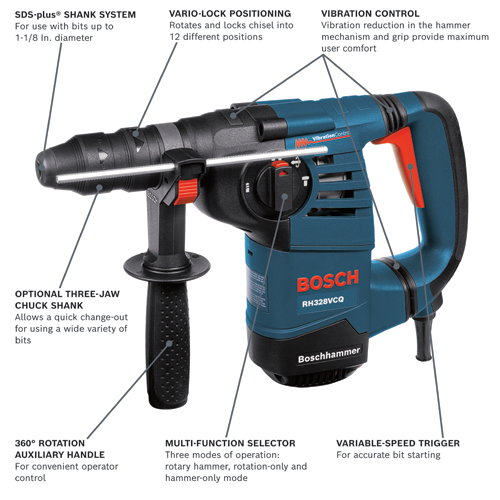
Credit: www.boschtools.com
Preparing For Safe Operation
Preparing for safe operation is the first step before using an SDS rotary hammer drill. It helps prevent accidents and protects you from injuries. Taking time to prepare ensures the job goes smoothly. Follow these key steps for safe use.
Essential Safety Gear
Wear safety glasses to protect your eyes from flying debris. Use ear protection to guard against loud noise. Gloves help you hold the drill firmly and protect your hands. Wear a dust mask to avoid breathing in dust. Closed-toe shoes keep your feet safe from falling objects.
Inspecting The Drill And Accessories
Check the drill for any damage or cracks. Make sure the power cord is intact and not frayed. Test the drill bit to see if it is sharp and fits tightly. Loose or damaged parts can cause accidents. Replace any worn or broken accessories before starting.
Setting Up Your Workspace
Clear the area of any clutter or obstacles. Ensure good lighting so you can see your work clearly. Keep children and pets away from the workspace. Position yourself for balance and a firm grip on the drill. Avoid wet or slippery floors to prevent falls.
Attaching And Securing Drill Bits
Attaching and securing drill bits properly is key for safe and efficient work with an SDS rotary hammer drill. Using the right bit and fixing it well ensures the drill works smoothly. It also prevents damage and accidents. This section explains how to select, insert, and lock the drill bits correctly.
Selecting The Correct Bit
Choose the bit based on your task and material. SDS bits come in various shapes for concrete, brick, or stone. Pick a bit that fits your drill’s SDS system. Using the right bit improves drilling speed and accuracy. Avoid bits that look worn out or damaged.
Inserting The Bit Properly
Hold the drill steady and push the bit into the chuck. Insert it fully until it stops. You may hear a click, showing the bit is in place. Do not force the bit if it feels stuck. Clean the bit’s shank and chuck before inserting for a better fit.
Ensuring A Tight Lock
Twist the bit slightly to lock it firmly. Check by pulling gently on the bit. It should not move or wiggle. A loose bit can slip or cause injury. Regularly check the bit lock during use, especially after heavy work.
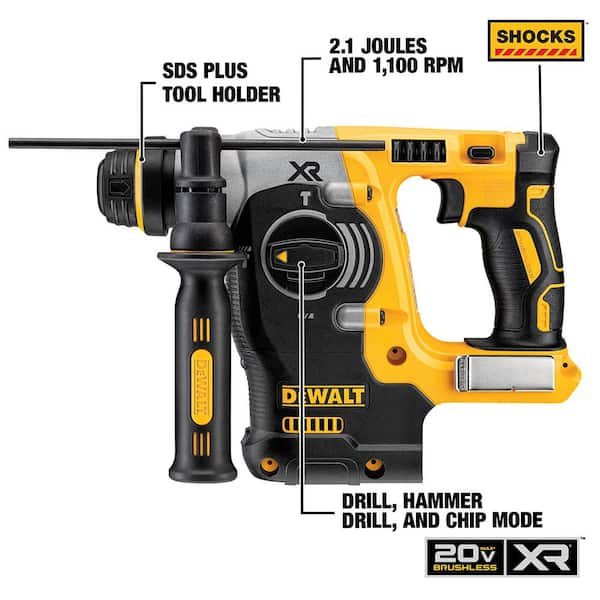
Credit: www.homedepot.com
Operating The Drill Effectively
Operating the SDS rotary hammer drill correctly improves your work quality and safety. Understanding how to use the drill modes, apply pressure, and maintain control is key. These skills help you complete tasks faster and avoid damage to materials or the tool.
Choosing The Right Mode
The SDS rotary hammer drill has different modes for various tasks. Use the hammer mode for drilling into concrete or stone. Switch to the rotary mode for wood or metal. Some drills offer a chisel mode for light demolition. Choosing the right mode makes drilling easier and protects the drill bit.
Applying Proper Pressure
Press the drill firmly but do not push too hard. Let the drill’s hammering action do the work. Excessive force can cause the drill to overheat or damage the material. Too little pressure slows the job and wears out the drill bit. Find a steady, moderate pressure for the best results.
Maintaining Control And Balance
Hold the drill with both hands for better control. Keep your body balanced and feet firmly on the ground. Avoid twisting your wrist while drilling. Use the side handle to steady the drill during tough jobs. Good control reduces fatigue and keeps your drilling accurate.
Maximizing Drill Performance
Getting the best from your SDS rotary hammer drill saves time and effort. Proper use of its features improves drilling speed and accuracy. Small adjustments can make a big difference in performance. Follow these tips to keep your drill working well and lasting longer.
Optimizing Speed And Impact Settings
Adjust the speed based on the material you drill. Lower speed works well for hard materials like concrete. Higher speed suits softer materials such as wood or drywall. Use the impact mode for tougher surfaces. Switch to rotary-only mode for light drilling tasks. Always check the drill manual for recommended settings.
Cooling Techniques
Overheating reduces drill power and tool life. Take breaks during long drilling sessions. Allow the drill to cool down naturally. Avoid pressing too hard on the drill; let it work at its own pace. Use water spray carefully to cool the bit if safe for your drill model.
Using Lubricants And Accessories
Lubricate the drill bits to reduce friction and wear. Use oil or grease made for power tools. Replace worn or damaged bits promptly. Choose the right bit size and type for each job. Use accessory handles for better control and safety. Clean accessories after use to keep them in good shape.
Troubleshooting Common Issues
Troubleshooting common issues with your SDS rotary hammer drill can save time and prevent damage. Knowing how to fix small problems helps you work without interruptions. This section covers easy solutions for bit slippage, overheating, and power loss. Follow these tips to keep your drill running smoothly.
Dealing With Bit Slippage
Bit slippage happens when the drill bit moves inside the chuck. This causes poor drilling and damages the bit. Check if the bit is clean and dry before use. Remove any dirt or grease from the bit shank. Make sure the bit locks firmly into the chuck. Tighten the chuck properly to hold the bit in place. Replace worn or damaged bits to avoid slippage. If the chuck is worn, consider repairing or replacing it.
Handling Overheating
Overheating can harm your drill and cause it to stop working. Avoid running the drill continuously for long times. Give the drill breaks to cool down during heavy work. Check the air vents for dust or blockages and clean them regularly. Use the right drill bit for the material to reduce strain. Keep the drill well-lubricated as per the manual. If overheating continues, stop using the drill and get it checked.
Fixing Power Loss
Power loss makes drilling slow or stops the drill altogether. Check the power source and make sure the cord is not damaged. Use a different outlet to rule out socket problems. Inspect the drill’s brushes and replace if worn out. Loose or damaged wiring inside the drill can cause power issues. Test the switch and replace it if faulty. Regular maintenance helps prevent power loss during work.
Maintaining Your Sds Rotary Hammer
Maintaining your SDS rotary hammer is key to keeping it working well. A well-cared-for drill lasts longer and performs better. Regular care prevents breakdowns and saves money. Follow simple steps to keep your tool in top shape.
Cleaning And Storage Tips
Clean the drill after every use. Remove dust and debris from vents and moving parts. Use a dry cloth and a small brush for tight areas. Avoid water or harsh cleaners that can damage the tool. Store the drill in a dry, cool place. Use the original case to protect it from dust and drops. Keep it away from moisture to prevent rust.
Regular Inspection And Repairs
Check the drill before each use. Look for cracks, loose parts, and worn-out bits. Test the power cord for any damage. Tighten screws and bolts as needed. Replace worn or damaged drill bits immediately. Do not use the tool if it has major damage. Take it to a professional for repairs to ensure safety and proper function.
Extending Tool Lifespan
Use the correct drill bits for each job. Avoid forcing the drill; let it work at its own speed. Keep the tool lubricated as per the manufacturer’s instructions. Avoid overheating by giving the drill breaks during long use. Follow all safety guidelines to prevent accidents. Proper use and care will make your SDS rotary hammer last many years.
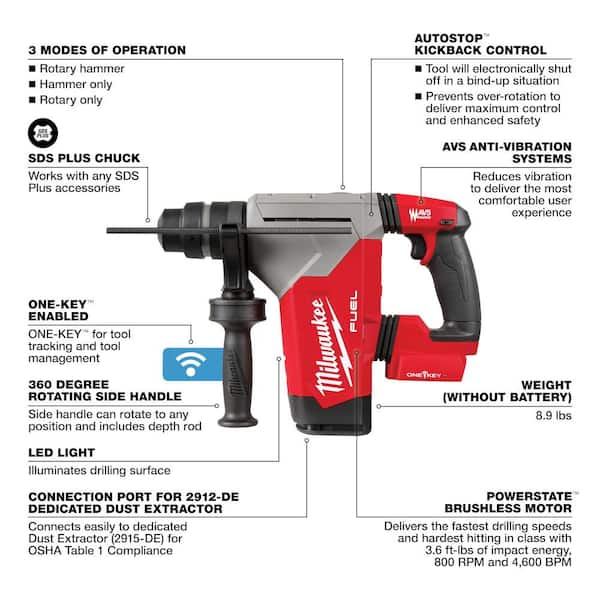
Credit: www.homedepot.com
Frequently Asked Questions
What Is An Sds Rotary Hammer Drill Used For?
An SDS rotary hammer drill is designed for heavy-duty drilling in concrete, brick, and stone. It combines rotation with hammering action to break tough materials efficiently. It’s ideal for construction, remodeling, and masonry tasks requiring powerful, precise drilling.
How Do I Insert Bits Into An Sds Rotary Hammer Drill?
To insert bits, pull back the chuck sleeve on the drill. Insert the SDS bit until it clicks into place. Release the sleeve to lock the bit securely. This system allows quick bit changes without tools, ensuring safe and stable operation.
Can I Use An Sds Rotary Hammer For Regular Drilling?
Yes, many SDS rotary hammers have a rotation-only mode for regular drilling in wood or metal. Switch off the hammer function to avoid damage. Always check your drill’s settings to match the material and task for optimal results.
How Do I Maintain My Sds Rotary Hammer Drill?
Regularly clean the drill and bits after use. Lubricate the chuck as recommended by the manufacturer. Check for wear or damage, and replace worn parts promptly. Proper maintenance extends tool life and ensures safe, efficient operation.
Conclusion
Using an SDS rotary hammer drill makes tough jobs easier and faster. Always choose the right drill bit for your task. Hold the drill firmly and apply steady pressure. Keep the drill straight to avoid damage. Wear safety gear to protect yourself.
Regular cleaning helps the tool last longer. Practice on scrap material before starting your project. With care and the right steps, you can get good results every time. This tool is helpful for drilling into concrete, brick, and stone. Simple tips like these keep your work safe and efficient.