
If you own a Milwaukee right angle drill, you know how handy it is for tight spaces and tricky jobs. But did you know that changing the speed on your drill can make your work faster and more precise?
Getting the speed right can save you time, prevent damage, and give you better control. In this guide, you’ll learn exactly how to adjust the speed on your Milwaukee right angle drill quickly and easily. Keep reading, and you’ll unlock the full power of your tool.
Milwaukee Right Angle Drill Basics
Changing speed on a Milwaukee right angle drill is simple. Just slide the switch near the trigger to select low or high speed. This lets you adjust power for different tasks quickly.
Key Features
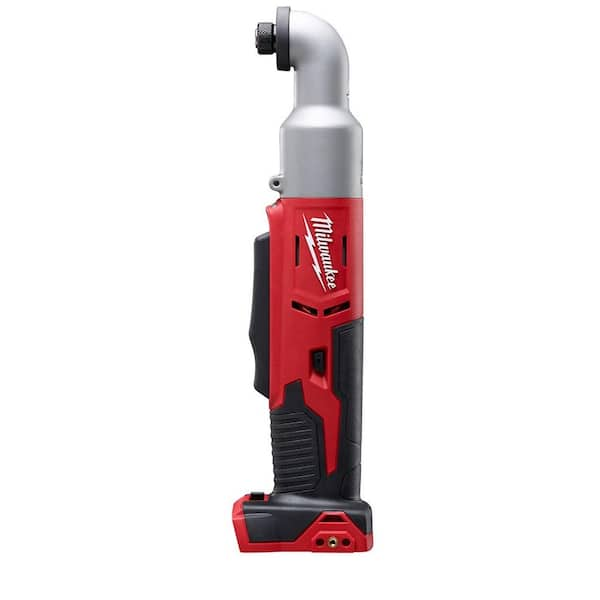
The Milwaukee Right Angle Drill is built for tight spaces. Its compact design helps you reach corners easily. The drill has a strong motor for tough jobs. It offers good control and comfort during use. The handle is designed to reduce hand fatigue. The drill also includes a durable metal gear case. This ensures long-lasting performance and reliability.
Speed Settings Overview
The drill has two main speed settings. Low speed offers more power for heavy tasks. High speed is ideal for quick drilling in soft materials. You can switch speeds using a simple selector switch. This switch is easy to reach while working. Adjusting speed helps protect your drill bits. It also improves work accuracy and efficiency.
Credit: www.homedepot.com
Identifying Speed Control
Understanding how to identify the speed control on your Milwaukee right angle drill is important. It helps you adjust the drill to the right speed for your task. Speed control improves accuracy and protects your drill from damage.
Knowing where the speed control is and the types available makes your work easier. This section guides you through finding and recognizing these controls.
Location Of Speed Switch
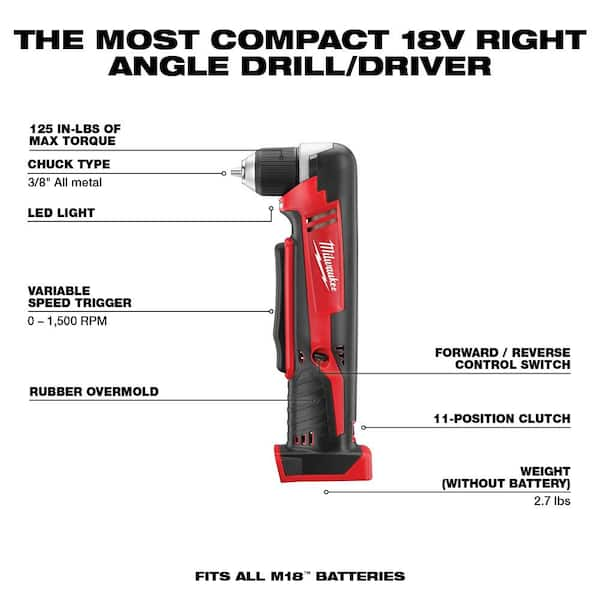
The speed switch is usually near the trigger or handle of the drill. It is easy to reach with your thumb or fingers. Some models have the switch on top of the drill body. Others place it on the side for quick access.
Look for a small lever or button marked with numbers or speed levels. This marking shows different speeds you can select. The switch may slide or click between settings.
Types Of Speed Controls
Milwaukee right angle drills have mainly two types of speed controls: a trigger switch and a two-speed selector.
The trigger switch controls speed by how hard you press it. Press lightly for slow speed, press harder for faster speed. This control offers smooth speed changes.
The two-speed selector is a separate switch that sets the drill to either low or high speed. It does not change speed gradually but gives fixed speed options. This selector is useful for switching tasks quickly.
Steps To Change Speed
Changing the speed on your Milwaukee right angle drill is simple and quick. Knowing the right steps helps you work efficiently. This guide breaks down the process into easy parts. Follow these steps to adjust the speed safely and correctly.
Power Off Safety
Always turn off the drill before changing speed. Unplug the battery or power source. This stops the drill from moving accidentally. Safety is the first step to avoid injury. Check that the drill is fully off before touching any controls.
Adjusting Speed Dial
Find the speed dial on the drill body. It usually has numbers showing different speed levels. Turn the dial to the desired speed setting. Lower numbers mean slower speed, higher numbers mean faster. Adjust slowly to get the right speed for your task.
Using Variable Speed Trigger
The drill also has a trigger for speed control. Press the trigger gently for slower speeds. Press harder to increase the speed gradually. This lets you control the drill speed in real time. Practice using the trigger for smooth operation.
Credit: www.homedepot.com
Tips For Optimal Speed Use
Using the right speed on your Milwaukee Right Angle Drill helps you work better and safer. It also keeps your tool in good shape for a long time. Follow these simple tips to get the best results from your drill.
Adjusting the speed correctly saves time and effort. It also stops damage to the material you drill. Let’s explore how to use the drill speed in the best way.
Matching Speed To Material
Different materials need different drill speeds. Soft materials like wood work well at high speed. Hard materials like metal need slower speed to avoid damage. Check the material before you set the speed. This keeps your work clean and smooth.
Avoiding Overheating
Running the drill too fast can cause overheating. Heat can damage the motor and drill bits. Use slower speeds for tough jobs. Take breaks during long drilling tasks. This helps the tool cool down and stay safe.
Extending Tool Life
Correct speed use makes your drill last longer. Avoid pushing the drill too hard. Use the right speed for each task. Clean and maintain the drill regularly. Proper care protects your investment and improves performance.
Troubleshooting Speed Issues
Troubleshooting speed issues on your Milwaukee right angle drill can save time and prevent damage. Problems like speed not changing or unusual sounds may happen during use. Identifying these issues quickly helps keep your tool working well.
Speed Not Changing
Check the speed selector switch first. Dirt or debris might block it. Clean the switch area carefully. Test the trigger to see if it responds properly. A worn trigger can cause speed problems. Make sure the battery is fully charged. Low power can affect speed control. If problems continue, the motor or control board may need inspection.
Unusual Sounds Or Stalling
Strange noises can mean internal damage. Grinding or clicking sounds are signs of worn gears. Stalling happens if the drill cannot keep power under load. Check for jammed drill bits or heavy materials. Let the drill cool down if it overheats. Faulty brushes inside the motor can also cause stalling. Replace worn parts to restore smooth operation.
When To Seek Repair
If simple cleaning and battery checks do not fix the problem, seek professional help. Avoid using the drill if it stalls often or makes loud noises. Continuing to use a faulty tool can cause more damage. A certified technician can safely diagnose and repair internal parts. Timely repair extends the life of your drill and ensures safety.
Credit: www.milwaukeetool.com
Frequently Asked Questions
How Do I Change Speed On Milwaukee Right Angle Drill?
To change speed, locate the variable speed trigger and adjust pressure. For models with a speed selector, switch between low and high settings as needed.
Can I Adjust Speed While Drilling With Milwaukee Drill?
Yes, you can smoothly vary speed by controlling the trigger pressure. This allows precise speed control during drilling tasks.
What Speed Settings Are Available On Milwaukee Right Angle Drills?
Most models have two speed settings: low for torque and high for speed. Some offer variable speed through the trigger for more control.
Is Changing Speed Important For Different Drilling Materials?
Yes, lower speeds work better on hard materials. Higher speeds suit soft materials. Adjust speed to prevent damage and ensure efficiency.
Conclusion
Changing the speed on your Milwaukee right angle drill is simple. Just follow the steps carefully and adjust the settings. This helps you work better on different materials. Using the right speed keeps your drill safe and lasts longer. Practice a few times to get comfortable with the controls.
Soon, you will feel confident handling any job. Remember to check your drill’s manual for details. Keep your tool ready and work with ease.