
Have you ever wanted to create your own pearl jewelry but felt unsure about how to start? Drilling pearls by hand might sound tricky, but with the right tips and a bit of patience, you can do it yourself.
Imagine turning a simple pearl into a beautiful necklace or bracelet that you made with your own hands. You’ll discover easy steps and expert advice that make pearl drilling safe and simple. Keep reading, and soon you’ll have the skills to add that perfect touch to your jewelry collection.
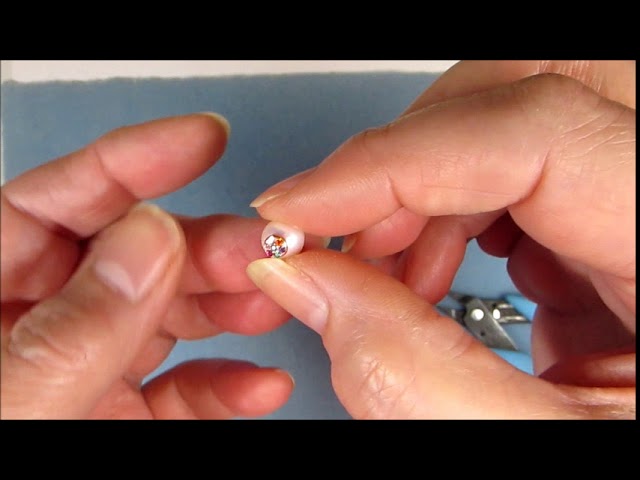
Credit: www.youtube.com
Choosing The Right Pearls
Choosing the right pearls is key before drilling by hand. Not every pearl can be drilled easily. The right pearl ensures a smooth process and less risk of damage. This section explains how to pick pearls for hand drilling.
Types Of Pearls Suitable For Drilling
Natural pearls are rare and fragile. They may crack or break while drilling. Cultured pearls are better choices. Akoya pearls are common and work well for drilling. Freshwater pearls are also popular because they are thicker. Avoid pearls with soft surfaces or cracks. Round and near-round pearls hold up best.
Checking Pearl Quality And Thickness
Quality matters. Inspect pearls for surface flaws or weak spots. Hold the pearl under bright light. Look for cracks, pits, or dullness. Thickness of the nacre layer is important. Thicker nacre means stronger pearls. Thin nacre can break during drilling. Use a magnifying glass for a closer look. Choose pearls that feel solid and heavy for their size.
Tools Needed For Hand Drilling
Drilling pearls by hand needs special tools. These tools help create clean holes without damaging the pearls. Using the right equipment makes the process easier and safer.
Preparing your workspace and wearing safety gear protect you during drilling. Below are the main tools and safety items needed for hand drilling pearls.
Essential Drilling Equipment
A small hand drill or pin vise works best for precision. It holds tiny drill bits steady for delicate work. Use diamond-tipped or carbide drill bits. They are sharp and strong enough for pearls.
Choose drill bits between 0.5 mm and 1 mm for most pearls. A soft surface like a rubber pad prevents slipping. A magnifying glass helps see the pearl clearly while drilling. Keep a container of water nearby to cool the drill bit.
Safety Gear And Workstation Setup
Wear safety glasses to protect your eyes from dust and small chips. Use a dust mask to avoid breathing fine particles. Set up your workspace with good lighting and a stable table.
Keep tools organized and close to avoid reaching and accidents. Secure the pearl gently with tweezers or a soft clamp. A clean and tidy area improves focus and safety during drilling.
Preparing Pearls For Drilling
Preparing pearls for drilling takes care and focus. Pearls are delicate. One wrong move can crack or ruin them. Proper preparation helps avoid damage and keeps pearls looking great. Follow these simple steps to get ready.
Marking The Drill Spot
Start by finding the best spot to drill. Look for the pearl’s natural hole or a less visible area. Use a fine, non-permanent marker to gently dot the spot. Make sure the mark is clear but light. This helps guide your drilling without harming the pearl’s surface.
Securing Pearls To Prevent Damage
Hold pearls firmly but gently. Use a soft cloth or a small clamp with padding. This stops the pearl from slipping during drilling. Avoid tight grips that can crack the pearl. Keeping the pearl stable makes the drilling smooth and safe.

Credit: www.caaap.org.pe
Step-by-step Drilling Process
Drilling pearls by hand needs care and focus. Each step is important to keep the pearl whole and pretty. Follow these steps to drill pearls safely and neatly.
Starting The Hole Gently
Begin with a small, sharp drill bit. Place the pearl on a soft surface. Hold it firmly but not too tight. Start drilling slowly to make a small mark. This helps guide the drill and stops slipping.
Maintaining Steady Pressure
Apply even pressure while drilling. Press too hard and the pearl may crack. Keep your hand steady and move the drill straight down. Take breaks if the drill gets hot. This keeps the pearl cool and safe.
Avoiding Common Drilling Mistakes
Don’t rush the drilling process. Avoid shaking or tilting the drill. Use a new drill bit if the old one is dull. Check the pearl often to prevent cracks. Practice on fake pearls first to build skill.
Post-drilling Care
After drilling pearls by hand, taking good care is very important. This step keeps pearls looking beautiful and stops damage. Proper care helps pearls last longer and keeps their shine bright.
Cleaning And Polishing Pearls
Clean pearls gently using a soft cloth. Use a damp cloth with water only. Avoid harsh chemicals or strong cleaners. These can harm the pearl’s surface.
Polish pearls lightly to keep their shine. Use a special pearl polishing cloth or a soft, dry cloth. Do not rub too hard to avoid scratches.
Inspecting Holes For Smoothness
Check the drilled holes carefully after cleaning. Run a small piece of soft thread through the hole. It should slide smoothly without catching.
If the hole feels rough, use a fine needle or small file. Gently smooth the edges to prevent damage to string or wire.

Credit: www.chordiajewels.com
Tips For Perfect Results
Getting perfect results while drilling pearls by hand requires patience and care. Small mistakes can crack or damage these delicate gems. Follow simple tips to protect your pearls and create neat holes.
These tips help you choose the right tools and handle pearls gently. They make the process easier and your finished jewelry look professional.
Choosing The Right Drill Bit Size
Select a drill bit slightly smaller than the pearl hole size. This prevents cracking and keeps the pearl intact. A fine, sharp bit works best for smooth drilling. Avoid large or dull bits that apply too much pressure. Measure your string or wire thickness first. Then pick a bit that fits well without forcing the pearl.
Handling Fragile Pearls With Care
Hold pearls gently but firmly during drilling. Use a soft surface or clamp to keep them steady. Avoid squeezing too hard or dropping them. Drill slowly to reduce heat and pressure. Pause often to cool the pearl and check progress. Keep pearls wet to prevent dust and cracking. Treat each pearl like a precious treasure throughout the process.
Frequently Asked Questions
How Do I Drill Pearls By Hand Safely?
Use a small, sharp drill bit and steady your pearl firmly. Drill slowly with light pressure to avoid cracking or chipping the pearl.
What Tools Are Needed To Hand Drill Pearls?
You need a fine hand drill or pin vise, a sharp drill bit, and a steady work surface. Proper lighting and magnification help accuracy.
How To Prevent Pearls From Cracking While Drilling?
Soak pearls in water before drilling to soften them. Drill slowly, apply minimal pressure, and keep the drill bit sharp for clean holes.
Can I Drill Natural And Cultured Pearls By Hand?
Yes, both natural and cultured pearls can be hand-drilled. Use delicate techniques and appropriate tools to avoid damage regardless of pearl type.
Conclusion
Drilling pearls by hand takes patience and care. Using the right tools helps avoid cracks. Always mark the spot before you start. Work slowly to keep the pearl safe. Practice on cheaper beads first. This way, you build confidence and skill.
Remember, steady hands create better results. Enjoy the process and learn with each try. Your pearls will look beautiful and unique. Keep these tips in mind for your next project.