
If you’re planning to work with Hardie Plank siding, knowing how to drill it correctly is a must. Drilling the wrong way can crack the material or cause damage that’s hard to fix.
But don’t worry—once you learn the right steps, you’ll save time and avoid costly mistakes. In this guide, you’ll discover simple tips and tricks to drill through Hardie Plank like a pro, even if you’re new to this type of work.
Ready to get it right the first time? Keep reading, and you’ll have the confidence to handle your project smoothly.
Credit: gsexteriorexperts.com
Choosing The Right Tools
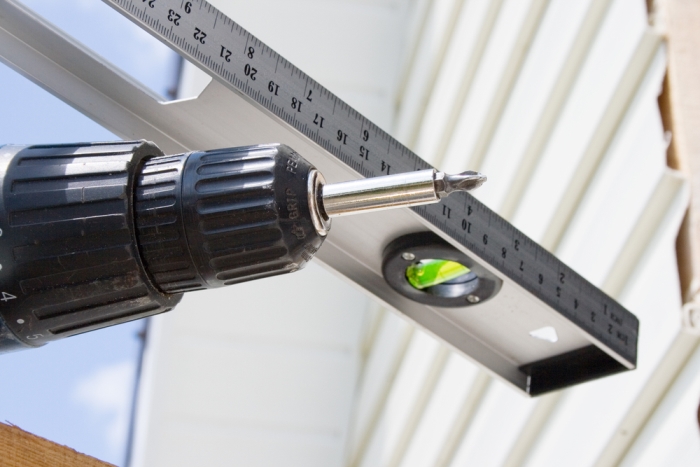
Choosing the right tools makes drilling Hardie Plank easier and safer. Using the correct drill and bits helps avoid damage to the plank and keeps your work clean. Safety gear protects you from dust and debris. Focus on these three key areas to prepare for drilling Hardie Plank.
Best Drill Types For Hardie Plank
Use a cordless drill with a strong motor. A drill with at least 18 volts works well. Hammer drills are not necessary and might damage the plank. A drill with variable speed control helps you work slowly and carefully. Choose a drill that feels comfortable in your hand for better control.
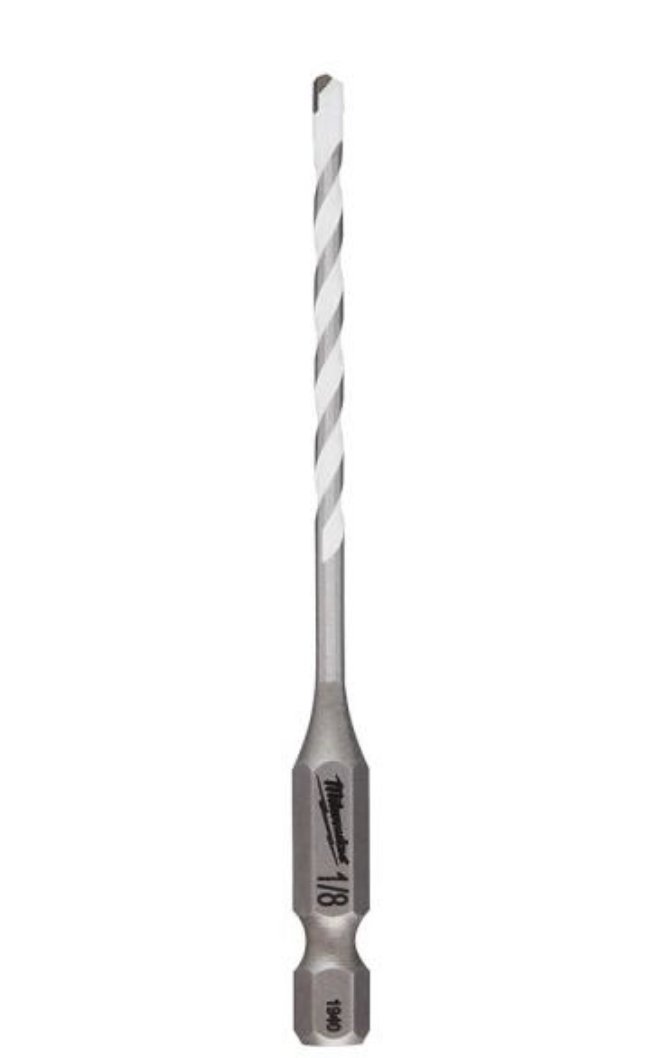
Selecting Proper Drill Bits
Pick carbide-tipped drill bits for Hardie Plank. These bits stay sharp and cut through fiber cement easily. Use masonry bits designed for concrete or brick. Avoid standard steel bits as they dull quickly. Choose the right size bit for your screws to prevent cracking.
Using Safety Gear
Wear safety glasses to protect your eyes from dust and chips. Use a dust mask or respirator to avoid breathing harmful particles. Gloves protect your hands from rough edges and splinters. Ear protection can help if your drill is loud. Dress in long sleeves to cover your skin from dust.
Preparing The Surface
Preparing the surface is a key step before drilling Hardie Plank. It helps the drill work better and prevents damage. Taking time to clean and mark the plank ensures precise and safe drilling.
Proper preparation makes the task smoother and results stronger. Follow simple steps to get the surface ready for drilling.
Cleaning The Hardie Plank
Start by removing dirt and dust from the plank surface. Use a soft brush or cloth to wipe it clean. Avoid using water if the plank is already installed. Dry surfaces help the drill bit grip properly. Clean surfaces reduce the chance of slipping or errors.
Marking Drill Points Accurately
Measure carefully to find the exact spots to drill. Use a pencil or marker for clear, visible marks. Double-check measurements to avoid mistakes. Marking helps guide the drill and keeps holes straight. Accurate points save time and prevent damage to the plank.
Drilling Techniques
Drilling Hardie Plank requires careful techniques to avoid damage. Use the right methods for clean holes and strong holds. Follow these steps to drill smoothly and safely.
Setting The Drill Speed
Choose a slow drill speed for Hardie Plank. High speed can cause cracks or chips. Keep the drill steady and controlled. This helps the bit cut cleanly through the material.
Applying Correct Pressure
Push the drill gently but firmly. Too much pressure can split the plank. Too little pressure will slow the work and wear out the bit. Let the drill do the work, not your force.
Avoiding Common Mistakes
Do not rush the drilling process. Avoid using dull drill bits; they cause damage. Always wear safety glasses to protect your eyes. Mark the spot clearly before drilling to keep holes precise.
Credit: entry-envy.com
Preventing Damage
Drilling Hardie Plank requires care to avoid damage. The plank is durable but can chip or crack under wrong handling. Preventing damage helps keep the surface smooth and strong. Follow simple steps to protect both the plank and your tools.
Protecting The Plank’s Finish
Use painter’s tape over the drilling spot. This prevents the drill bit from slipping. It also stops the surface from chipping. Drill slowly and apply light pressure. Avoid pushing too hard to keep the finish intact. Choose a carbide-tipped drill bit for clean holes. It cuts smoothly through the plank.
Reducing Dust And Debris
Hardie Plank creates fine dust when drilled. This dust can irritate your eyes and lungs. Wear safety glasses and a dust mask for protection. Use a vacuum or a dust collector near the drill. This helps capture dust as you work. Clean the area often to avoid buildup. Keeping the workspace tidy improves safety and tool performance.
After Drilling Care
After drilling Hardie Plank, proper care is important. It keeps the plank strong and safe from damage. Taking small steps helps the plank last longer and look better. The next two sections explain how to seal drill holes and maintain the plank’s strength.
Sealing Drill Holes
Drill holes in Hardie Plank must be sealed quickly. This stops water from getting inside. Use a high-quality exterior sealant made for fiber cement. Apply the sealant around the hole edges. Make sure the hole is fully covered. Let the sealant dry as per the instructions. Sealing protects the plank from moisture and rot.
Maintaining Structural Integrity
Drilling can weaken Hardie Plank if done carelessly. Avoid making holes too close together. Keep holes away from plank edges to prevent cracks. Check the plank for any signs of damage after drilling. Replace or repair damaged sections promptly. Proper care keeps the plank strong and safe for years.
Troubleshooting Tips
Drilling Hardie Plank can sometimes cause problems. These issues may slow down your work or damage the material. Knowing how to fix common problems helps you keep the project on track. Troubleshooting tips make drilling easier and protect your tools and planks.
Handling Drill Bit Wear
Drill bits wear out fast on Hardie Plank. Dull bits cause slow drilling and rough holes. Check bits often for sharpness. Replace bits that look worn or dull. Use carbide-tipped bits for longer life. Clean bits after each use to stop buildup. Keep a few spare bits ready to avoid delays.
Dealing With Cracks Or Chips
Hardie Plank can crack or chip while drilling. Use slow speed and steady pressure to reduce damage. Avoid pushing too hard or drilling too fast. Start with a small pilot hole before the final size. Place masking tape over the spot to protect the surface. If cracks appear, fill them with exterior-grade caulk. Smooth the surface before painting to hide repairs.

Credit: www.youtube.com
Frequently Asked Questions
How Do You Drill Into Hardie Plank Siding?
Use a carbide-tipped drill bit for best results. Drill slowly to avoid cracking the plank. Start with a small pilot hole, then enlarge carefully. Always wear safety goggles and a dust mask.
What Drill Bit Is Best For Hardie Plank?
A carbide-tipped or masonry drill bit works best. These bits can handle the cement fiber material without dulling quickly. Avoid using standard wood bits as they may break or wear out fast.
Can You Drill Hardie Plank Without Cracking It?
Yes, by drilling slowly and using the correct bit. Start with a small pilot hole and increase size gradually. Applying gentle pressure helps prevent cracks. Wearing protective gear is also important.
Should You Wet Hardie Plank Before Drilling?
No, it’s better to drill dry to prevent damage. Hardie Plank is designed to resist moisture. Wetting may cause the material to soften and weaken during drilling.
Conclusion
Drilling Hardie Plank needs care and the right tools. Use a carbide-tipped drill bit for clean holes. Drill slowly to avoid cracking or chipping the plank. Mark the spot clearly before you start drilling. Keep the drill steady and apply gentle pressure.
Follow these steps to ensure your project goes smoothly. Now, you can drill Hardie Plank with confidence and ease.