
Have you ever wanted to turn your old silverware into something new and creative? Drilling holes in silverware can open up a world of DIY possibilities, from making unique jewelry to crafting stylish home decor.
But if you’re unsure how to start or worried about damaging your favorite pieces, you’re in the right place. This guide will show you simple, safe steps to drill holes in silverware like a pro, even if you’ve never used a drill before.
Keep reading, and you’ll discover easy tips to transform your silverware into amazing creations with confidence.
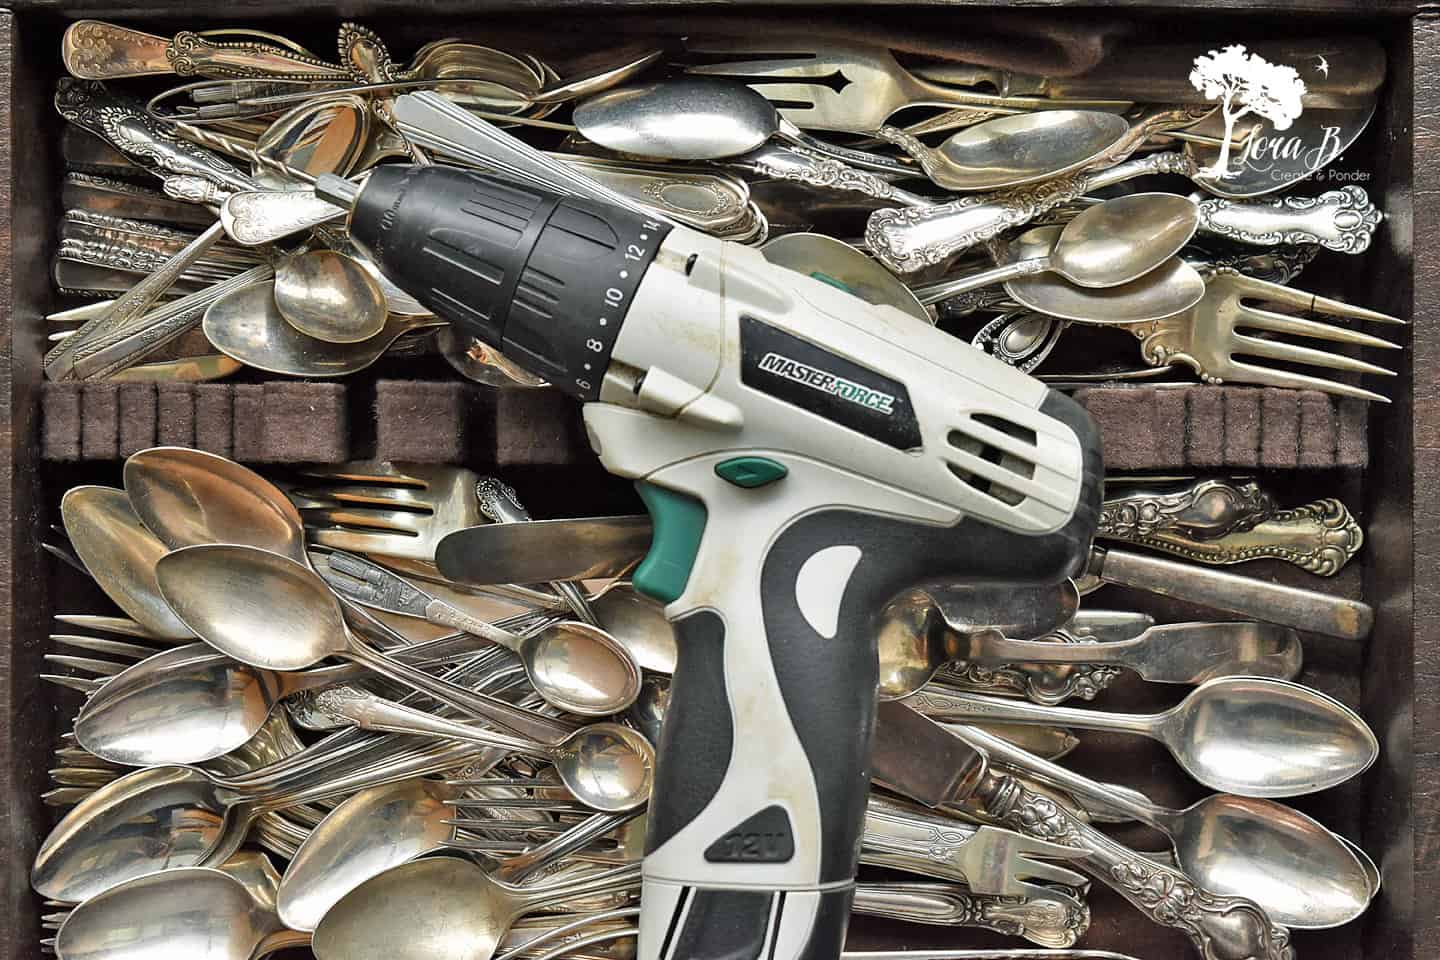
Credit: lorabloomquist.com
Tools Needed
Drilling holes in silverware requires the right tools. Using proper equipment makes the job easier and safer. Each tool has a special role in the process. Preparing your tools before starting helps you work smoothly and avoid mistakes.
Types Of Drill Bits
Choose drill bits designed for metal. High-speed steel (HSS) bits work well on silverware. Titanium-coated bits last longer and cut cleaner. Start with a small bit for a pilot hole. Then use a larger bit for the final hole size. Sharp bits reduce slipping and damage.
Safety Gear
Wear safety glasses to protect your eyes from metal shavings. Use gloves to avoid cuts and improve grip. A dust mask prevents breathing in small particles. Ear protection helps if your drill is noisy. Safety gear keeps you safe and comfortable.
Additional Equipment
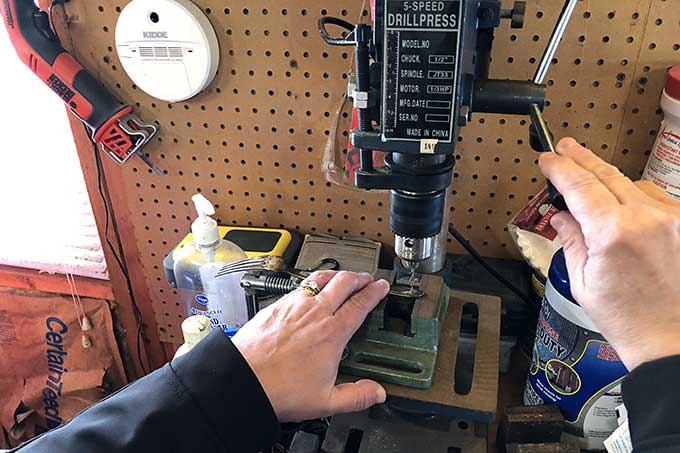
A clamp or vise holds the silverware steady. This stops it from moving while drilling. Use a marker or tape to mark the drill spot. A drill with adjustable speed gives better control. A small brush or cloth cleans metal shavings after drilling.
Choosing Silverware
Choosing the right silverware is key before drilling holes. The type and condition affect the ease and result of the project. Some silverware pieces hold up better than others. Knowing what to pick saves time and prevents damage.
Consider the material and style. This helps find pieces that work well for your design or function. Not all silverware is easy to drill, so choose wisely for best results.
Material Considerations
Silverware comes in different metals like stainless steel, silver, and aluminum. Stainless steel is strong and resists rust. It can be harder to drill but lasts longer. Silver is softer but more expensive and may bend. Aluminum is very easy to drill but less durable. Pick a metal that fits your tools and project needs.
Best Pieces To Drill
Spoons and forks work well for drilling holes. Their handles are usually thick enough to hold a hole. Avoid pieces with thin or decorative handles. Knives can be tricky because of their shape and sharp edges. Choose flat, smooth handles for easier drilling. Old or worn silverware may crack, so pick sturdy pieces.
Preparing The Silverware
Preparing silverware for drilling is key to a smooth process. Proper prep ensures clean holes and prevents damage. It starts with cleaning and marking the spot. Then, securing the silverware keeps it steady while drilling.
Cleaning And Marking
Clean the silverware thoroughly to remove dirt and oils. Use warm water and mild soap. Dry it well before moving on.
Mark the exact spot for the hole using a marker or pencil. Place a small dot or cross to guide the drill. This helps keep the hole precise and neat.
Securing The Piece
Hold the silverware firmly in place. Use a clamp or a vise to avoid slipping. Stability is important to avoid mistakes or injury.
Place a piece of scrap wood under the silverware. This protects your work surface and the drill bit. Make sure the silverware is flat and steady before drilling.
Drilling Techniques
Drilling holes in silverware requires careful technique. Silverware is often thin and soft, so drilling needs patience. Proper drilling prevents damage and creates clean holes. Understanding the right speed, pressure, and cooling helps a lot. These tips make the process easier and safer.
Drill Speed And Pressure
Use a slow drill speed to avoid overheating the metal. High speed can melt or bend the silverware. Apply gentle pressure to keep control. Press too hard, and the drill bit may slip or break. Steady, light pressure works best for clean holes.
Cooling Methods
Metal heats quickly during drilling. Heat can damage the silverware or dull the drill bit. Stop often to cool the metal with water or oil. Cooling keeps the metal firm and protects your tools. Use a small brush or cloth to apply coolant carefully.
Avoiding Damage
Secure the silverware tightly before drilling. Movement can cause scratches or uneven holes. Place a soft cloth under the piece to protect surfaces. Use the right drill bit size for the hole you want. Check your progress slowly to avoid cracks or bending.
Finishing Touches
After drilling holes in silverware, finishing touches improve safety and look. These steps make the metal smooth and shiny. They help avoid cuts and give a neat appearance.
Removing Burrs
Burrs are rough edges left after drilling. They can cause scratches or cuts. Use a small file or sandpaper to remove burrs carefully. Move in one direction until the edge feels smooth. Check by running your finger gently along the hole. No sharp bits should remain.
Polishing The Edges
Polishing makes the edges bright and smooth. Use a polishing cloth or a rotary tool with a soft wheel. Rub the edges lightly to remove scratches and dullness. This step helps the silverware look clean and fresh. It also protects the metal from rust and wear.
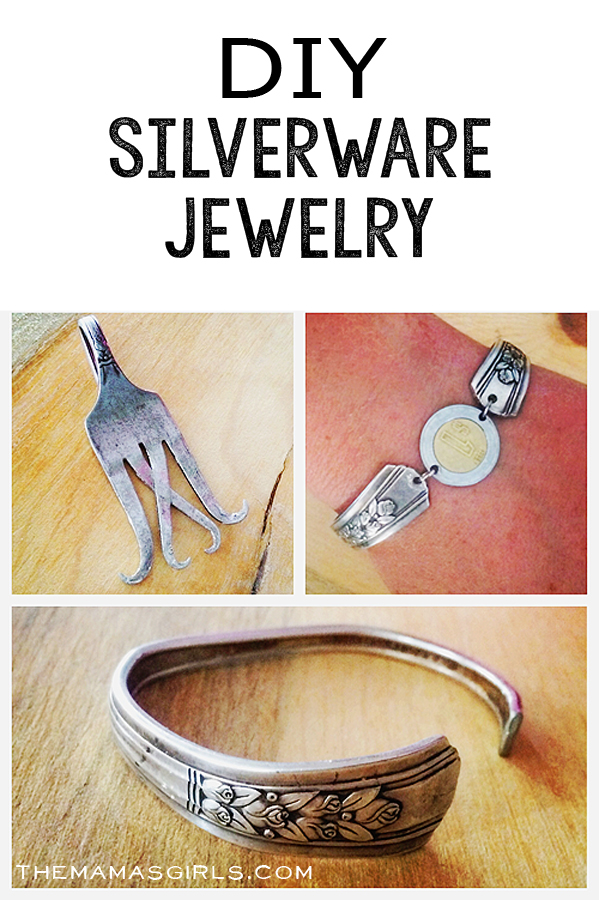
Credit: www.themamasgirls.com
Creative Uses
Drilling holes in silverware opens up many creative possibilities. Old forks, spoons, and knives can become unique art pieces. Transforming silverware into new items gives them new life. This technique works great for personal projects and gifts.
Jewelry Making
Silverware pieces can turn into stylish jewelry. Drill small holes to attach hooks or chains. Fork tines or spoon handles make great pendants. Bracelets and earrings look unique with silverware parts. Handmade jewelry feels special and original.
Home Decor Ideas
Use drilled silverware for charming home decorations. Create wind chimes by connecting pieces with string. Old spoons become hooks for hanging keys or towels. Forks and knives can form creative photo holders. These projects add character to any room.
Credit: www.houseofhawthornes.com
Frequently Asked Questions
How Do You Drill Holes In Silverware Safely?
Use a drill with a small carbide or titanium bit. Secure the silverware firmly with a clamp. Drill slowly to avoid bending or cracking the metal. Wear safety goggles and gloves to protect yourself during the process.
What Tools Are Best For Drilling Silverware Holes?
A handheld electric drill with a small metal drill bit works best. Use carbide or titanium bits for durability. Additionally, a clamp or vice ensures stability. Safety equipment like goggles and gloves is essential for protection.
Can I Drill Holes In Silverware Without Damaging It?
Yes, by using a slow drill speed and sharp bit. Secure the silverware firmly to prevent movement. Avoid applying excessive pressure which can bend or crack the metal. Proper technique minimizes damage and produces clean holes.
Why Drill Holes In Silverware?
Drilling holes allows you to repurpose silverware into hooks, jewelry, or crafts. It also enables hanging or attaching silverware pieces creatively. This technique adds functionality and decorative value to old or unused utensils.
Conclusion
Drilling holes in silverware can be simple with the right tools. Take your time and measure carefully. Use a small drill bit to start the hole. Keep the silverware steady while you drill. Clean the edges after drilling for a smooth finish.
This skill lets you create unique crafts or fix items. Practice a few times to build confidence. Soon, you will handle silverware drilling with ease and safety. Give it a try and see the results yourself!