
Have you ever faced the challenge of removing a stubborn rivet and didn’t know where to start? Drilling out a rivet might seem tricky, but with the right steps, you can do it quickly and safely.
Imagine saving time and avoiding damage to your project by mastering this simple skill. You’ll discover clear, easy-to-follow instructions that will help you drill out rivets like a pro. Keep reading, and you’ll gain the confidence to tackle your next repair or DIY task without hesitation.
Tools Needed
Drilling out a rivet needs the right tools. Using proper equipment makes the job safe and smooth. Prepare your workspace and gather these essentials before you start.
Drill Types
A cordless drill offers freedom of movement. It is easy to handle and works well for most rivets. A corded drill provides constant power for tougher jobs. Choose a drill with variable speed control for better precision. This control helps prevent damage to the material around the rivet.
Drill Bits
Use high-speed steel (HSS) drill bits for metal rivets. They stay sharp and cut efficiently. Start with a small bit to make a pilot hole. Then switch to a bit size that matches the rivet diameter. Avoid dull bits; they cause slipping and increase risk of injury.
Safety Gear
Wear safety glasses to protect your eyes from metal shavings. Gloves shield your hands from sharp edges and hot surfaces. Ear protection helps reduce noise from the drill. Ensure your clothing fits well to avoid getting caught in moving parts.
Preparing The Work Area
Preparing the work area is the first step in drilling out a rivet. A clean and stable workspace helps you work safely and accurately. Small details matter. They make the job easier and faster. Keep tools and materials close by. Clear space allows better focus.
Cleaning The Surface
Remove dirt, grease, and dust from the rivet area. Use a cloth or brush for cleaning. A clean surface helps the drill bit grip better. It also prevents slipping and damage. Check for paint or rust that might hide the rivet head. Scrape or sand it gently to expose the rivet fully. This makes drilling precise.
Securing The Material
Hold the material firmly before drilling. Use clamps or a vise to keep it still. Movement during drilling can cause mistakes or injury. Secure the piece on a solid workbench. Make sure the rivet is easy to reach and see. Proper support gives control and accuracy. It also protects your hands from the drill bit.
Identifying Rivet Types
Identifying the type of rivet is the first step to drill it out correctly. Rivets come in different shapes and sizes. Each type needs a specific approach for removal. Knowing the rivet style helps choose the right tools. It also prevents damage to the surrounding material.
Common Rivet Styles
Solid rivets are strong and often used in metalwork. They have a smooth, rounded head. Pop rivets, or blind rivets, have a stem that pulls through to expand the rivet body. Drive rivets have a small pin in the center that you hit to set them. Split rivets have legs that spread out inside the hole. Each style needs a different drilling technique.
Choosing The Right Drill Bit
Select the drill bit based on the rivet size and material. A high-speed steel (HSS) bit works well for most rivets. Carbide bits are better for hard metals. The drill bit diameter should match the rivet’s head or body size. Use a smaller bit to start, then increase size carefully. This avoids damaging the base material around the rivet.

Credit: www.wikihow.com
Step-by-step Drilling Process
Drilling out a rivet requires careful attention and the right steps. Following a clear process helps remove the rivet safely. The step-by-step drilling process breaks down the task into simple actions. Each step focuses on precision and safety to protect your materials.
Marking The Rivet Center
First, find the exact center of the rivet head. Use a marker or punch tool to mark the spot. This guide helps keep the drill bit steady. Accurate marking prevents slipping and damage to the surrounding area.
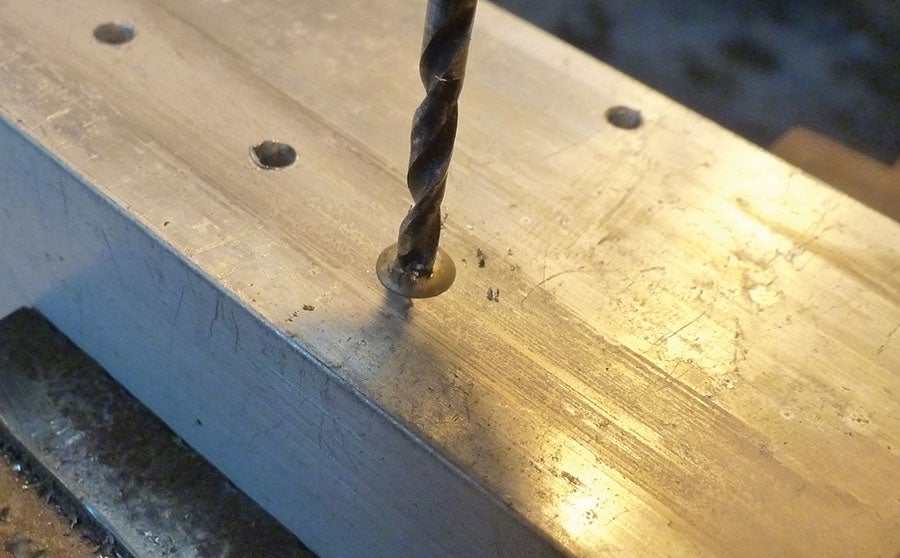
Starting The Drill
Choose a drill bit slightly smaller than the rivet head. Hold the drill steady and start at low speed. Apply gentle pressure to avoid slipping. Keep the drill straight to make a clean hole.
Removing The Rivet Head
Drill carefully through the rivet head until it separates. Watch for signs that the head is loosening. Stop drilling once the head is free. Remove the rivet head with pliers or by hand.
Pushing Out The Rivet Body
Use a punch tool or the drill bit to push out the rivet body. Tap gently if needed to avoid damaging the material. The rivet should slide out easily once the head is removed. Clean the hole to prepare for a new rivet or fastener.
Dealing With Stubborn Rivets
Some rivets refuse to come out easily. These stubborn rivets need special care and patience. Using the right techniques can save time and protect your materials. This section explains how to handle tough rivets without damage.
Using Penetrating Oil
Penetrating oil helps loosen rust and dirt around the rivet. Apply a small amount on the rivet and wait 10 to 15 minutes. The oil seeps into tight spaces and reduces friction. This step makes drilling much easier and less stressful.
Applying Steady Pressure
Use a drill with a sharp bit for steady pressure. Press down evenly and avoid pushing too hard. Let the drill bit do the work. Slow and steady drilling prevents slipping and keeps the hole clean.
Alternative Removal Methods
If drilling fails, try other removal methods. Use a center punch to mark the rivet’s middle. Tap gently to create a small dent. This helps guide the drill bit accurately. For very tough rivets, use a grinder to cut the head off carefully. Always wear safety glasses during this process.
Credit: www.kitplanes.com
Post-removal Cleanup
After drilling out a rivet, cleaning up the area is essential. This step ensures safety and prepares the surface for the next task. Small metal bits or rough edges can cause injury or damage tools. A smooth finish helps when installing a new fastener or finishing the project.
Smoothing Rough Edges
Use a file or sandpaper to smooth any sharp edges around the hole. Move the tool in a gentle, circular motion. Check often to avoid removing too much material. Smooth edges reduce the risk of cuts and help fasteners fit better.
Inspecting The Hole
Look closely at the drilled hole for any cracks or damage. The hole should be clean and round. Use a flashlight to see inside clearly. If the hole is damaged, consider repairing or redrilling it. A perfect hole ensures strong and safe fastening.
Safety Tips
Drilling out a rivet can be risky without proper safety measures. Taking safety seriously prevents injuries and damage. Follow these tips to protect yourself and your work area.
Protective Equipment
Wear safety goggles to shield your eyes from metal shards. Use gloves to protect your hands from sharp edges and hot metal. Ear protection reduces noise from the drill. Wear a dust mask to avoid breathing metal dust. Choose sturdy shoes to protect your feet from falling tools or materials.
Drilling Precautions
Secure the workpiece firmly before drilling. Use the correct drill bit size for the rivet. Drill slowly to avoid slipping and losing control. Keep your hands away from the drill bit path. Unplug the drill before changing bits or adjusting the setup. Work in a well-lit area to see clearly. Check your drill for damage before starting.

Credit: www.youtube.com
Frequently Asked Questions
How Do I Safely Drill Out A Rivet?
To safely drill out a rivet, use a drill bit slightly larger than the rivet head. Secure the workpiece firmly. Drill slowly, applying steady pressure to avoid damaging surrounding material. Wear safety goggles to protect your eyes from metal shavings.
What Tools Are Needed To Drill Out A Rivet?
You need a power drill, drill bits, safety goggles, and pliers. A center punch helps mark the rivet center. Optionally, use a hammer and punch to remove rivet remnants after drilling.
Can I Reuse A Rivet After Drilling It Out?
No, rivets are one-time use fasteners. Drilling them out damages their structure. Always replace with new rivets to ensure a secure hold and safety.
How Do I Choose The Right Drill Bit Size?
Pick a drill bit slightly larger than the rivet head diameter. This helps drill through the rivet without damaging the base material. Start with a smaller bit if unsure, then increase size gradually.
Conclusion
Drilling out a rivet is simple with the right tools and steps. Stay patient and take your time. Always wear safety gear to protect yourself. Choose the correct drill bit size for the rivet. Keep the drill steady to avoid damage.
Practice on scrap material if unsure. Removing rivets becomes easier with practice and care. Now, you can handle rivet removal confidently and safely.