
Drilling into porcelain tile can feel tricky and even scary if you’ve never done it before. You might worry about cracking the tile or ruining your wall.
But what if you could do it right the first time, saving yourself time, money, and frustration? In this guide, you’ll discover simple steps and expert tips to drill into porcelain tile safely and cleanly. By the end, you’ll have the confidence to handle this task like a pro.
Ready to learn how to get the job done without damage? Let’s dive in.

Credit: www.youtube.com
Choosing The Right Drill Bit
Choosing the right drill bit is very important for drilling into porcelain tile. Porcelain is hard and delicate. The wrong bit can crack or break the tile. It can also wear out quickly and make the job harder. Using the correct drill bit makes drilling easier and safer. It also protects the tile from damage.
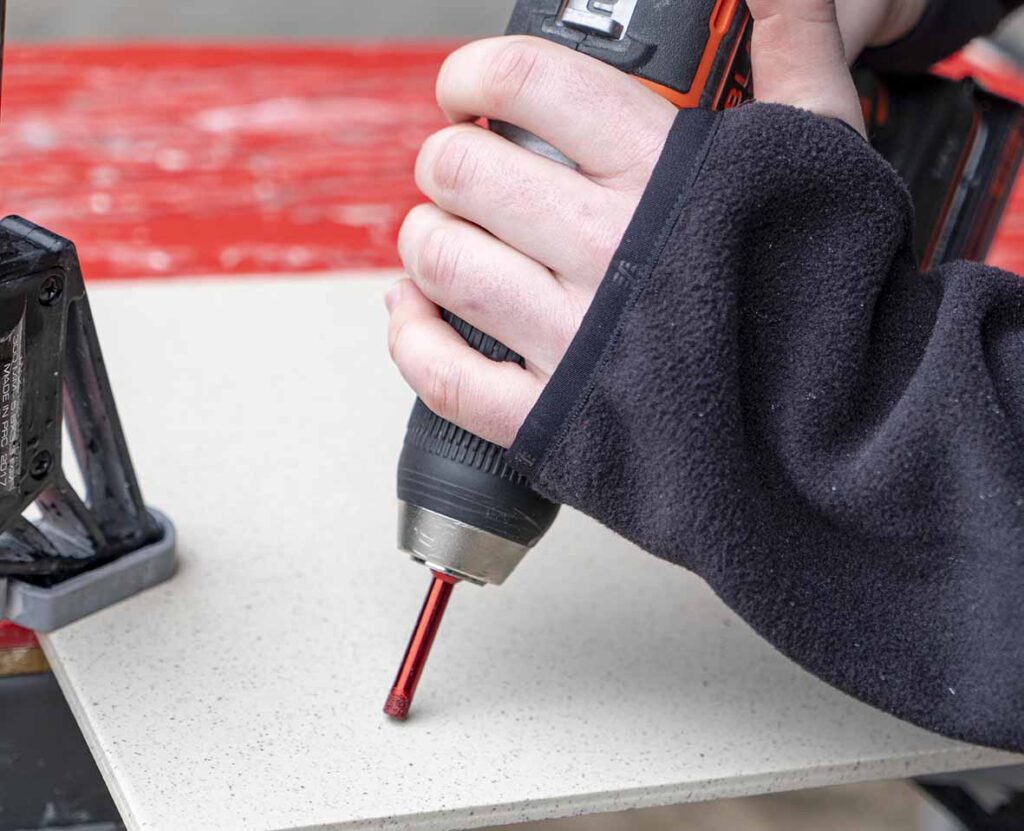
Diamond-tipped Bits
Diamond-tipped bits are the best choice for porcelain tile. They have tiny diamonds on the tip. Diamonds are very hard and cut through the tile smoothly. These bits last longer and give clean holes. They work well on very hard surfaces like porcelain.
Carbide-tipped Bits
Carbide-tipped bits are a good option too. They are less expensive than diamond bits. Carbide tips are hard and can drill through tile without cracking it. They do not last as long as diamond bits but work well for small projects.
Avoiding Standard Bits
Standard drill bits are not made for porcelain tile. They can cause cracks or chips in the tile. These bits wear down quickly and do not cut well. Avoid using regular bits to protect your tile and get better results.
Credit: ceramiccity.ie
Preparing The Tile Surface
Preparing the tile surface is an important step before drilling into porcelain tile. It helps prevent damage and makes the drilling process easier. Proper preparation ensures the drill bit stays in place and creates a clean hole. Take time to prepare the surface carefully.
Cleaning And Marking
Start by cleaning the tile surface with a soft cloth. Remove dust, dirt, and grease. A clean surface helps the drill bit grip better. Use a marker or pencil to mark the exact spot for drilling. Mark clearly but gently to avoid scratching the tile.
Using Tape For Stability
Place a piece of masking or painter’s tape over the marked spot. The tape adds grip and stops the drill bit from slipping. It also reduces the risk of cracking the tile. Press the tape firmly onto the tile to hold it in place during drilling.
Setting Up Your Drill
Setting up your drill correctly is key to drilling into porcelain tile safely and cleanly. This step helps avoid cracks and keeps the drill bit steady. Take your time to prepare your drill before starting.
Selecting Drill Speed
Choose a slow drill speed for porcelain tile. High speeds can cause overheating and damage the tile. Start at the lowest speed and increase only if needed. Slow speed gives better control and prevents slipping.
Using A Drill Guide
A drill guide keeps the drill bit steady and straight. It helps avoid slipping on the smooth tile surface. Use a guide or clamp to hold your drill at the right angle. This makes drilling easier and more precise.
Credit: www.rubi.com
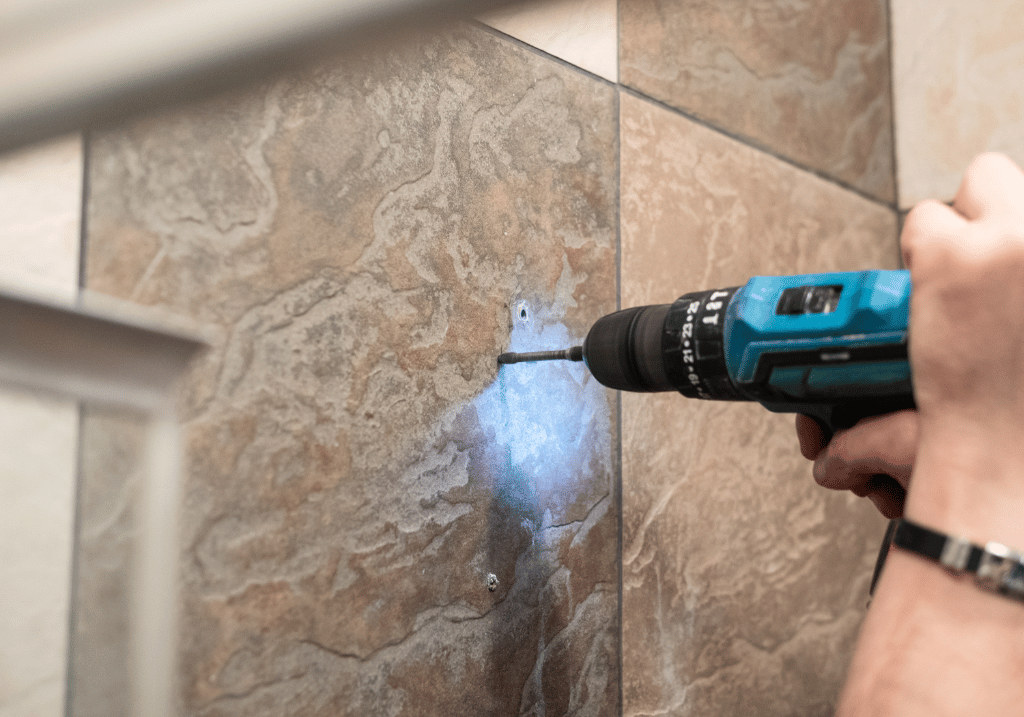
Drilling Techniques For Porcelain
Drilling into porcelain tile requires special care and technique. Porcelain is very hard and can crack easily if drilled incorrectly. Using the right methods helps you make clean holes without damaging the tile. Focus on control and patience for best results.
Starting With A Pilot Hole
Begin by marking the spot where you want to drill. Use a small drill bit designed for tile to create a pilot hole. This hole guides the bigger drill bit and stops it from slipping. Drill slowly and gently to avoid cracks. A piece of tape on the tile can help keep the drill bit steady.
Applying Steady Pressure
Use firm but gentle pressure while drilling. Press too hard and the tile may break. Too soft, and the drill bit will slip or overheat. Keep the drill steady and let it do the work. Slow, even pressure helps you control the hole size and shape.
Cooling The Drill Bit
Drilling makes heat. Hot bits can damage porcelain and dull quickly. Use water or a damp cloth to cool the drill bit often. Stop drilling now and then to add water. Cooling keeps the bit sharp and protects the tile from cracks.
Common Mistakes To Avoid
Drilling into porcelain tile can be tricky. Many people make mistakes that cause cracks or damage. Avoiding these common errors will save time and money. It also helps you get clean, precise holes without stress. Pay attention to these key points to protect your tile and complete your project smoothly.
Skipping Safety Measures
Safety is the first step. Always wear safety goggles to protect your eyes. Dust and small tile chips can fly during drilling. Use gloves to protect your hands from sharp edges. Work in a well-ventilated area. Keep your workspace clear to avoid accidents. Skipping these steps can lead to injury or damage.
Using Excessive Force
Applying too much pressure can crack the tile. Let the drill do the work. Press gently and steadily. Start with a slow drill speed to avoid slipping. Rushing the process increases the risk of breaking the tile. Patience helps you make clean holes without damage.
Ignoring Tile Thickness
Porcelain tiles vary in thickness. Thicker tiles need more time and the right drill bit. Using a regular bit on thick tile may not work. Check the tile thickness before you start. Choose a drill bit designed for hard materials. This ensures the bit cuts properly without damaging the tile.
Finishing Touches
After drilling into porcelain tile, the work is not quite done. Finishing touches make your project look neat and last longer. These steps keep your tile safe from damage and help maintain its beauty. Let’s focus on cleaning debris and smoothing rough edges for a clean finish.
Cleaning Debris
Remove dust and small tile pieces from the hole carefully. Use a soft brush or a vacuum to clear the area. Wipe the surface gently with a damp cloth to remove fine dust. Clean holes help adhesives or anchors stick better. A clean space also prevents scratches and stains on the tile.
Smoothing Rough Edges
Check the drilled hole for any sharp or rough edges. Use a small nail file or fine sandpaper to smooth these edges. Move gently around the hole to avoid cracking the tile. Smooth edges stop chips from forming later. This step also protects your hands and tools from cuts. Take your time to make the hole neat and safe.
Safety Tips While Drilling
Drilling into porcelain tile requires care to avoid accidents and damage. Safety should always come first. Proper safety steps protect you and keep your work clean.
Protective Gear
Wear safety goggles to protect your eyes from flying fragments. Use gloves to shield your hands from sharp edges. A dust mask helps prevent inhaling fine particles. Closed-toe shoes protect your feet from dropped tools or debris.
Handling Dust And Fragments
Porcelain dust can irritate your lungs and skin. Work in a well-ventilated area or outside if possible. Use a vacuum or damp cloth to clean dust regularly. Avoid touching your face while drilling to keep dust away from your eyes and mouth.
Frequently Asked Questions
How Do I Start Drilling Into Porcelain Tile Safely?
Begin by marking the drill spot with tape to avoid slipping. Use a carbide-tipped or diamond drill bit designed for tiles. Start drilling at a slow speed with light pressure. Keep the bit and tile cool by spraying water frequently during drilling.
What Type Of Drill Bit Works Best On Porcelain Tile?
A diamond-tipped or carbide-tipped drill bit works best for porcelain tile. These bits are designed to cut through hard, brittle surfaces without cracking. Avoid standard wood or metal bits as they can damage the tile or drill bit.
How Can I Prevent Porcelain Tile From Cracking?
Use a low drill speed and light pressure to reduce stress on the tile. Place masking tape over the drill spot for extra grip. Keep the drill bit cool with water to prevent overheating. Avoid hammer drills unless specifically designed for tile.
Should I Use Water While Drilling Porcelain Tile?
Yes, water acts as a coolant and lubricant when drilling porcelain tile. It prevents the drill bit from overheating and reduces tile cracking risk. Spray water regularly or use a wet drill attachment for best results.
Conclusion
Drilling into porcelain tile takes care and the right tools. Use a diamond drill bit for best results. Keep the drill speed slow to avoid cracks. Always wear safety glasses to protect your eyes. Mark the spot clearly before you start drilling.
Take breaks to let the tile cool down. With patience and care, the job will go smoothly. You can hang shelves or fixtures without damage. Stay calm and work step-by-step for success. This simple guide helps you finish your project safely.