

Have you ever wanted to turn your glass pot into something unique but didn’t know how to start? Drilling a hole in glass might sound tricky or risky, but with the right steps, you can do it safely and easily.
Imagine customizing your pot exactly how you want—whether for drainage, decoration, or creating a cool DIY project. In this guide, you’ll learn simple, clear instructions to drill a perfect hole without cracking or breaking your glass pot. Keep reading, and you’ll gain the confidence to take on this task like a pro.

Credit: wissmachglass.com
Tools Needed
Drilling a hole in a glass pot needs special tools. Using the right tools makes the job easier and safer. You need tools that work well with glass and protect you.
Below are the main tools you need for this task.
Choosing The Right Drill Bit
Pick a drill bit made for glass or tile. Diamond-tipped bits work best because they cut glass smoothly. Avoid regular metal bits; they can crack the glass. Use a small size first to make a guide hole. Then, use a bigger bit if needed.
Safety Gear Essentials
Wear safety glasses to protect your eyes from glass shards. Use gloves to keep your hands safe. A dust mask helps stop glass dust from entering your lungs. Always have a clear workspace to avoid accidents.
Additional Supplies
Keep a container of water nearby to cool the drill bit. Cooling stops the glass from heating and breaking. Use tape on the spot to guide the drill and stop slipping. A marker helps mark where to drill clearly.

Credit: www.youtube.com
Preparing The Glass Pot
Preparing a glass pot for drilling is a key step for a clean, safe hole. It helps avoid cracks and breaks. Careful preparation makes the drilling easier and more precise.
Cleaning The Surface
Start by cleaning the glass pot well. Use mild soap and warm water to remove dirt and grease. Dry the pot with a soft cloth. A clean surface helps the drill bit grip better. Dirt or oil can cause slipping and damage.
Marking The Drill Spot
Choose the exact spot where you want the hole. Use a non-permanent marker or a small piece of tape. Marking helps guide the drill and keeps it steady. Avoid moving the pot after marking. Precision here prevents mistakes during drilling.
Drilling Techniques
Drilling a hole in a glass pot needs careful steps to avoid cracks. Using the right drilling techniques helps you work safely and get clean results. This section explains key techniques to follow for smooth drilling.
Setting Up The Drill
Choose a drill with a diamond or carbide bit for glass. Secure the glass pot on a flat surface. Use clamps or a soft towel to keep it steady. Mark the spot where you want the hole. This prevents the drill from slipping during work.
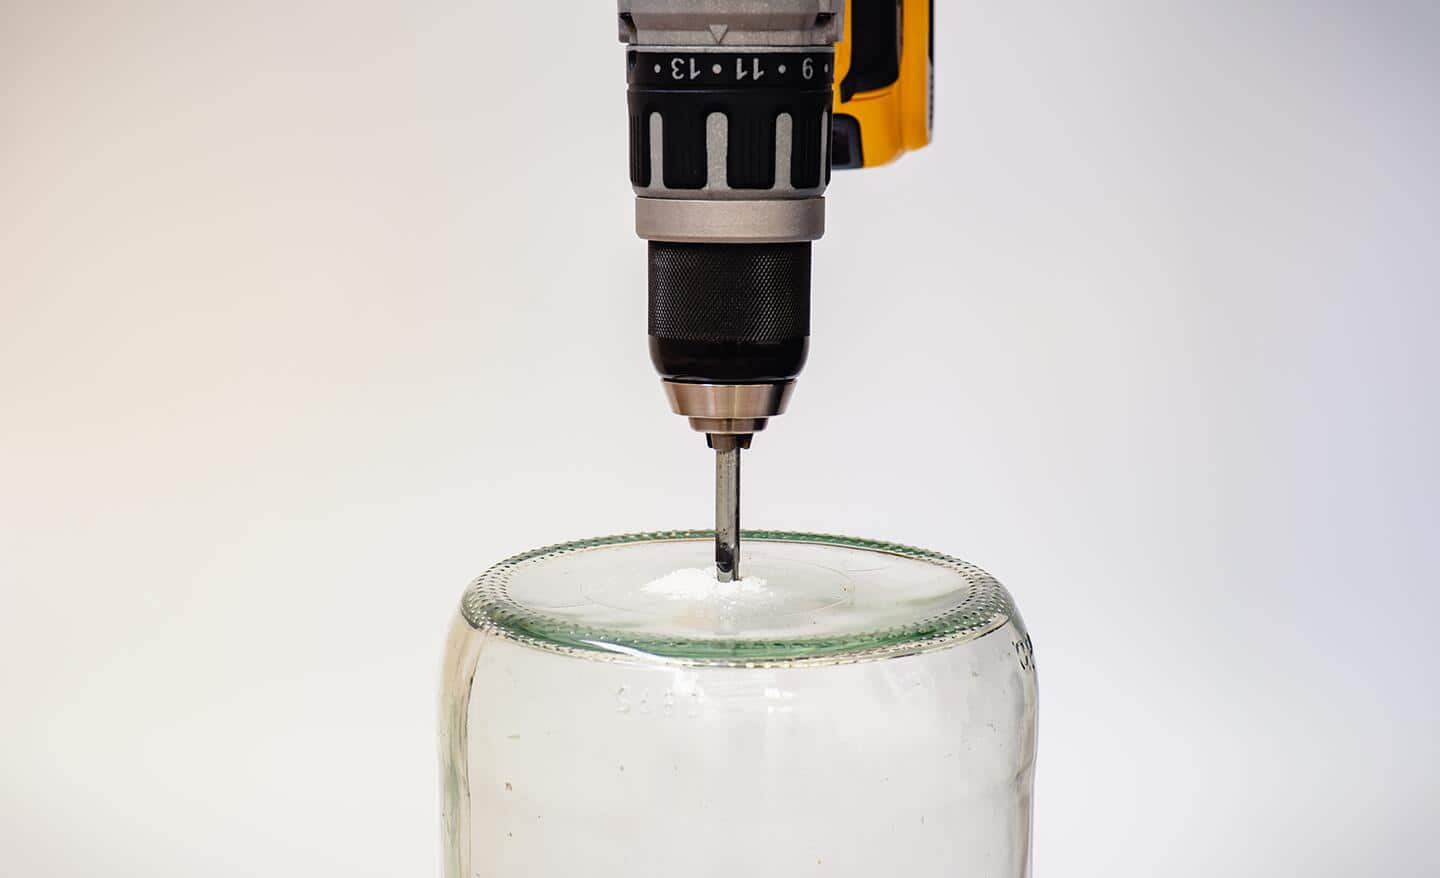
Drilling At Low Speed
Start drilling slowly to avoid glass breakage. High speed creates heat and pressure, causing cracks. Apply gentle pressure and let the drill bit do the work. Take breaks if needed to reduce stress on the glass.
Keeping The Glass Cool
Heat can crack glass quickly. Use water or a damp cloth to cool the drill bit and glass. Spray water often or dip the drill bit in water regularly. Cooling helps the drill cut smoothly and prevents damage.
Handling Common Issues
Drilling a hole in a glass pot can be tricky. Small mistakes cause cracks or chips. Knowing how to handle these issues helps keep your pot safe and strong. This section covers two common problems and easy ways to fix or avoid them.
Preventing Cracks
Cracks start from too much pressure or heat. Use a drill with a diamond tip for better control. Always keep the glass wet during drilling. Water cools the glass and stops heat build-up. Drill slowly and avoid pushing hard. Let the drill do the work. Support the pot firmly to stop it from moving. These steps reduce the chance of cracks forming.
Fixing Minor Chips
Minor chips happen if the drill slips or the glass is thin. Use clear nail polish or epoxy to seal chips. This stops cracks from growing bigger. Apply the polish gently and let it dry fully. Sand the edges lightly if they feel rough. This makes the pot safer to handle. Fixing chips quickly keeps your pot looking good and lasting longer.
Finishing Touches
After drilling a hole in a glass pot, the work is not quite done. Finishing touches ensure the hole is safe and looks neat. These steps protect the pot and help it last longer. Taking time here makes a big difference in the final result.
Smoothing The Hole Edges
The edges of the hole can be sharp or rough. Use fine sandpaper or a diamond file to smooth these edges. Move gently and in a circular motion around the hole. This prevents cracks and protects your hands from cuts. Take your time and check often for smoothness.
Cleaning After Drilling
Drilling glass leaves dust and tiny glass pieces behind. Clean the pot with warm water and mild soap. Use a soft cloth or sponge to avoid scratches. Rinse well to remove all dust particles. Dry the pot with a clean towel. This keeps the pot safe and ready for use.
Credit: www.homedepot.com
Frequently Asked Questions
How Do I Drill A Hole In A Glass Pot Safely?
Use a diamond drill bit and water for cooling. Start slowly to avoid cracking. Wear safety glasses and gloves for protection.
What Type Of Drill Bit Works Best For Glass Pots?
A diamond-tipped drill bit is ideal. It cuts smoothly without shattering the glass. Avoid regular bits as they cause cracks.
Can I Drill A Hole In A Glass Pot Without Cracking It?
Yes, by using water to cool and a slow drilling speed. Support the pot firmly and avoid applying too much pressure.
How Large Should The Drill Hole Be In A Glass Pot?
Choose a hole size based on the pot’s purpose. Commonly, 1/4 to 1/2 inch works for drainage or drainage attachments.
Conclusion
Drilling a hole in a glass pot takes care and patience. Use the right tools and keep water nearby to cool the glass. Work slowly and avoid putting too much pressure on the glass. Small steps prevent cracks and breakage.
This simple method helps you create holes safely and cleanly. Now, you can customize your glass pots for plants or crafts. Enjoy your project with confidence and safety in mind.