
Finish nails for a nail gun are thin, durable fasteners designed for precision tasks like trim, molding, and cabinetry. They leave minimal holes and hold securely without splitting wood, making them ideal for professional and DIY projects.
Key Takeaways
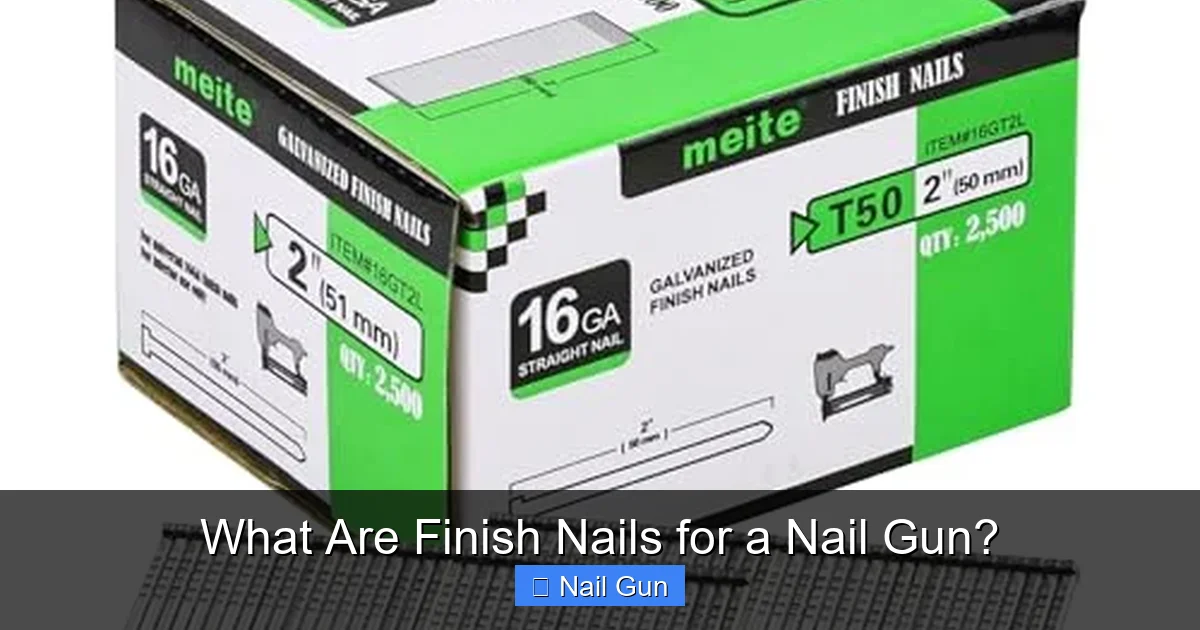
- Finish nails are thin, strong fasteners made for nail guns and used in delicate woodworking tasks like trim and molding.
- They come in various gauges and lengths—15-gauge and 16-gauge are most common, with lengths from 1 to 2.5 inches.
- Finish nails are collated in strips or coils to fit specific nail guns, ensuring smooth, jam-free operation.
- They leave small holes that are easy to conceal with wood filler or putty, creating a clean, professional finish.
- Ideal for indoor projects like baseboards, crown molding, door casings, and furniture assembly.
- Use the right nail gun—finish nailers are designed for these nails and provide consistent depth and power.
- Proper technique matters—angle, depth, and spacing affect the final look and strength of the joint.
What Are Finish Nails for a Nail Gun?
If you’ve ever worked on trim, molding, or cabinetry, you’ve probably seen—or used—finish nails. These small but mighty fasteners are a staple in woodworking and construction, especially when precision and a clean finish matter. But what exactly are finish nails for a nail gun, and why are they so popular?
In this guide, you’ll learn everything you need to know about finish nails: what they are, how they work, the different types available, and how to use them effectively with a nail gun. Whether you’re a DIY enthusiast or a professional contractor, understanding finish nails will help you achieve stronger, cleaner, and more professional results.
Understanding Finish Nails: The Basics

Visual guide about What Are Finish Nails for a Nail Gun?
Image source: protoolreviews.com
Finish nails are a type of fastener specifically designed for use with pneumatic or cordless finish nail guns. Unlike framing nails or brad nails, finish nails are thicker than brads but thinner than common nails, striking the perfect balance between holding power and minimal surface damage.
They are typically made from hardened steel and often feature a slight head (called a “dome head”) that helps grip the material without pulling through. Some finish nails also have a coated surface—like galvanized or stainless steel—to resist rust and corrosion, especially important in humid environments.
Why Use Finish Nails?
Finish nails are ideal for projects where appearance matters. Because they’re thin and leave small holes, they’re less likely to split delicate wood like pine, oak, or maple. This makes them perfect for:
– Installing baseboards and crown molding
– Attaching door and window casings
– Building cabinets and furniture
– Securing trim and decorative moldings
Their strength ensures a secure hold, while their subtle profile means you can easily hide the nail heads with a bit of wood filler and paint.
Types of Finish Nails
Visual guide about What Are Finish Nails for a Nail Gun?
Image source: m.media-amazon.com
Not all finish nails are the same. They vary in gauge, length, material, and collation style. Choosing the right one depends on your project and nail gun.
Gauge: What Does It Mean?
The “gauge” of a nail refers to its thickness. The higher the gauge number, the thinner the nail. For finish nails, the most common gauges are:
– 15-gauge: Thicker and stronger, ideal for heavy trim, baseboards, and exterior moldings. These nails have larger heads and provide excellent holding power.
– 16-gauge: Slightly thinner than 15-gauge, these are the most popular for general trim work. They offer a great balance of strength and subtlety.
While 18-gauge nails exist, they’re usually classified as brad nails and are better suited for very light trim or delicate materials.
Length Matters
Finish nail lengths typically range from 1 inch to 2.5 inches. The right length depends on the thickness of the materials you’re joining:
– 1 to 1.25 inches: Best for thin trim or attaching lightweight moldings.
– 1.5 to 2 inches: Ideal for standard baseboards, door casings, and cabinet frames.
– 2 to 2.5 inches: Used for thicker trim or when extra holding power is needed.
A good rule of thumb: the nail should be at least 2.5 times the thickness of the material being fastened.
Material and Coating
Finish nails come in different materials to suit various environments:
– Steel: Strong and affordable, great for indoor use.
– Galvanized steel: Coated to resist rust, perfect for bathrooms or exterior trim.
– Stainless steel: Highly corrosion-resistant, ideal for coastal areas or outdoor projects.
Always match the nail material to the environment to prevent rust and ensure longevity.
Collation: How Nails Are Held Together
Finish nails are sold in strips or coils held together by adhesive or wire. This is called collation. The two main types are:
– Adhesive collation: Nails are glued side by side in a straight strip. Common in 15- and 16-gauge finish nailers.
– Wire collation: Nails are connected by thin wire. Offers more nails per strip and is often used in high-volume jobs.
Make sure your nail gun is compatible with the collation type—using the wrong kind can cause jams or damage.
Choosing the Right Finish Nail Gun
Using the right nail gun is just as important as choosing the right nail. Finish nail guns are specifically designed for finish nails and offer precision, power, and ease of use.
Pneumatic vs. Cordless
– Pneumatic finish nailers: Powered by an air compressor. They’re lightweight, powerful, and great for long jobs. However, they require a compressor and hose.
– Cordless finish nailers: Run on batteries and use gas or air pressure. They’re portable and convenient but may be heavier and cost more.
For most DIYers, a cordless model offers the best balance of power and convenience.
Depth Adjustment and Trigger Options
Look for a nail gun with:
– Depth adjustment: Lets you control how deep the nail is driven. This is crucial for avoiding surface damage.
– Bump or sequential firing: Bump mode lets you fire quickly by tapping the nose; sequential mode requires you to pull the trigger each time—safer and more precise.
How to Use Finish Nails with a Nail Gun
Using finish nails correctly ensures strong, clean results. Follow these steps for best practices.
Step 1: Prepare Your Materials
– Measure and cut your trim or molding to size.
– Sand any rough edges and clean the surfaces to be joined.
– Dry-fit the pieces to ensure a tight fit before nailing.
Step 2: Load the Nail Gun
– Disconnect the air hose or remove the battery for safety.
– Open the magazine and insert the strip of finish nails with the heads facing the correct direction (usually toward the driver blade).
– Close the magazine and reattach power.
Step 3: Adjust the Depth
– Use the depth adjustment wheel to set how deep the nail will go.
– Test on a scrap piece of wood. The nail head should sit just below the surface—not too deep (which can weaken the hold) or too shallow (which leaves a bump).
Step 4: Position and Fire
– Hold the nail gun perpendicular to the surface.
– Press the nose firmly against the wood before pulling the trigger.
– For tight corners or angled joints, you may need to angle the gun slightly (up to 15 degrees).
Step 5: Fill and Finish
– Once all nails are in, use wood filler or putty to cover the holes.
– Sand lightly once dry, then paint or stain to match the surrounding area.
Practical Tips for Best Results
– Use a nail set: If a nail isn’t fully driven, use a nail set to gently tap it below the surface.
– Space nails properly: Place nails every 12 to 16 inches for trim, closer for heavier pieces.
– Avoid splitting: Pre-drill pilot holes in hardwoods or near the end of a board.
– Work in sections: For long runs of trim, work in 3- to 4-foot sections to maintain alignment.
Troubleshooting Common Issues
Even with the best tools, problems can happen. Here’s how to fix common issues:
Nails Not Driving Fully
– Check air pressure (for pneumatic guns)—should be 70–120 PSI.
– Ensure the depth setting isn’t too shallow.
– Clean the driver blade and magazine—dirt or debris can block the mechanism.
Jams or Misfeeds
– Use only the correct gauge and collation type.
– Don’t overload the magazine.
– Clean the gun regularly and lubricate moving parts (if recommended).
Splitting Wood
– Use shorter nails or pre-drill holes.
– Avoid nailing too close to the edge of the board.
– Choose a lower gauge (thinner) nail for delicate wood.
When Not to Use Finish Nails
While finish nails are versatile, they’re not for every job. Avoid them for:
– Structural framing or load-bearing walls
– Outdoor decking (use deck screws instead)
– Heavy-duty construction (framing nails are better)
For these tasks, consider using framing nails, screws, or other fasteners designed for higher stress.
Conclusion
Finish nails for a nail gun are essential tools for anyone working on trim, molding, or fine woodworking. Their thin profile, strong hold, and clean finish make them ideal for projects where appearance and precision matter. By choosing the right gauge, length, and material—and pairing them with a quality finish nailer—you can achieve professional results with ease.
Whether you’re installing baseboards in your living room or building custom cabinets, finish nails help you work faster, cleaner, and with greater confidence. With the tips and techniques in this guide, you’re ready to tackle your next project like a pro.