

Is your Bosch cordless drill acting up just when you need it most? You don’t have to throw it away or rush to buy a new one.
Imagine saving time and money by fixing it yourself. This guide will walk you through simple, clear steps to repair your Bosch cordless drill quickly and safely. Whether it’s not powering on, making strange noises, or losing charge, you’ll learn exactly what to do to get your drill back in action.
Keep reading and take control of your tool’s health today!
Credit: sageuae.com
Common Bosch Drill Problems
Bosch cordless drills are popular for their power and ease of use. Still, they can face some common problems over time. Knowing these issues helps in quick repair and better use of the tool. This section covers typical problems you might find in a Bosch cordless drill.
Battery Issues
The battery is the heart of any cordless drill. A common problem is the battery not holding a charge. This can happen due to old age or improper charging. Sometimes, the battery may not connect well with the drill. Dirt or damaged contacts cause this. Replacing or cleaning the battery contacts often solves the issue.
Motor Troubles
The motor drives the drill’s power. It may stop working or run weakly. Dust and debris can clog the motor vents. This causes overheating and damage. Brushes inside the motor wear out after long use. Replacing worn brushes can restore motor function. Regular cleaning also helps keep the motor healthy.
Chuck Problems
The chuck holds the drill bit firmly. It can become loose or fail to grip the bit. Dirt or rust inside the chuck causes slipping. The keyless chuck may not tighten properly if worn. Cleaning and lubricating the chuck can fix most problems. In some cases, replacing the chuck is necessary.
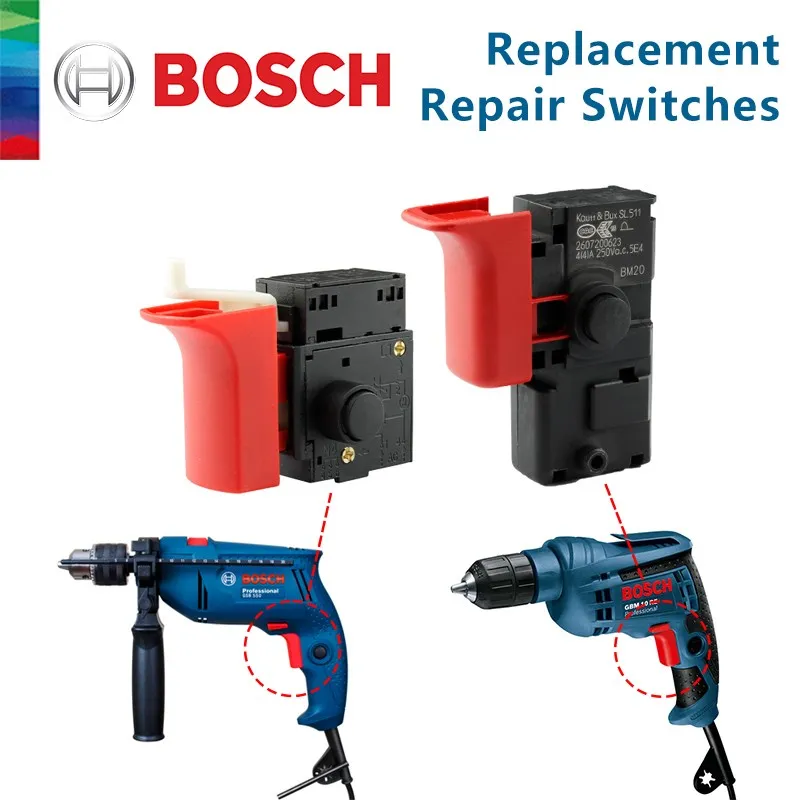
Trigger Malfunctions
The trigger controls the drill’s speed and power. Sometimes, the trigger may stick or not respond. Dust and wear can cause trigger failure. Electrical contact inside the trigger switch may break. Cleaning or replacing the trigger switch can restore smooth operation. Check wiring if the problem persists.
Tools Needed For Repair
Repairing a Bosch cordless drill needs the right tools. These tools help you open, check, and fix the drill safely. Using the correct tools makes the repair easier and faster. It also protects your drill from damage during the repair process.
Screwdrivers And Pliers
Screwdrivers are essential for removing screws from the drill casing. Use both flathead and Phillips screwdrivers for different screw types. Pliers help to hold small parts and pull out components gently. Needle-nose pliers are best for tight spaces inside the drill.
Multimeter Use
A multimeter tests the electrical parts of the drill. It checks the battery, motor, and wiring for faults. This tool shows if parts have power or need replacement. Learning to use a multimeter can save time and money on repairs.
Replacement Parts
Having replacement parts ready is important. Common parts include batteries, brushes, and switches. Use only parts made for Bosch cordless drills. Proper parts ensure your drill works like new after repair.
Safety Tips Before Repair
Repairing a Bosch cordless drill requires care and attention to safety. Before starting any repair work, follow important safety steps. These steps protect you and keep the drill safe to use later. Always prepare well to avoid accidents.
Disconnect Power Source
Always remove the battery before opening the drill. This stops the drill from turning on by mistake. Check twice to be sure no power is connected. Disconnecting the power is the first rule of safe repair.
Wear Protective Gear
Wear safety glasses to protect your eyes from dust and small parts. Use gloves to avoid cuts from sharp edges. Choose clothes that cover your skin well. Protective gear keeps injuries away and helps you work safely.
Step-by-step Repair Guide
Repairing a Bosch cordless drill can save money and extend its life. This step-by-step guide breaks down the process clearly. Follow each step carefully to fix common issues with your drill.
Removing The Battery
Start by removing the battery from the drill. Press the release button and slide the battery out. This ensures safety and prevents electrical accidents.
Opening The Drill Casing
Use a screwdriver to remove screws holding the casing. Gently separate the two halves of the drill. Keep screws in a safe place for reassembly.
Inspecting Internal Components
Look inside for worn or broken parts. Check wires, switches, and the motor for damage. Dirt or debris can also cause problems.
Replacing The Battery
If the battery no longer holds a charge, replace it with a new one. Make sure the new battery matches the model of your drill. Insert it firmly back into place.
Fixing The Chuck
The chuck may become loose or stuck. Tighten it using the chuck key or by hand. Clean any dirt that blocks its movement.
Repairing The Trigger
A faulty trigger stops the drill from starting. Check the trigger switch for damage or dirt. Replace the switch if it does not work properly.
Testing The Drill
Put the battery back and switch on the drill. Test it on a low setting to check all repairs. Listen for unusual sounds and check smooth operation.
Maintaining Your Bosch Drill
Maintaining your Bosch cordless drill helps it work longer and better. Small care steps keep the drill in good shape. This saves money and avoids trouble during projects. Simple habits keep your tool ready for any job.
Regular Cleaning
Clean the drill after each use. Remove dust and dirt with a soft cloth. Use a small brush to clear vents and crevices. Avoid water or harsh chemicals on the drill. Keeping it clean stops parts from wearing out fast.
Proper Storage
Store the drill in a dry, cool place. Avoid leaving it in hot or damp areas. Use the original case or a sturdy box. Keep it away from heavy objects that can damage it. Proper storage stops rust and protects the drill.
Battery Care Tips
Charge the battery fully before the first use. Do not overcharge or leave it on the charger too long. Store batteries in a cool, dry spot. Remove the battery if the drill will not be used for weeks. Good battery care keeps your drill running strong.

Credit: www.ifixit.com
When To Seek Professional Help
Knowing when to seek professional help is key to fixing your Bosch cordless drill safely. Some problems need expert tools and skills. Trying to fix complex issues alone can cause more damage or injury. Understanding when to call a technician saves time and money.
Complex Electrical Issues
Electrical problems can be tricky and dangerous. Faulty wiring or motor issues need special tools to diagnose. Professionals have the right equipment and knowledge. They can fix electrical faults without risking harm. Avoid opening the drill’s internal parts if you lack experience.
Warranty Considerations
Your drill may still have a warranty. Opening or repairing it yourself can void this warranty. Professional repairs keep your warranty valid. Check the warranty terms before starting any repair. Using authorized service centers ensures proper care and coverage.

Credit: www.youtube.com
Frequently Asked Questions
How Do I Fix A Bosch Cordless Drill That Won’t Start?
Check the battery charge and connections first. Clean the contacts and replace the battery if needed. Inspect the trigger switch for damage. If broken, replace it to restore functionality.
What Causes A Bosch Cordless Drill To Lose Power?
Battery aging or poor connection often causes power loss. Dirty contacts or worn brushes can reduce performance. Regularly clean and replace faulty parts to maintain drill power.
How Can I Replace The Bosch Cordless Drill’s Chuck?
Unscrew the chuck by turning it counterclockwise. Remove the old chuck carefully. Install the new one by tightening it securely. Test to ensure it holds drill bits firmly.
Why Is My Bosch Drill Overheating During Use?
Overheating usually results from prolonged use or blocked ventilation. Allow the drill to cool periodically. Clean vents from dust to improve airflow and prevent damage.
Conclusion
Repairing your Bosch cordless drill can save time and money. Follow each step carefully for the best results. Regular maintenance helps keep the drill working well. Always check the battery and connections first. Small issues often have simple fixes. Taking care of tools extends their life.
Now, you can confidently handle basic repairs yourself. Keep your drill ready for any project ahead.