

Are you wondering if you can use a mortice bit on your drill press? It’s a common question for anyone who wants to make precise square holes without buying extra tools.
Using the right bit can save you time and improve your woodworking projects, but not all bits work well with every machine. You’ll discover the truth about mortice bits and drill presses. Keep reading to find out how to get the best results safely and effectively.

Credit: www.reddit.com
Mortice Bit Basics
Understanding the basics of a mortice bit helps you decide if you can use it on a drill press. Mortice bits are special tools made for cutting square or rectangular holes. These bits differ from regular drill bits, which create round holes. Knowing what a mortice bit is and its types makes your woodworking easier and more precise.
What Is A Mortice Bit
A mortice bit is a drill bit designed to cut square holes. It has a sharp, hollow chisel surrounding a drill bit. The drill bit removes most wood inside the hole. The chisel cuts the corners to create a square shape. This tool is essential for making joints in woodworking.
Types Of Mortice Bits
There are several types of mortice bits. Hollow chisel mortice bits are the most common. They combine a drill bit inside a square chisel. Spiral mortice bits have a spiral drill bit inside the square chisel. Some bits are adjustable for different hole sizes. Each type suits different woodwork tasks and precision levels.
Common Uses
Mortice bits are mainly used in woodworking. They create mortices for joints in doors, cabinets, and furniture. These bits help fit tenons tightly in wood joints. They are also used to make slots for locks or hinges. Using a mortice bit ensures strong and clean joints in wood projects.
Credit: woodgears.ca
Drill Press Features
A drill press is a powerful tool for precise drilling tasks. Understanding its features helps you use it better. Each feature plays a role in how well it performs. Knowing these can help you decide if a mortice bit fits your drill press.
Key Components
The drill press has several important parts. The base supports the whole machine. The column is a vertical pole that holds the head and table. The table holds the workpiece and can move up or down. The head contains the motor and drill chuck. The chuck grips the drill bit tightly. Each part works together for accurate drilling.
Adjusting Speed And Depth
Speed control lets you match the drill speed to the material. Softer materials need slower speeds. Harder materials need faster speeds. Most drill presses have a belt or electronic speed control. Depth adjustment stops the drill from going too deep. It helps you make consistent holes every time.
Safety Mechanisms
Safety is key when using a drill press. Most machines have a guard to cover moving parts. Emergency stop buttons let you turn off the drill fast. Some models have automatic shutoff if the drill overheats. Wearing safety glasses and securing your workpiece keeps you safe. These features reduce accidents and protect you during work.
Compatibility Factors
Using a mortice bit on a drill press depends on several compatibility factors. These factors ensure the bit fits well and works safely. Understanding these points helps you avoid damage and get clean cuts.
Shank Size And Fit
The shank size of the mortice bit must match the drill press chuck. Most mortice bits have a specific shank diameter. Check if your drill press chuck can hold that size firmly. A loose fit causes wobbling and uneven holes. A tight fit keeps the bit stable and accurate.
Chuck Type Considerations
Drill presses often have different chuck types. Keyed chucks, keyless chucks, or specialized collets. Mortice bits usually require a strong grip. Keyed chucks provide better tightening for these bits. Some bits may need a collet adapter for a secure fit. Make sure your chuck type suits the mortice bit.
Drill Press Power And Torque
Mortice bits need enough power to cut through wood smoothly. Your drill press must offer enough torque to handle the bit size. Low-power drill presses may stall or overheat. Higher torque machines can maintain steady speed under load. Check your drill press specs to match the bit requirements.
Using Mortice Bits On Drill Press
Using mortice bits on a drill press can help create clean, accurate mortices. It offers better control compared to hand tools. Drill presses provide steady power and precise depth control. This makes them useful for woodworking projects requiring strong joints.
To get the best results, proper setup and technique are essential. Safety and stability must come first. Follow these tips to use mortice bits effectively on your drill press.
Setup And Alignment
Start by fitting the correct mortice bit securely in the chuck. Check that the bit is sharp and in good condition. Align the workpiece so the drill bit matches the mortice position. Use the drill press table adjustments to get perfect alignment. Set the drilling depth using the depth stop to avoid drilling too deep.
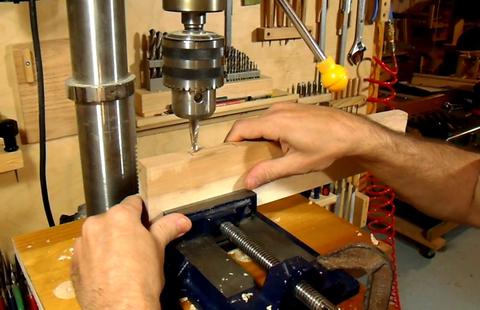
Clamping And Workpiece Stability
Secure the workpiece firmly to the drill press table using clamps. Avoid any movement during drilling to prevent mistakes or injury. Use a sacrificial board under your workpiece to protect the drill table. Double-check the clamps before starting the drill press. Stability improves cut quality and safety.
Cutting Technique Tips
Start the drill press at a low speed for better control. Apply steady, even pressure to avoid bit damage. Clear wood chips often by lifting the bit slightly during the cut. Avoid forcing the bit through the material. Let the drill press do the work for clean, smooth mortices.
Common Challenges
Using a mortice bit on a drill press comes with some common challenges. These problems can affect your work quality and tool safety. Understanding these issues helps you avoid mistakes and get better results.
Bit Slippage Issues
Bit slippage happens when the mortice bit moves inside the chuck. This can cause uneven holes or damage to the bit. Tightening the chuck firmly and using the right size bit reduces this problem. Check the bit often during use to keep it secure.
Overheating Risks
Mortice bits can get very hot during drilling. Overheating can dull the bit or damage the drill press. Use slow speeds and apply light pressure to keep the bit cool. Pause occasionally to let the bit cool down if needed.
Inaccurate Cuts And How To Avoid Them
Inaccurate cuts happen if the drill press or bit is not steady. Use clamps to hold the wood tightly in place. Make sure the drill press table is level. Take your time and guide the bit slowly for clean, precise cuts.
Maintenance And Care
Proper maintenance and care keep your mortice bits working well. They last longer and cut cleaner. Taking simple steps helps avoid damage and keeps your drill press safe. Follow these tips to keep your mortice bits in top shape.
Cleaning Your Mortice Bits
Remove wood dust and resin after each use. Use a soft brush to clean hard-to-reach areas. Wipe the bits with a cloth dampened in light oil. This stops rust and keeps the metal smooth. Avoid water as it can cause corrosion.
Sharpening Tips
Dull bits reduce cutting quality and strain your drill press. Use a fine file or sharpening stone to restore edges. Hold the bit steady and sharpen at the original angle. Sharpen gently to avoid removing too much metal. Check the bit often for sharpness during use.
Storage Recommendations
Store bits in a dry, cool place to prevent rust. Use a dedicated box or case to keep bits separate. Avoid tossing bits in a drawer where they can knock together. Label your bits for easy identification and quick access. Proper storage maintains their shape and sharpness.
Alternative Tools
Mortice bits are not always the best fit for every drill press. Several alternative tools offer better results and safety. These options help create clean, precise mortices with less effort.
Dedicated Morticing Machines
Dedicated morticing machines are designed for cutting square or rectangular holes. They hold the chisel and drill bit securely. This makes it easier to create accurate mortices. These machines save time and reduce mistakes. They are perfect for frequent or large projects.
Router Options
Routers can create mortices using special jigs or templates. They offer more control over depth and shape. Routers make smooth, clean cuts in wood. They work well for small to medium mortices. Adjusting speed and bits allows for different sizes and styles.
Hand Tools
Traditional hand tools like chisels and mallets still work well. They give you full control over the cut. Hand tools require more skill and time. They are good for small jobs or fine details. Using hand tools improves craftsmanship and precision.

Credit: www.popularwoodworking.com
Frequently Asked Questions
Can I Use A Mortice Bit On A Drill Press Safely?
Yes, you can use a mortice bit on a drill press if the bit fits securely. Always ensure proper alignment and use clamps to hold the workpiece steady. This setup allows for precise and clean mortice cuts, improving your woodworking accuracy.
What Drill Press Speed Is Best For Mortice Bits?
Use a slow to medium drill press speed for mortice bits. Higher speeds can cause overheating and damage the bit. Adjust speed based on wood hardness and bit size to ensure clean cuts and longer bit life.
Do Mortice Bits Fit Standard Drill Chucks?
Mortice bits usually have a square shank, which may not fit standard drill chucks. You might need an adapter or a specialized chuck for secure fitting on your drill press. Always check the bit’s shank size before use.
Can I Make Deep Mortices With A Drill Press?
Yes, a drill press can create deep mortices by adjusting the depth stop. This helps control cutting depth precisely and produces consistent mortices. Ensure you make multiple passes for deeper cuts to avoid bit damage.
Conclusion
Using a mortice bit on a drill press can work well with care. Always check the bit size and drill press settings first. Secure your wood piece tightly to avoid slips. Take slow, steady cuts to prevent damage. This method saves time and gives cleaner holes.
Remember, safety is key during every step. Try it out, and see how it fits your project needs. Simple steps lead to better results.