

Are you ready to tackle your next project but unsure how to get your Ridgid cordless drill driver started? It can feel tricky at first, especially if you’re new to power tools.
But once you know the simple steps, you’ll be drilling like a pro in no time. You’ll discover exactly how to start your Ridgid cordless drill driver quickly and safely. Keep reading to unlock the tips that will boost your confidence and make your work easier from the very first use.
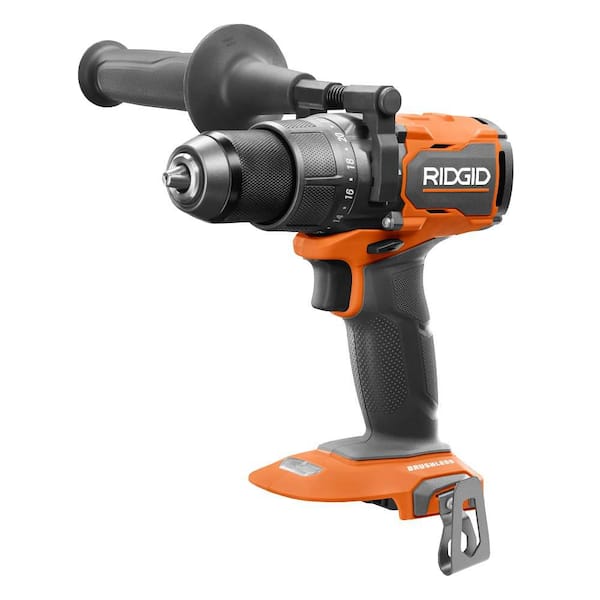
Choosing The Right Ridgid Drill
Choosing the right Ridgid drill is the first step to a smooth project. The right tool fits your needs and makes work easier. Ridgid offers various cordless drills, each designed for specific tasks. Picking the right one means less hassle and better results.
Types Of Ridgid Cordless Drills
Ridgid has several cordless drill types. Compact drills are small and light. They work well for tight spaces and light tasks. Standard drills offer more power. They handle most household jobs easily. Heavy-duty drills are strong and built for tough work. They suit professionals and big projects. Each type serves a different purpose. Choose based on your project size and power needs.
Key Features To Consider
Battery life is crucial. Longer battery means more work without charging. Look for drills with high voltage for more power. Check the drill’s speed settings. Variable speeds help with different materials. Torque control improves precision. A comfortable grip reduces hand strain. Weight matters too; lighter drills are easier to handle. Consider included accessories like extra batteries or carrying cases. These features improve your experience and efficiency.

Credit: www.pawnamerica.com
Charging The Battery
Charging the battery is the first step to using your Ridgid cordless drill driver. Without a charged battery, the drill will not work. Proper charging keeps the battery healthy and ready for use. Follow simple steps to charge the battery safely and correctly.
Locating The Battery Pack
The battery pack usually sits at the bottom of the drill handle. It slides in and out for easy removal. Check the drill to find the battery pack. Press the release buttons on the sides to remove it. Make sure the battery is fully detached before charging.
Proper Charging Techniques
Use the charger that comes with your Ridgid drill. Plug the charger into a power outlet first. Then, insert the battery pack into the charger. The charger’s light will show the charging status. Wait until the light indicates full charge before removing the battery.
Avoid overcharging the battery to extend its life. Do not charge the battery in very hot or cold places. Keep the charger and battery dry. Regular charging helps keep your drill ready for any job.
Attaching The Drill Bit
Attaching the drill bit is the first step to using a Ridgid cordless drill driver. The right bit fits your project and tool perfectly. This ensures smooth drilling and better results. Follow simple steps to select and attach the bit correctly. This keeps your work safe and efficient.
Selecting The Correct Drill Bit
Choose a drill bit that matches your material. Wood, metal, and plastic need different bits. Check the bit size to match the screw or hole size. Using the wrong bit can damage the material or the drill. Pick a bit made for cordless drills for best performance.
Inserting And Securing The Bit
Hold the drill firmly with one hand. Open the chuck by turning it counterclockwise. Insert the drill bit straight into the chuck. Tighten the chuck by turning it clockwise. Make sure the bit is straight and secure. A loose bit can slip or cause injury. Double-check the bit before starting your drill.

Credit: powertools.ridgid.com
Powering On The Drill
Powering on a Ridgid cordless drill driver is simple. Knowing how to start it correctly helps you work safely and efficiently. This section explains the basic steps to power on the drill and adjust its speed.
Locating The Power Button
The power button is usually near the handle or trigger of the drill. It looks like a small switch or trigger you press with your finger. Some models have a button, while others start by pulling the trigger. Check your drill’s design to find it quickly.
Before pressing the power button, make sure the battery is fully charged. A low battery can stop the drill from working or reduce its power. Insert the battery into the base of the drill until it clicks into place.
Adjusting Speed Settings
Most Ridgid cordless drills have adjustable speed settings. These settings control how fast the drill spins. A lower speed is good for drilling into soft materials or driving screws. Higher speeds work better for drilling into hard materials like metal or wood.
Look for a dial or switch near the power button to change the speed. Some drills have two speed levels, while others have variable speed control. Start with a low speed to avoid mistakes. You can increase the speed as needed for your task.
Basic Operating Tips
Starting a Ridgid cordless drill driver is easy with the right tips. Basic operating tips help you use the tool safely and effectively. These tips improve your control and make drilling smooth. Follow these steps to get started.
Holding The Drill Safely
Hold the drill with both hands for better control. Keep your fingers away from the drill bit. Maintain a firm grip to avoid slipping. Keep your body balanced while drilling. Wear safety glasses to protect your eyes. Make sure the drill is off before changing bits.
Starting Drilling On Different Surfaces
Start drilling at a low speed to avoid slipping. Use a small pilot hole on hard surfaces. Increase speed gradually for soft materials like wood. Keep the drill steady and straight to avoid damage. Apply light pressure; do not force the drill. Stop if the drill bit gets hot or stuck.
Troubleshooting Common Issues
Troubleshooting common problems helps you use your Ridgid cordless drill driver better. Small issues can stop your work. Fixing them fast saves time and stress. Here are some usual problems and how to solve them.
Drill Not Starting
Check if the battery is fully charged. A low battery stops the drill from starting. Make sure the trigger is pressed correctly. Dirt or dust can block the trigger. Clean it gently. Look for any damage to the drill body. If it is broken, the drill may not start. Try pressing the safety lock button. Sometimes it stops the drill from working.
Battery Problems
Use the right battery for your drill model. Old batteries hold less power and drain quickly. Charge the battery fully before use. Avoid using the drill if the battery is hot. Let it cool down first. Clean the battery contacts with a dry cloth. Bad contacts cause poor power transfer. Store batteries in a cool, dry place to keep them healthy.
Bit Slipping
Check if the bit is tightened properly in the chuck. Loose bits slip during drilling. Use the chuck key or hand-tighten the chuck firmly. Select the right bit size for the task. Worn or damaged bits slip more easily. Replace old bits to keep work smooth. Avoid using too much force on the drill. Let the drill do the work to prevent slipping.
Credit: www.homedepot.com
Frequently Asked Questions
How Do You Insert A Battery In A Ridgid Cordless Drill?
To start, align the battery pack with the drill’s base slot. Slide it firmly until it clicks into place, ensuring a secure connection for power.
What Is The First Step To Operate A Ridgid Drill?
First, insert a fully charged battery into the drill. Then, adjust the torque setting to your task before pressing the trigger to start drilling.
How Do You Change Drill Bits On A Ridgid Cordless Driver?
Hold the chuck and rotate it counterclockwise to loosen. Remove the old bit, insert the new bit, then tighten the chuck securely.
How Do You Turn On A Ridgid Cordless Drill?
Press the trigger switch located under the handle. The drill powers on as long as the battery is inserted and charged.
Conclusion
Starting a Ridgid cordless drill driver is simple and quick. First, insert a fully charged battery into the drill. Then, select the right drill bit and secure it tightly. Press the power button to turn on the drill. Adjust the speed settings based on your task.
Always hold the drill firmly for better control. With these easy steps, you can begin your project confidently. Practice a little to get comfortable. Soon, using the drill will feel natural and safe. Keep your drill charged and ready for any job.