

Are you tired of struggling to find the perfect spot for your drill press? Building your own drill press stand can solve that problem and make your work easier and safer.
Imagine having a sturdy, custom stand that fits your space and keeps your tools steady every time you work. In this guide, you’ll learn simple steps to create a drill press stand that suits your needs—no fancy skills required. Keep reading, and you’ll be ready to tackle your next project with confidence and precision.
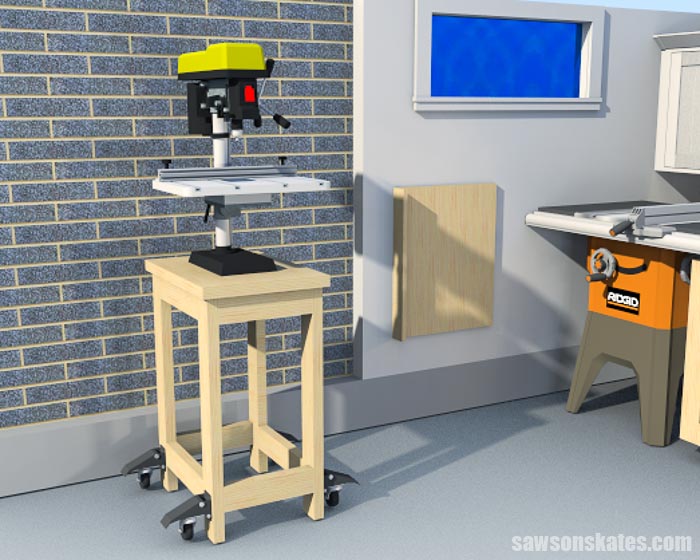
Credit: sawsonskates.com
Choosing The Right Materials
Choosing the right materials is crucial for building a strong drill press stand. The right materials ensure stability and durability. They also make your work easier and safer. This section guides you through selecting wood and hardware that match your needs.
Selecting Wood Types
Wood forms the main structure of your drill press stand. Choose wood that is strong and easy to work with. Pine is affordable and simple to cut. Oak and maple are harder woods that last longer. Avoid softwoods that may bend or break easily. Plywood is a good choice for the base because it resists warping. Always pick wood that is straight and free of cracks.
Necessary Hardware And Tools
Hardware holds the stand together and keeps it stable. Use sturdy screws or bolts for strong joints. Metal brackets add extra support to corners. Rubber feet stop the stand from sliding during use. You need a drill, screwdriver, measuring tape, and saw for assembly. Sandpaper smooths rough edges for safety. A level helps keep everything even and balanced.
Planning The Stand Design
Planning the stand design is a crucial step before building your drill press stand. It helps ensure the stand will fit your workspace and meet your needs. Thoughtful planning prevents mistakes and wasted materials. Consider the size of your drill press and the space available in your workshop. Think about stability and ease of use. This section covers how to determine the right dimensions and add practical storage options.
Determining Dimensions
Start by measuring your drill press carefully. Note its base size and height. Add extra space for comfortable operation and adjustments. The stand should be sturdy and strong enough to hold the drill press. Consider the height that suits your working style to avoid strain. The width and depth should also allow room for materials and tools around the press. Keep the stand compact if your workspace is small. Balance between space and stability is key.
Incorporating Storage Options
Storage is important for keeping tools and accessories organized. Plan shelves or drawers under the drill press table. Open shelves work well for quick tool access. Drawers help store small items like drill bits safely. Include hooks or racks for clamps and cords. Think about what tools you use most often. Design storage to make your work faster and neater. Proper storage reduces clutter and protects your tools.
Cutting And Preparing Components
Cutting and preparing components is a key step in building a drill press stand. It shapes the wood or metal parts to fit perfectly. Accurate cutting ensures the stand is strong and stable. Careful preparation saves time during assembly and prevents mistakes. This section explains how to measure, mark, and cut safely.
Measuring And Marking
Measure each piece twice before cutting. Use a tape measure or ruler for accuracy. Mark lines clearly with a pencil or marking tool. Straight, visible lines guide your cuts precisely. Mark all parts according to the design plan. Check measurements against the plan to avoid errors. Use a square tool to make sure lines are straight. Clear marks help you stay on track during cutting.
Safe Cutting Techniques
Wear safety goggles and gloves to protect yourself. Use clamps to hold the material firmly in place. Choose the right saw for the material and cut type. Cut slowly and steadily to avoid slips. Keep fingers away from the blade at all times. Follow the tool’s instructions for safe operation. Clean the workspace from dust and debris regularly. Safety comes first to prevent accidents and injuries.
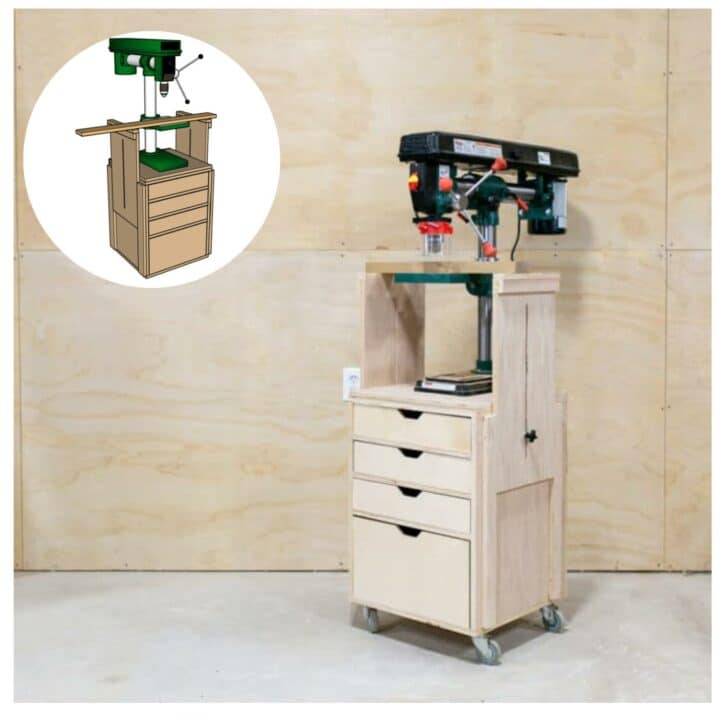
Credit: wilkerdos.com
Assembling The Frame
Assembling the frame is a key step in building your drill press stand. It creates the base that supports the entire structure. A strong frame keeps the drill press steady and safe during use. Follow simple steps to join parts and check stability. This ensures your stand lasts long and works well.
Joining Methods
Choose the right way to connect the frame parts. Screws work well for wood and metal frames. Use bolts if you want a stronger hold. Wood glue can add extra strength for wooden frames. Drill pilot holes before screwing to avoid splitting wood. Tighten all fasteners firmly but avoid over-tightening.
Ensuring Stability
Check that the frame sits flat on the floor. Use a level to make sure all sides are even. Add corner braces for extra support. These prevent wobbling during use. Test the frame by pressing on it gently. Adjust or reinforce weak spots before proceeding.
Mounting The Drill Press
Mounting the drill press correctly is important for safety and accuracy. A steady stand prevents wobbling and keeps the drill press stable during use. This section explains the key steps to mount your drill press securely.
Aligning The Base
Start by placing the drill press base on the stand’s top surface. Check that the base sits flat without any gaps. Align the base holes with the pre-drilled holes on the stand. This ensures the drill press will be centered and balanced. Use a level to confirm the base is perfectly horizontal. Proper alignment prevents uneven drilling and vibrations.
Securing With Bolts
Insert bolts through the aligned holes on the base and stand. Choose bolts that fit snugly and are strong enough to hold the weight. Tighten the bolts using a wrench or socket tool. Make sure each bolt is firmly tightened but avoid over-tightening, which can damage the base. Double-check all bolts to confirm they are secure. Firm fastening keeps the drill press safe and steady during work.
Adding Finishing Touches
Adding finishing touches to your drill press stand is important. It makes the stand safe and durable. These final steps improve the look and feel of your project. A well-finished stand will last longer and work better. Let’s explore how to perfect your stand.
Sanding And Smoothing
Start by sanding all surfaces of the stand. Use medium-grit sandpaper first to remove rough spots. Then, switch to fine-grit paper for a smooth finish. Sand edges and corners carefully to avoid splinters. Wipe away dust with a clean cloth. Smooth surfaces help paint or stain stick well.
Applying Protective Coating
Choose a protective coating to shield the wood from damage. Use paint, varnish, or wood sealant depending on your style. Apply the coating evenly with a brush or cloth. Let the first coat dry completely before adding another. Two or three coats offer the best protection. This step helps prevent water damage and wear over time.
Tips For Maintenance And Safety
Maintaining your drill press stand ensures it stays safe and works well. Regular care prevents damage and keeps the tool steady. Safety is key to avoid accidents during use. Follow these tips to keep your stand in top shape and protect yourself.
Regular Inspections
Check all bolts and screws often. Tighten any loose parts to keep the stand firm. Look for cracks or rust on the metal parts. Clean dust and debris from surfaces to avoid wear. Test the stability before each use to prevent tipping.
Safe Usage Practices
Always wear safety glasses to protect your eyes. Keep your hands away from moving drill bits. Use clamps to hold workpieces instead of your hands. Do not force the drill; let it work at its own pace. Turn off the drill press before making adjustments or cleaning.

Credit: fixthisbuildthat.com
Frequently Asked Questions
What Materials Are Needed To Build A Drill Press Stand?
You need plywood or MDF, screws, wood glue, clamps, and paint or finish. Optional items include caster wheels for mobility and shelves for storage.
How Do I Ensure Stability In A Drill Press Stand?
Use a wide base and solid wood materials. Secure all joints tightly and add braces for extra support. Weight distribution is key for stability.
Can I Customize The Drill Press Stand Size?
Yes, measure your drill press and workspace. Adjust dimensions accordingly. Custom sizing ensures the stand fits well and suits your workflow.
What Tools Are Required To Build A Drill Press Stand?
Basic tools include a drill, saw, screwdriver, measuring tape, and clamps. Sandpaper and a level help with finishing and accuracy.
Conclusion
Building a drill press stand takes some time and effort. Follow each step with care and patience. A good stand keeps your drill steady and safe. It also helps you work better and faster. Use sturdy materials to make it last long.
Check your work often to avoid mistakes. Soon, you will have a useful tool for your projects. Enjoy the satisfaction of building something with your own hands. Keep practicing and improving your skills every day.