

If you’ve ever found yourself stuck with the wrong drill bit in your cordless drill, you know how frustrating it can be. Changing a drill bit might seem tricky at first, but once you know the simple steps, it becomes quick and easy.
This skill will save you time, keep your projects moving, and make your drill work exactly how you need it to. Keep reading, and you’ll learn exactly how to change a drill bit on your cordless drill like a pro—no hassle, no confusion.
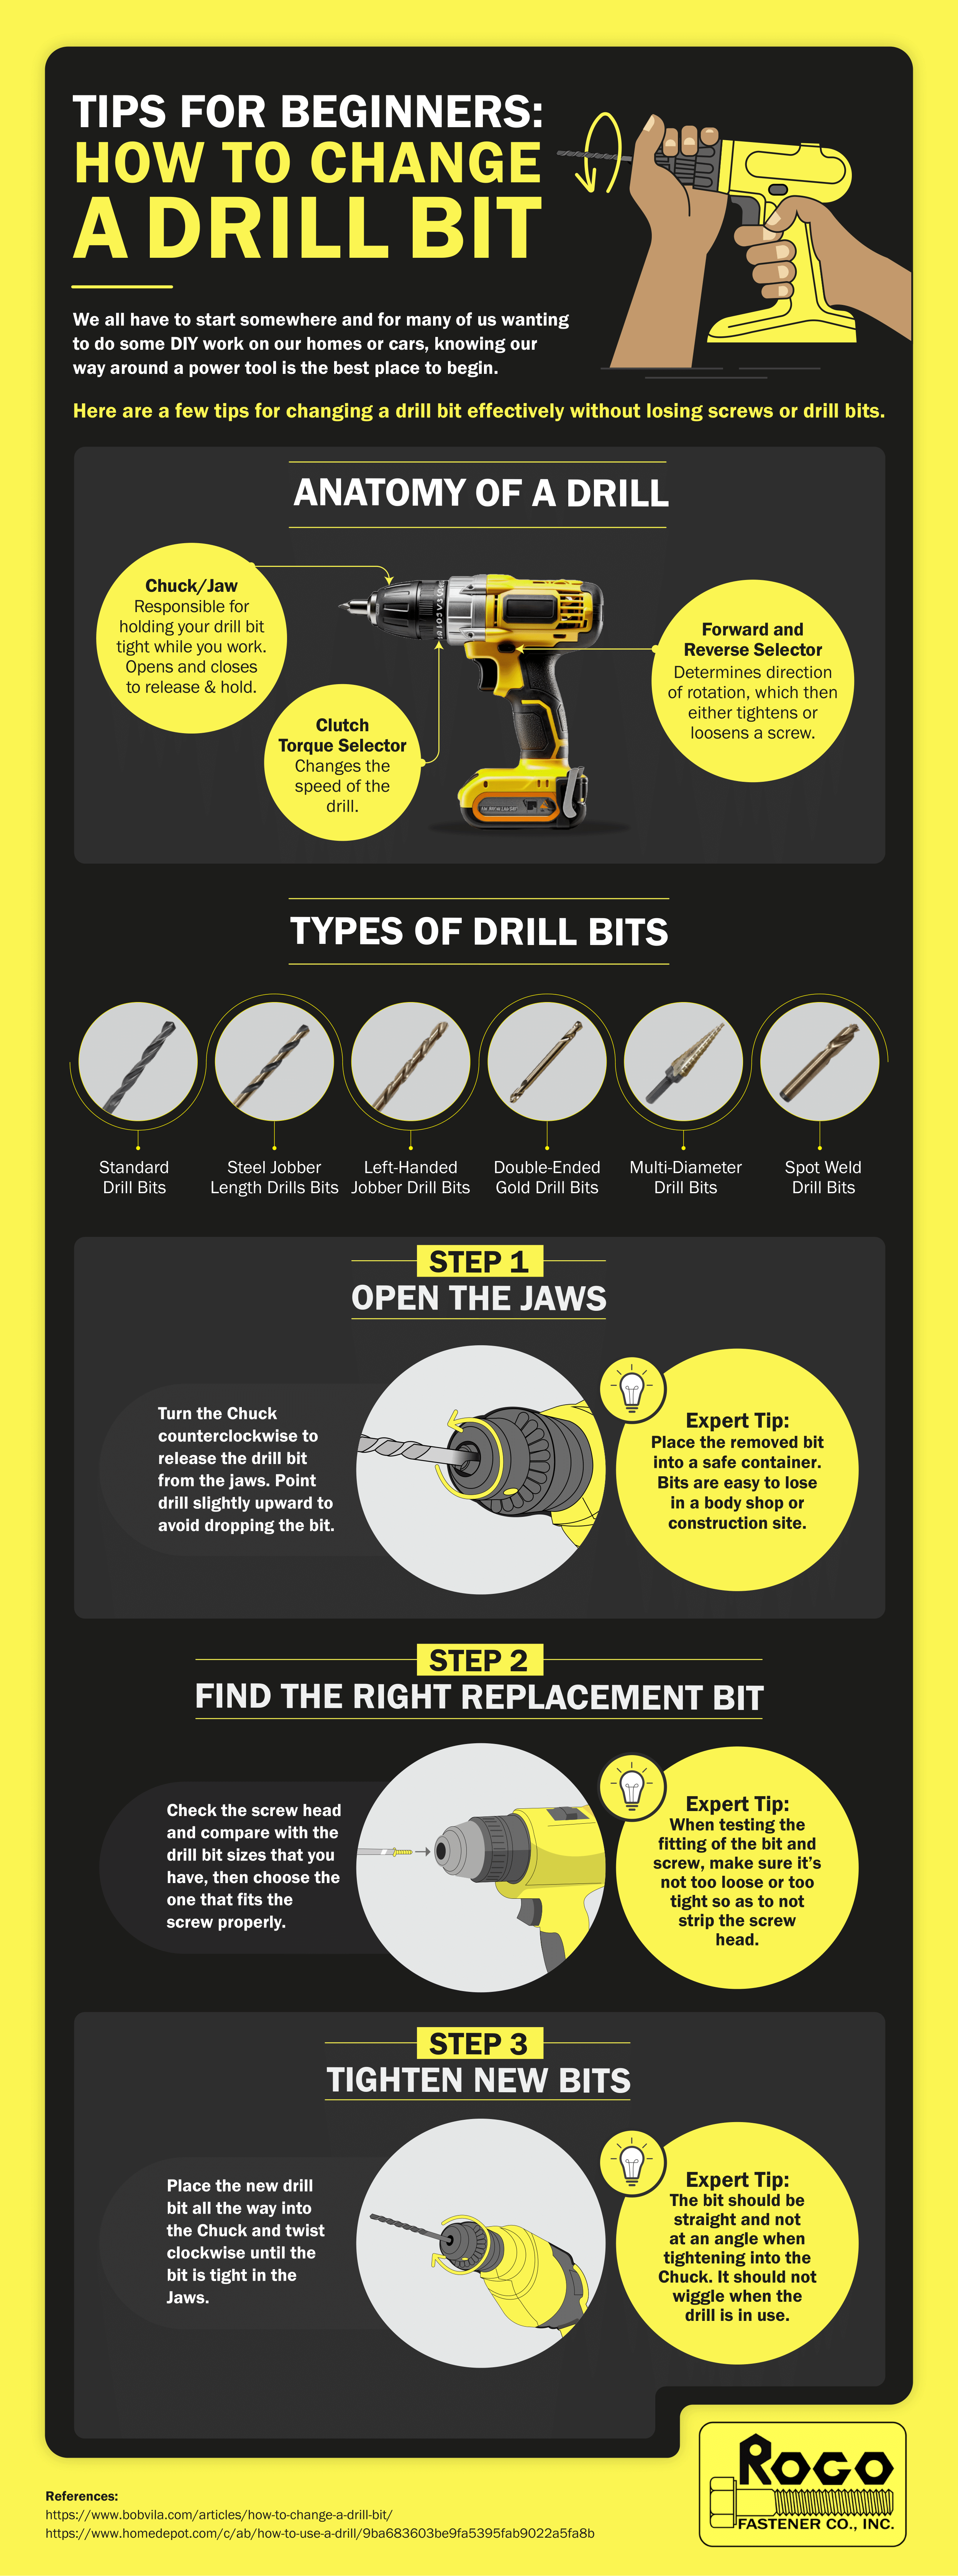
Credit: rogofastener.com
Tools Needed
Changing a drill bit on a cordless drill is simple. The right tools make the job easier and faster. Gather everything before starting to avoid interruptions.
Cordless Drill
The cordless drill is the main tool. It holds the drill bit and powers the drilling. Make sure it has enough battery charge before changing the bit.
Drill Bits
Choose the correct drill bit for your project. Bits come in different sizes and types. Keep them organized to find the right one quickly.
Chuck Key Or Keyless Chuck
Some drills use a chuck key to tighten or loosen the bit. Others have a keyless chuck that you turn by hand. Know which type your drill uses.
Protective Gloves
Wear gloves to protect your hands from sharp edges. Gloves also improve grip on the drill and bits. Safety first.
Clean Cloth
A clean cloth helps remove dust and dirt from the drill. Keeping the chuck clean ensures a secure bit fit. Wipe the drill before changing the bit.
Safety Precautions
Safety is the first step when changing a drill bit on a cordless drill. Taking simple precautions protects you from injuries. It also helps keep the drill in good condition.
Follow these safety tips carefully before you start. Stay alert and work slowly to avoid mistakes. Safety is key to a smooth and safe bit change.
Turn Off And Unplug The Drill
Always switch off the drill before changing the bit. Remove the battery to stop any accidental starts. This step prevents the drill from running while your hands are near the bit.
Wear Protective Gear
Use safety glasses to protect your eyes from flying debris. Wear gloves to guard your hands from sharp edges. A dust mask helps if you work in dusty areas.
Work In A Clear Area
Choose a clean, well-lit workspace. Remove objects that may cause slips or trips. A tidy space helps you focus and work faster.
Handle The Drill Bit Carefully
Hold the bit firmly but gently to avoid dropping it. Check the bit for cracks or damage before use. Damaged bits can break and cause injury.
Identify Your Drill Type
Before changing a drill bit on a cordless drill, identify your drill type. Different drills have different ways to change bits. Knowing your drill type helps you follow the right steps.
Keyless Chuck Drills
Many cordless drills use a keyless chuck. This chuck tightens and loosens by hand. You can turn it to open the jaws and remove the bit. No extra tools are needed.
Keyed Chuck Drills
Some drills use a keyed chuck. This type needs a special tool called a chuck key. The key fits into holes on the chuck. Turn the key to loosen or tighten the bit.
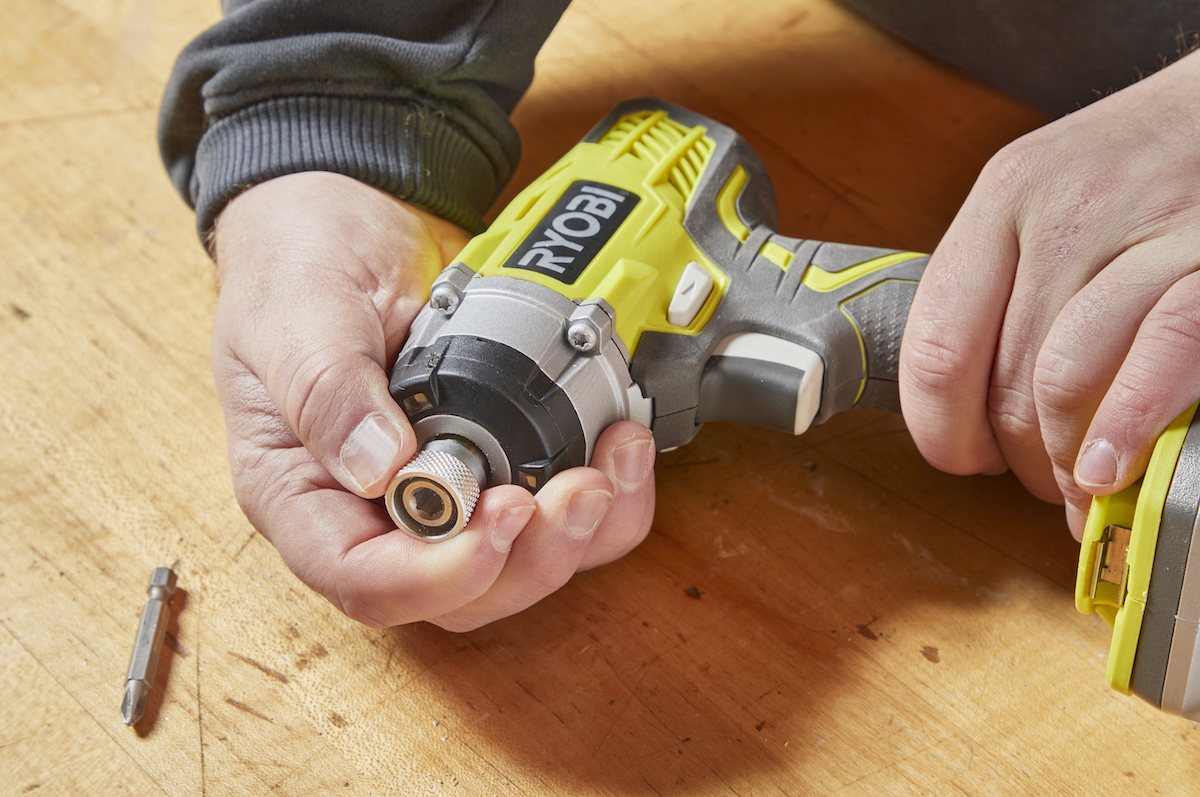
Hex Shank Or Sds Drills
Hex shank and SDS drills hold bits differently. They often use a quick-release mechanism. Pull or twist the collar to unlock the bit. Then, remove or insert the bit easily.

Credit: www.youtube.com
Remove Old Drill Bit
Removing the old drill bit is the first step to change it safely. This step clears the way for a new bit. Doing it right saves time and prevents damage to the drill. Follow these simple actions to remove the old bit easily.
Loosen The Chuck
Hold the drill firmly. Grip the chuck, the round part that holds the bit. Turn the chuck counterclockwise. This action loosens the grip on the drill bit. Some cordless drills have a keyless chuck, which you can turn by hand. Others need a chuck key. Keep turning until the bit feels loose.
Extract The Bit
Pull the drill bit out gently. Use your fingers to grasp the base of the bit. If it is stuck, wiggle it slightly while pulling. Remove the bit completely from the chuck. Check the bit for wear or damage before setting it aside. Now the drill is ready for a new bit.
Select The Right Drill Bit
Selecting the right drill bit is key to a successful project. The drill bit must match the material and task. Using the wrong bit can cause damage or poor results. Take time to choose the correct type and size.
Bit Types
Drill bits come in many types. Each type suits different materials. For wood, use spade or brad point bits. For metal, twist bits work best. Masonry bits are for concrete or brick. Using the right bit type prevents damage and improves drilling.
Size Matching
Pick a drill bit that matches the hole size needed. Too large or too small bits cause problems. Check the measurement on the bit carefully. Match the bit size to screws or anchors for a tight fit. Proper size ensures clean holes and strong holds.
Insert New Drill Bit
Inserting a new drill bit into your cordless drill is a simple step that prepares your tool for the task. This step ensures the bit stays firmly in place while you work. Proper insertion improves safety and drill performance.
Positioning The Bit
Hold the drill with one hand. With the other hand, open the chuck by twisting it counterclockwise. Insert the new drill bit straight into the chuck’s center. Push it in as far as it will go. Make sure the bit is centered and straight. This helps the drill work smoothly and avoid wobbling.
Tightening The Chuck
Turn the chuck clockwise to tighten it around the drill bit. Use your hand to twist until it feels secure. For extra grip, hold the drill steady while tightening. Some drills have a keyless chuck, so hand tightening is enough. If your drill uses a chuck key, insert and turn it clockwise to lock the bit firmly.
Test The Drill Bit
Testing the drill bit is a key step after changing it on a cordless drill. It confirms the bit is secure and works properly. This step prevents damage to your project and ensures safety.
Testing also helps you check if the drill bit matches the task. A quick test reveals if the bit spins smoothly without wobbling. It saves time and avoids frustration during drilling.
Secure The Drill
Hold the drill firmly with both hands. Keep the drill steady to avoid slips. A secure grip helps you control the drill during the test.
Start With Low Speed
Turn the drill on at a low speed first. Low speed reduces sudden movements and gives you better control. Watch the bit carefully as it spins.
Observe The Bit
Check if the bit spins straight and does not wobble. Wobbling means the bit is loose or damaged. Stop and adjust the bit if you see any problems.
Listen For Unusual Sounds
Pay attention to sounds while the drill runs. Strange noises may indicate a problem with the bit or drill. Normal operation sounds smooth and even.
Test On Scrap Material
Try drilling a small hole in scrap wood or plastic. This test shows how the bit performs on real material. If the bit cuts cleanly, it is ready to use.
Maintenance Tips
Proper maintenance keeps your cordless drill working well for a long time. Simple care steps help avoid problems and save money. Regular checks and cleaning make changing drill bits easier and safer.
Follow these tips to keep your drill in top shape. Your work will be smoother and faster.
Keep The Chuck Clean
Dirt and dust can block the chuck. Use a small brush to clean it often. Wipe with a dry cloth to remove leftover debris. Clean chuck parts grip drill bits better.
Lubricate Moving Parts
Apply light oil to the chuck and other moving parts. This stops rust and helps smooth operation. Avoid using too much oil. A little goes a long way.
Check For Wear And Tear
Look for cracks or damage on the chuck and drill body. Replace worn parts quickly. Damaged parts can cause drill bits to slip or break.
Tighten The Chuck Properly
Always tighten the chuck firmly after changing bits. Loose bits can fall out or cause accidents. Use the drill’s key or hand-tighten if it has a keyless chuck.
Store Your Drill Correctly
Keep the drill in a dry, cool place. Avoid damp or dusty areas. Proper storage prevents rust and keeps electrical parts safe.
Credit: www.bobvila.com
Frequently Asked Questions
How Do I Loosen A Cordless Drill Chuck?
To loosen a cordless drill chuck, hold the drill firmly. Turn the chuck counterclockwise by hand or use the drill’s key if available. This releases the drill bit safely for removal or replacement.
What Safety Steps Should I Take Before Changing Drill Bits?
Always remove the battery or unplug the drill first. Wear safety gloves and eye protection. Ensure the drill is on a stable surface before changing the bit.
How Do I Properly Insert A New Drill Bit?
Open the chuck by turning it counterclockwise. Insert the drill bit fully into the chuck. Tighten the chuck clockwise firmly to secure the bit in place.
Can I Change Drill Bits Without A Chuck Key?
Yes, many cordless drills have keyless chucks. You can twist the chuck by hand to loosen or tighten the bit quickly and easily.
Conclusion
Changing a drill bit on a cordless drill is simple and quick. Always turn off the drill before starting. Loosen the chuck by twisting it by hand. Remove the old bit carefully. Insert the new bit straight and tighten the chuck firmly.
Double-check the bit is secure before use. This small skill saves time and keeps your work safe. Practice a few times to feel confident. Now, you can switch bits easily for any project. Keep your drill ready for all your tasks.