

If you want to fix or clean your Dewalt cordless drill, the first step is knowing how to take it apart safely and easily. You might feel unsure or worried about damaging your drill while disassembling it.
Don’t worry—this guide will walk you through each step clearly and simply. By the end, you’ll have the confidence to handle your drill like a pro and keep it working smoothly for years to come. Ready to get started? Let’s dive in!
Tools Needed
Disassembling a Dewalt cordless drill requires a few simple tools. Having the right tools makes the process smooth and safe. Prepare your workspace with good lighting and a clean surface. Keep all tools close for easy access during the task.
Screwdrivers
A set of screwdrivers is essential for removing screws from the drill. Use both flathead and Phillips head screwdrivers. These help in loosening different types of screws found in the drill. Choose screwdrivers that fit the screws well to avoid damage.
Allen Wrenches
Some Dewalt drills use hex screws that need Allen wrenches. Have a small set of these wrenches ready. They come in different sizes, so pick the one that fits the screws perfectly. This tool helps in removing parts safely without stripping screws.
Pliers
Pliers assist in gripping and pulling small parts. Needle-nose pliers work best for tight spaces. They help remove pins, clips, or wires carefully. Use pliers to hold parts steady while unscrewing or disconnecting them.
Plastic Pry Tools
Plastic pry tools help open the drill casing without scratching it. Avoid using metal tools to prevent damage. These tools gently separate plastic parts without cracking them. They are useful for delicate internal components.
Magnetic Tray
A magnetic tray keeps screws and small parts from getting lost. It holds metal pieces securely during disassembly. Use it to organize and remember where each piece belongs. This saves time when reassembling the drill.
Credit: www.liftingitalia.com
Safety Precautions
Safety is the most important part of disassembling a Dewalt cordless drill. Taking the right steps prevents injury and protects the tool. Always prepare your workspace and yourself before starting.
Remove The Battery
Always take out the battery before opening the drill. This stops any power from running through the tool. It lowers the risk of electric shock or the drill starting by mistake.
Wear Safety Gear
Use safety glasses to protect your eyes from dust and small parts. Gloves help protect your hands from sharp edges and dirt. Dress in clothes that fit well and cover your skin.
Work In A Clean Area
Choose a tidy and well-lit space. A clean area helps you find small screws and parts easily. Good light helps you see what you are doing clearly.
Use The Right Tools
Select tools made for electronics or small repairs. Using the wrong tools can damage the drill or cause injury. Keep all tools organized and within reach.
Keep Track Of Parts
Use small containers to hold screws and pieces. Label them if possible. This keeps parts safe and makes reassembly easier. Losing parts can stop the repair process.
Preparing The Drill
Preparing your Dewalt cordless drill is the first step before taking it apart. Proper preparation makes the process safer and easier. Start with simple tasks that protect you and the tool.
Removing The Battery
Always remove the battery before disassembling the drill. This prevents accidental starts that could cause injury. Press the release buttons on both sides of the battery. Pull the battery straight out from the drill base. Store the battery in a safe, dry place away from dust and moisture.
Cleaning The Drill Surface
Clean the drill surface to remove dirt and debris. Use a dry cloth or soft brush to wipe the outside. Avoid using water or liquid cleaners on the drill. Dirt can block screws and small parts. A clean surface helps you see all components clearly during disassembly.

Credit: www.ifixit.com
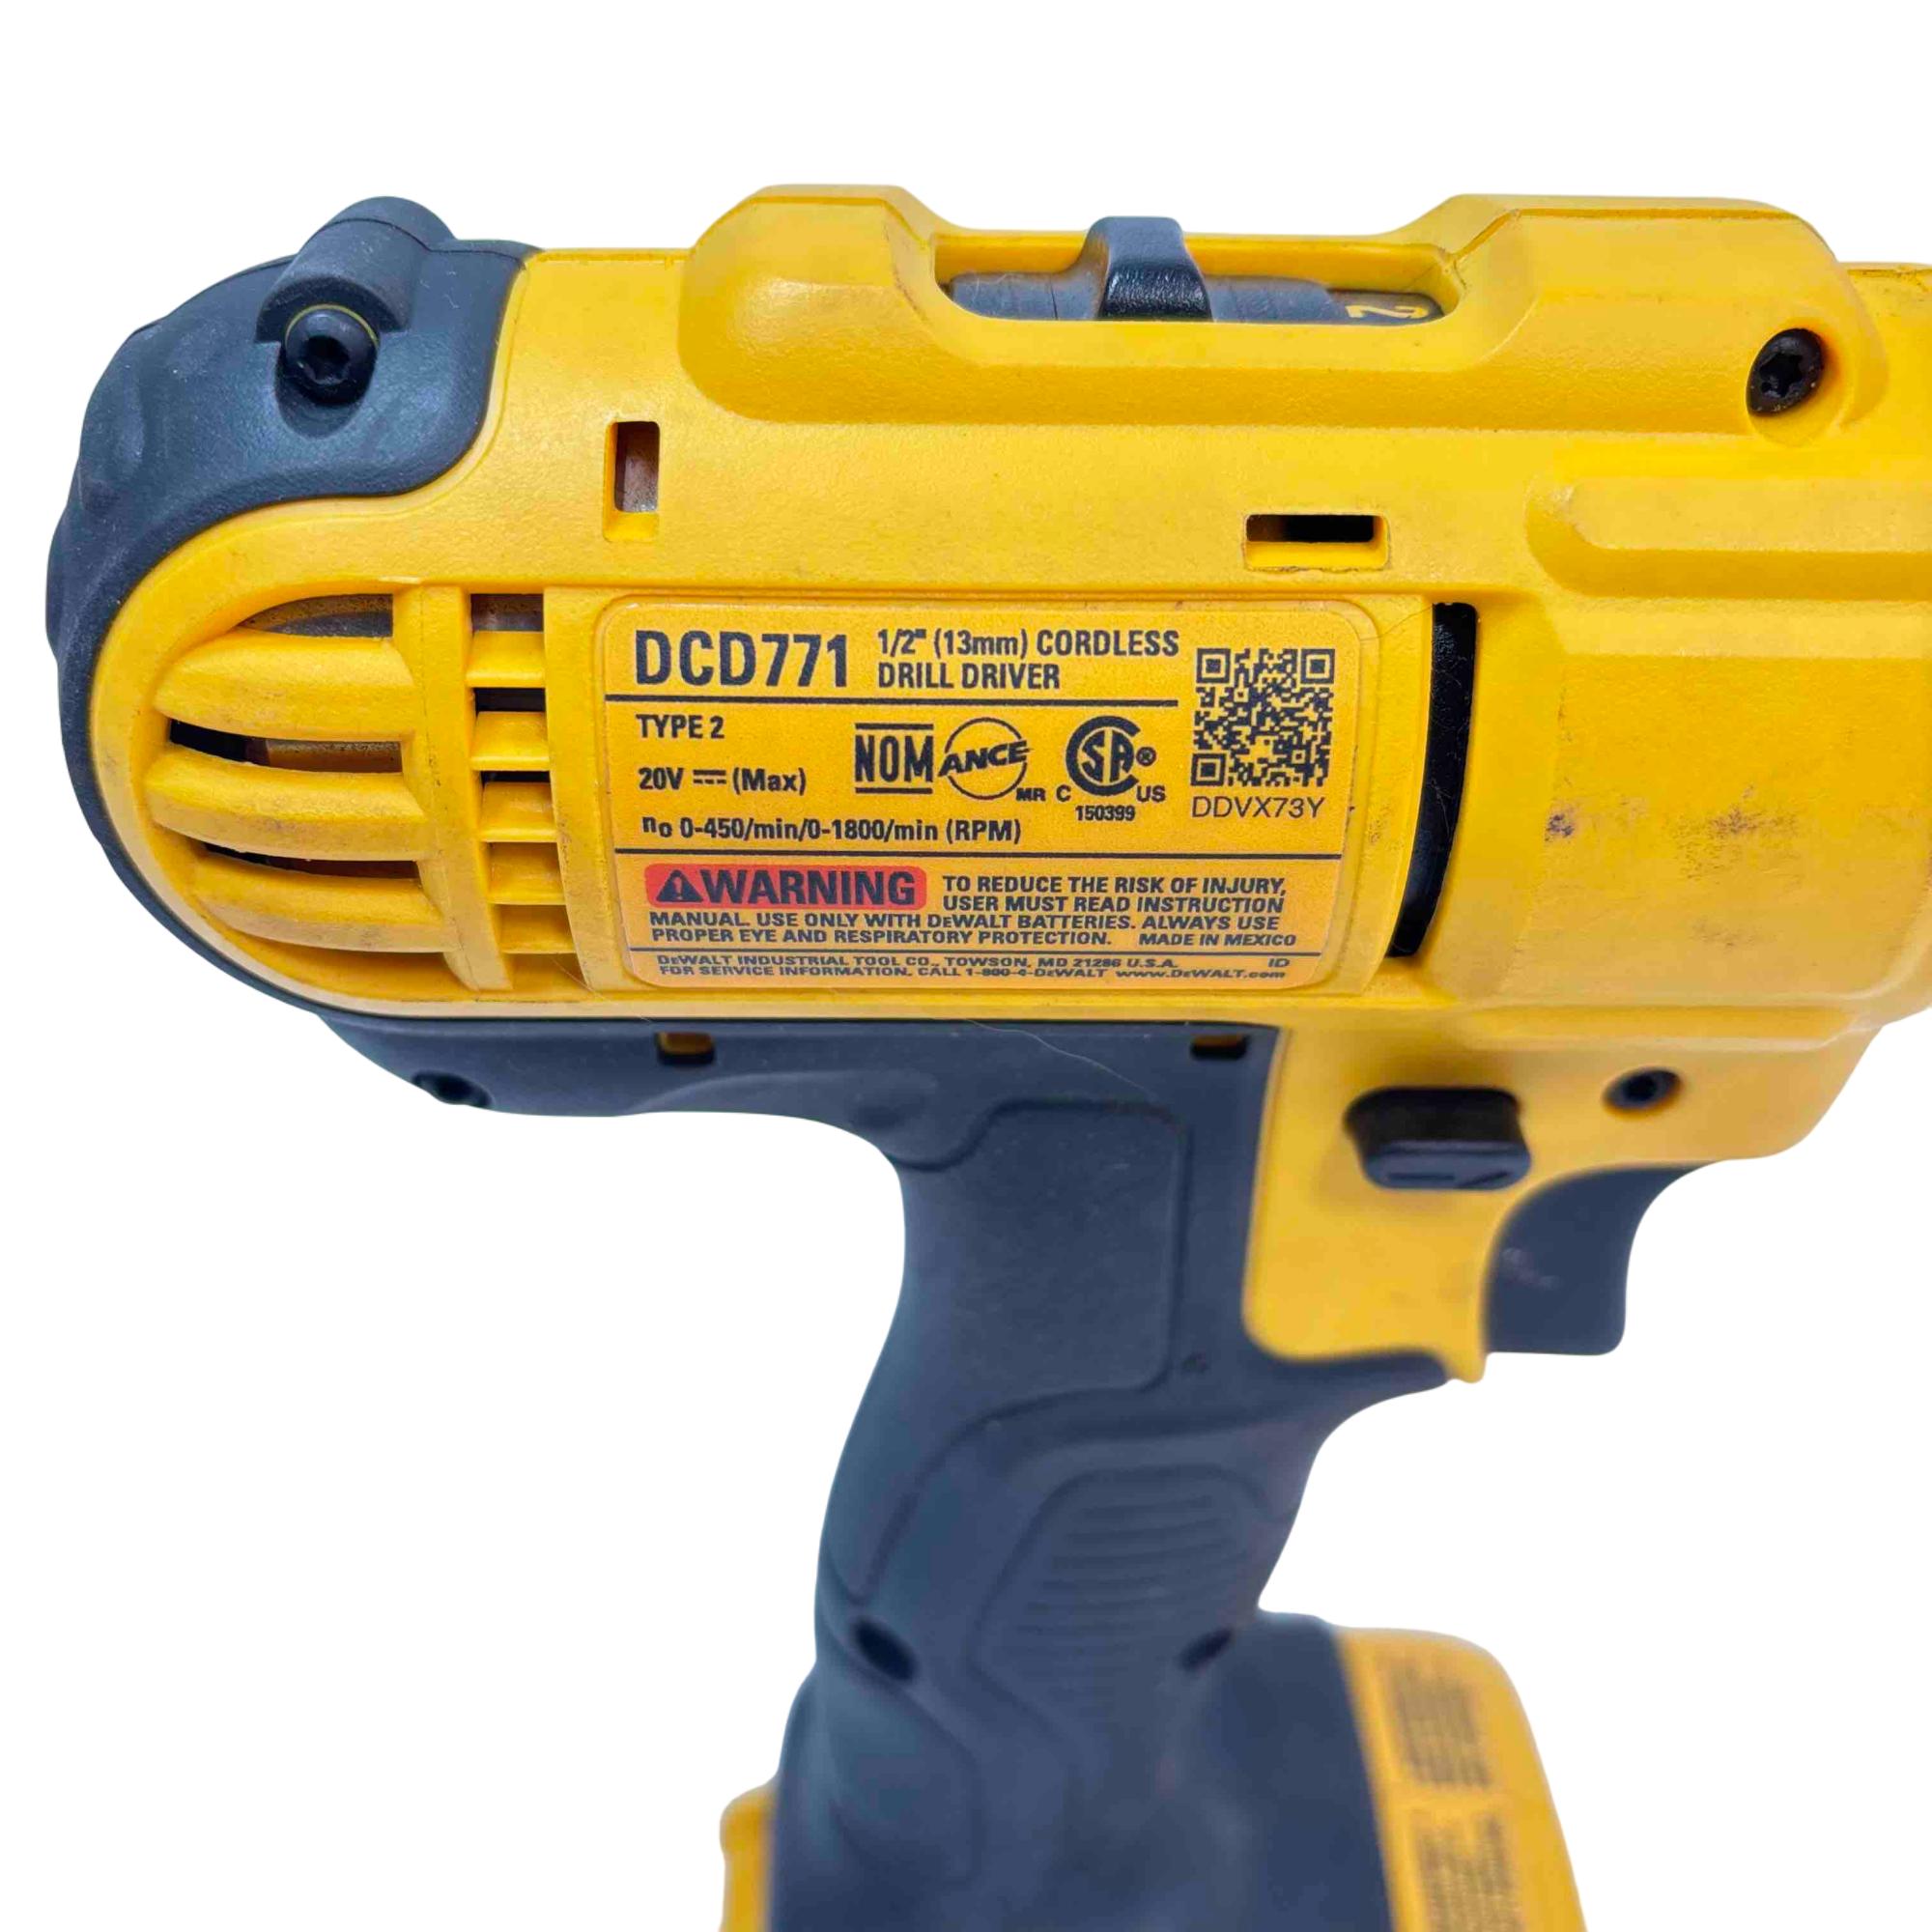
Removing The Chuck
Removing the chuck from a Dewalt cordless drill is a key step in drill maintenance and repair. The chuck holds the drill bit firmly in place. Taking it off helps you clean, replace, or fix parts inside. Follow these simple steps to remove the chuck safely and easily.
Loosening The Chuck
First, make sure the drill is off and the battery is removed. This prevents any accidental starts. Hold the drill firmly with one hand. Use the other hand to turn the chuck sleeve counterclockwise. The chuck may be tight. Use a cloth for a better grip if needed. Keep turning until the chuck loosens and you can move it freely.
Detaching The Chuck
Once the chuck is loose, locate the screw inside the chuck. This screw holds the chuck onto the drill shaft. It usually has a left-hand thread. Use a screwdriver to turn the screw clockwise to remove it. After removing the screw, hold the chuck and pull it straight off the drill shaft. Some models may require a wrench for extra force. Now, the chuck is detached and ready for cleaning or replacement.
Opening The Drill Housing
Opening the drill housing is the first step to access the inner parts of your Dewalt cordless drill. This step requires patience and care. A clean workspace helps prevent losing small parts. Follow these instructions to open the drill housing safely.
Locating Screws
Look closely at the drill’s body to find the screws. Most screws are on the back and sides of the drill. Some may hide under stickers or rubber covers. Use a small screwdriver to remove these screws. Keep the screws in a safe place for reassembly.
Separating Housing Halves
After removing the screws, gently pull the two halves apart. Use a plastic pry tool to avoid damaging the drill. Do not force the housing open if it feels stuck. Check for hidden screws or clips holding it together. Once open, you can see the drill’s internal parts clearly.
Disconnecting Internal Components
Disconnecting the internal components is a key step in taking apart a Dewalt cordless drill. It allows access to the drill’s core parts for repair or cleaning. Careful handling is important to avoid damage.
Start by identifying the parts that connect the drill’s controls and motor. These parts must be removed gently. Follow safety steps and keep track of all screws and wires.
Removing The Trigger Switch
The trigger switch controls the drill’s power. To remove it, first locate the screws holding it in place. Use a screwdriver to take out these screws carefully.
Next, gently pull the trigger switch out of its slot. Watch for any wires attached to it. Do not pull hard to avoid breaking the wires.
Detaching The Motor Wires
The motor wires connect the drill’s battery to the motor. These wires need to be detached to fully disassemble the drill.
Identify the wire connectors near the motor. Use a small tool or your fingers to disconnect them. Pull the connectors straight out without twisting.
Keep the wires organized to make reassembly easier. Avoid touching any metal parts to prevent short circuits.
Removing The Motor And Gear Assembly
Removing the motor and gear assembly is a key step in disassembling a Dewalt cordless drill. This part controls the drill’s power and speed. Taking it out carefully helps in cleaning, repairing, or replacing worn parts.
Handle each piece gently to avoid damage. Keep track of small screws and parts. Clear workspace helps to stay organized.
Extracting The Motor
First, disconnect the drill from any power source. Remove the screws holding the motor in place. Gently pull the motor out of the drill housing. Check for wires attached to the motor.
Detach wires carefully using a small screwdriver or pliers. Note their positions for reassembly. Avoid pulling on wires directly to prevent damage. The motor should come out smoothly once all screws and wires are free.
Taking Out The Gears
Next, focus on the gear assembly. Remove any screws or clips securing the gears. Pull the gear assembly out slowly. Gears may be tightly fitted, so use light force.
Observe gear arrangement before removal. This helps during reassembly. Clean the gears with a dry cloth if needed. Inspect for wear or damage. Replace gears if they show signs of heavy use.
Cleaning And Inspecting Parts
Cleaning and inspecting the parts of your Dewalt cordless drill is a key step. It keeps the drill working well and lasts longer. Dirt, dust, and damage can stop the drill from working properly. Take time to check each part carefully. This helps find any problems early and fix them.
Checking For Wear
Look closely at all parts for signs of wear. Check the chuck, trigger, and battery contacts. Worn parts may look cracked, bent, or rusty. Also, spin moving parts to feel for rough spots. Replace parts that show damage. Using worn parts can cause more damage or failure.
Cleaning Components
Remove dirt and dust from every part. Use a soft brush or cloth to clean tight spots. Avoid water on electrical parts to prevent damage. Use a small amount of rubbing alcohol for stubborn grease. Clean battery contacts carefully to keep good power flow. Clean parts help the drill run smoothly and safely.
Reassembling Tips
Reassembling a Dewalt cordless drill requires care and focus. Taking the right steps ensures your drill works well again. Follow these tips to put the parts back correctly and safely.
Aligning Parts Correctly
Start by matching each part to its original place. Check the shape and size to fit parts properly. Misaligned parts can stop the drill from working. Take your time to see that gears and components line up well. Small mistakes here cause bigger problems later.
Securing Screws Tightly
Use the right screwdriver for each screw. Tighten screws firmly but do not force them. Over-tightening can strip the threads or break parts. Loose screws make the drill unsafe to use. Check all screws once more after assembly to be sure.

Credit: www.youtube.com
Frequently Asked Questions
How Do I Safely Disassemble A Dewalt Cordless Drill?
First, remove the battery to avoid electric shock. Use the right screwdriver to remove screws. Keep parts organized and note their order for reassembly.
What Tools Are Needed To Take Apart A Dewalt Drill?
You need a Phillips head screwdriver, a flathead screwdriver, and possibly a Torx driver. A small container helps keep screws safe.
How To Avoid Damaging Parts When Disassembling Dewalt Drills?
Handle all components gently. Avoid forcing parts apart. Use proper tools and follow step-by-step instructions to prevent damage.
Can I Replace The Motor In A Dewalt Cordless Drill?
Yes, after disassembly, inspect the motor. If faulty, purchase the exact replacement model and install it carefully following guides.
Conclusion
Disassembling a Dewalt cordless drill takes care and patience. Follow the steps carefully to avoid damage. Keep track of all screws and parts. Use the right tools for each task. Take your time and work slowly. This guide helps you understand your drill better.
Repairs and maintenance become easier with practice. Safety always comes first—unplug or remove the battery before starting. With these tips, you can handle your drill confidently and safely. Try it yourself and see how simple it can be.