

Drilling a level hole in a post might seem simple, but if it’s off even a little, your whole project can suffer. You want your posts to be sturdy and straight, not crooked or weak.
In this guide, you’ll learn easy steps to make sure every hole you drill is perfectly level. Whether you’re building a fence, a deck, or a simple DIY project, getting this right will save you time and frustration. Keep reading, and you’ll discover tips that make the job faster and your results stronger.
Credit: e-rigging.com
Choosing The Right Tools
Choosing the right tools is key to drill a level hole in a post. The right tools make the job easier and improve accuracy. Poor tools can cause mistakes and waste time.
This section explains the best drills, drill bits, and extra equipment needed. Use this guide to prepare before starting your project.
Types Of Drills For Posts
Drill choice depends on the post material and hole size. Cordless drills are popular for their ease and portability. They work well for most wood posts.
For harder materials, like metal or concrete, use a hammer drill. It provides extra power and impact to drill through tough surfaces. A drill with adjustable speed helps control the drilling process.
Selecting The Correct Drill Bit
Drill bits come in different types and sizes. Wood bits have sharp points to start holes easily. For metal posts, use high-speed steel bits.
Choose the bit size to match the hole diameter. A bit too small or large can cause loose or tight holes. Check bit condition and replace if dull or damaged.
Additional Equipment Needed
Use a level to keep the drill steady and straight. Clamps hold the post firmly in place. This prevents movement during drilling.
Mark the drilling spot with a pencil or marker. Safety glasses protect your eyes from dust and debris. A drill guide can help maintain the right angle.

Credit: www.youtube.com
Preparing The Post
Preparing the post is the first step to drill a level hole accurately. This stage ensures safety and precision. Taking time here saves effort later. Follow these simple steps to get ready.
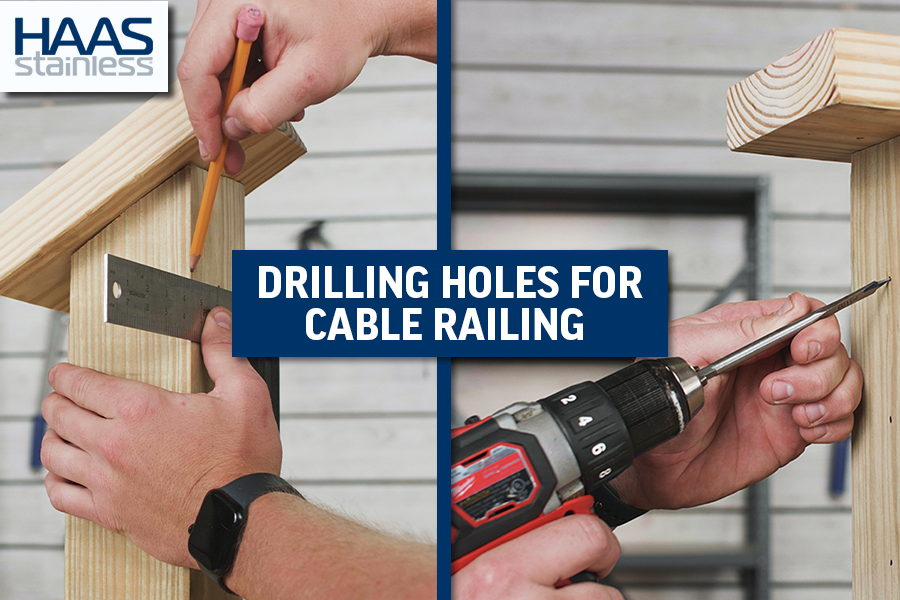
Marking The Drill Spot
Find the exact spot where you want the hole. Use a pencil or marker to make a clear dot. Check the height and position twice. A well-marked spot guides the drill perfectly. Use a ruler or measuring tape for accuracy.
Securing The Post
Keep the post steady before drilling. Use clamps or a vise to hold it firmly. A moving post causes uneven holes. Make sure the post does not wobble. Secure it on a flat surface for best results.
Checking For Obstructions
Look inside the post for nails or wires. Remove any objects that can block the drill. Use a stud finder or tap the post lightly. Obstructions can damage the drill bit. Clear the area to avoid surprises during drilling.
Ensuring Level Accuracy
Ensuring level accuracy is key when drilling holes in posts. A hole that is not level can cause instability or misalignment. Precise drilling helps keep your project strong and looking professional. Use simple tools and steady techniques to get the best results.
Using A Level Guide
A level guide helps mark the exact spot for drilling. Place the guide on the post to check the horizontal line. Adjust the post or mark until the bubble in the level is centered. This step ensures your hole will be straight and even.
Setting Up A Drill Guide
A drill guide keeps your drill bit steady and aligned. Attach the guide to the post before drilling. The guide prevents the drill from slipping or tilting. Use clamps if needed to hold the guide firmly in place. This setup improves accuracy and safety.
Tips For Maintaining Steady Hands
Keep your hands steady for clean, level holes. Hold the drill with both hands to improve control. Stand in a comfortable position to avoid shaking. Take slow, steady pressure on the trigger. Rest your arms on a stable surface if possible.
Credit: www.finehomebuilding.com
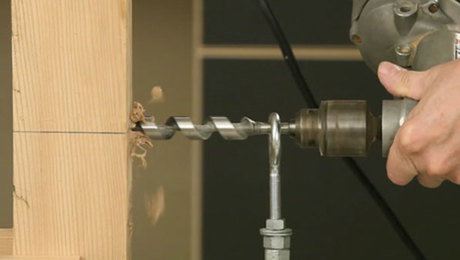
Drilling The Hole
Drilling a level hole in a post is a task that requires focus and the right technique. This step is important for a neat finish and strong hold. Understanding how to drill properly helps avoid mistakes and damage. Below are key tips to drill the hole correctly and safely.
Starting The Drill Correctly
Hold the drill steady and place the bit on the marked spot. Begin drilling slowly to avoid slipping. Keep the drill straight and aligned with the post. Start with a small pilot hole if needed. This guides the drill and prevents errors.
Controlling Drill Speed
Adjust the drill speed based on the material. Use low speed for hard materials to avoid burning. Higher speeds work well for soft wood. Keep a steady pace. Too fast can cause rough edges or break the bit.
Dealing With Tough Materials
Use a sharp drill bit designed for hard surfaces. Apply steady pressure without forcing the drill. Let the bit do the cutting work. Take breaks to cool the bit and prevent damage. Clean out debris often for a clean hole.
Troubleshooting Common Issues
Drilling a level hole in a post can sometimes be tricky. Small mistakes can cause the hole to be off-level, the drill bit to slip, or the wood to splinter. These issues can affect the strength and appearance of your project. Understanding how to fix and prevent these problems will save time and effort.
Fixing Off-level Holes
Check the angle of your drill before starting. Use a level or angle guide to keep the drill steady. If the hole is already off-level, try to correct it by drilling a new hole beside the first one. Make sure to mark the right spot carefully. Avoid enlarging the wrong hole, as this weakens the post.
Preventing Drill Bit Slippage
Mark the drilling spot with a sharp pencil or awl. This creates a small dent for the bit to grip. Hold the drill firmly and start drilling slowly. Use a drill bit with a sharp tip designed for wood. Avoid pushing too hard, which can cause the bit to slip and make uneven holes.
Handling Splintering Wood
Place a scrap piece of wood under the post to support it. Drill slowly and steadily to reduce splintering. Use a sharp drill bit made for wood to make clean cuts. You can also tape the drilling area with painter’s tape to hold wood fibers together. This keeps the edges neat and prevents damage.
Finishing Touches
After drilling a level hole in a post, the finishing touches make a big difference. These small steps ensure the hole is clean, smooth, and accurate. They help your project look professional and last longer. Pay close attention to these final details for the best results.
Cleaning The Hole
Remove wood chips and dust from inside the hole. Use a brush or compressed air to clear debris. A clean hole helps screws or bolts fit better. It also prevents damage to tools and fasteners.
Smoothing The Edges
Check the hole edges for rough spots or splinters. Use sandpaper or a file to smooth the surface. Smooth edges reduce the risk of cracks in the wood. They make the post look neat and polished.
Inspecting For Accuracy
Use a level or square to check the hole’s angle. Make sure it matches your project’s needs exactly. Correct any small mistakes before moving on. Accurate holes ensure strong and stable connections.
Frequently Asked Questions
How Do I Ensure A Hole Is Level When Drilling A Post?
Use a carpenter’s level or a digital angle finder to align the drill bit. Mark the spot clearly before drilling.
What Tools Are Best For Drilling Level Holes In Posts?
A drill with a level attachment, a carpenter’s level, and sharp drill bits are ideal for precise, level holes.
How Can I Avoid Angled Holes In Wooden Posts?
Clamp a straight edge or use a drill guide to keep the drill perpendicular to the post surface.
What Drill Bit Size Should I Use For Posts?
Choose a drill bit size based on the bolt or anchor size you plan to use for a snug fit.
Conclusion
Drilling a level hole in a post takes patience and the right tools. Use a level to check your drill’s angle often. Mark the spot clearly before you start drilling. Take your time to keep the drill steady and straight.
Small steps make a big difference in the final result. With practice, your holes will come out neat and accurate. Keep these tips in mind for your next project. Good holes help build strong, stable posts every time.