

Have you ever faced a stubborn rivet that just won’t budge? Whether you’re fixing a piece of furniture, working on your car, or tackling a DIY project, knowing how to drill a rivet out can save you time and frustration.
In this guide, you’ll discover simple, step-by-step techniques that anyone can follow—even if you’re not an expert. By the end, you’ll feel confident handling rivets like a pro and avoid common mistakes that can damage your work. Ready to learn the tricks that make this tough job easier?
Let’s dive in.

Credit: www.youtube.com
Tools Needed
Removing a rivet takes the right tools. Using proper equipment makes the job easier and safer. Prepare these tools before starting to drill out a rivet.
Drill Types
Choose a drill that fits your project size. A cordless drill offers good control and mobility. It works well for most rivet sizes. For tougher metals, a corded drill provides more power. Make sure the drill has adjustable speed settings. Slow speeds help prevent overheating and damage.
Drill Bits
Select drill bits made for metal. High-speed steel (HSS) bits are common and affordable. Cobalt bits are stronger and last longer on hard metals. Pick a bit slightly larger than the rivet’s center. This helps remove the rivet without harming surrounding material.
Safety Gear
Protect yourself during drilling. Wear safety goggles to shield your eyes from metal shards. Use gloves to protect your hands from sharp edges. Ear protection helps reduce noise from the drill. A dust mask keeps metal dust out of your lungs.

Credit: www.wikihow.com
Preparing The Workspace
Preparing your workspace is the first step to drill a rivet out safely and efficiently. A clean and organized area helps prevent accidents and makes the task easier. Taking time to prepare saves effort later and ensures better results.
Clearing The Area
Remove all clutter from your work surface. Tools, debris, and loose items can get in the way or cause distractions. Clear space around your workpiece to move freely. Good lighting is important to see the rivet clearly. A well-lit area reduces mistakes and helps you focus on the task.
Securing The Workpiece
Hold the item firmly before drilling. Use clamps or a vise to keep it steady. A moving workpiece makes drilling unsafe and inaccurate. Check that the piece is stable on the table or bench. Securing the workpiece protects your hands and ensures a clean drill hole.
Selecting The Right Drill Bit
Selecting the right drill bit is key to removing a rivet cleanly. The drill bit must fit well and handle the rivet material. Choosing the wrong bit can cause damage or make the job harder. This section explains how to pick the perfect drill bit for drilling out a rivet.
Matching Bit Size
The drill bit size should match the rivet’s center. Usually, the bit is the same size as the rivet shaft. Too small a bit will wear out fast and not remove the rivet. Too large a bit may damage the surrounding metal. Measure the rivet diameter before starting. Use a drill bit slightly smaller than the rivet head. This ensures the rivet drills out without harming the hole.
Material Considerations
Rivets come in different metals, such as aluminum, steel, or copper. Use a drill bit that can cut through the rivet metal easily. High-speed steel (HSS) bits work well for most rivets. For hard steel rivets, cobalt or titanium-coated bits last longer. Soft metals like aluminum need sharp bits that do not clog. Always pick a bit designed for the rivet’s metal type to get smooth drilling.
Drilling The Rivet
Drilling a rivet is an important step to remove it safely. This process requires care and precision. Drilling the rivet correctly helps to avoid damage to the surrounding material. The key is to focus on three main actions: marking the center, using the right drilling technique, and avoiding damage.
Marking The Center
Start by marking the center of the rivet head. Use a marker or a punch tool for accuracy. This mark guides the drill bit to the right spot. Without a clear mark, the drill can slip and cause damage.
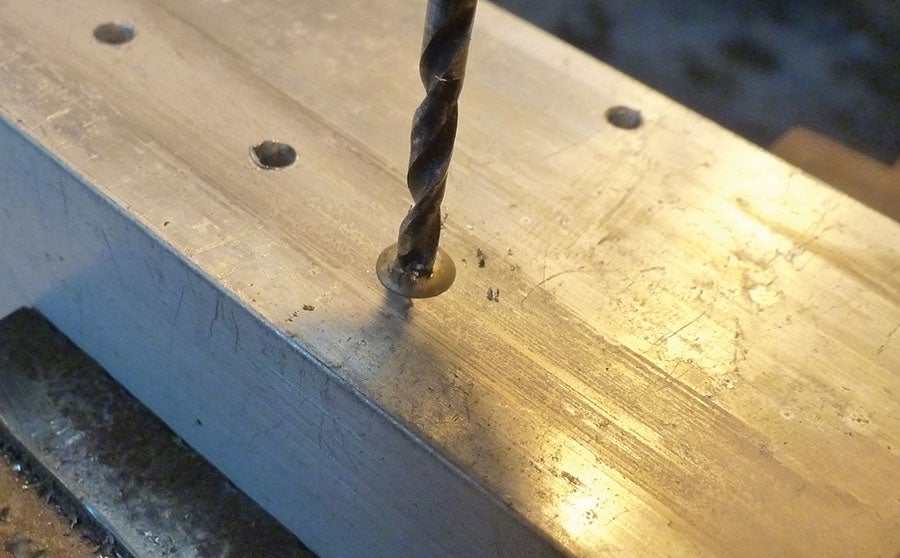
Drilling Technique
Choose a drill bit slightly smaller than the rivet’s head. Hold the drill steady and start at a low speed. Drill straight down into the center mark. Apply gentle pressure to avoid slipping. Increase speed once the bit grips the metal. Stop drilling when the rivet head separates from the shaft.
Avoiding Damage
Keep the drill bit vertical to prevent harming the surrounding area. Use a clamp to secure the workpiece. Avoid pushing too hard to stop the drill from wandering. Replace dull drill bits to ensure clean cuts. Wear safety glasses to protect your eyes from metal shavings.
Removing The Rivet Head
Removing the rivet head is the first step in drilling a rivet out. The head holds the rivet tightly in place. You need to remove it carefully to avoid damaging the surrounding material. This process makes it easier to push the rivet out later.
Use the right tools and techniques for a clean and safe removal. Proper removal saves time and effort for the next steps.
Using A Punch
A punch helps to remove the rivet head precisely. Choose a punch slightly smaller than the rivet head. Place the punch on the center of the rivet head. Tap it gently with a hammer.
Keep your hand steady and strike softly at first. Increase force only if needed. The punch will separate the rivet head from the shaft. Avoid hitting too hard to protect the work surface.
Cleaning The Hole
After removing the rivet head, clean the hole thoroughly. Use a wire brush or a small drill bit. Remove any rust, dirt, or metal fragments inside the hole. A clean hole helps the drill bit work smoothly.
Cleaning also prevents damage to the surrounding material. Take your time to ensure the hole is free of debris before moving forward.
Handling Common Issues
Drilling out a rivet can sometimes bring unexpected problems. These issues can slow your work or damage your tools. Knowing how to handle common problems makes the process smoother and safer.
Dealing With Stuck Rivets
Stuck rivets resist the drill and can cause frustration. Try using a center punch to mark the rivet head. This keeps the drill bit from slipping off. Apply steady, light pressure instead of forcing the drill. Use a drill bit designed for metal to cut through easier. If the rivet still won’t budge, try tapping around it to loosen it. Avoid using excessive force that might damage the material around the rivet.
Preventing Drill Bit Breakage
Drill bits can break if used incorrectly. Always use the right size bit for the rivet. Keep the drill bit sharp; dull bits require more pressure. Use slow, steady drilling speed to reduce heat buildup. Cool the bit occasionally with water to stop overheating. Hold the drill straight to avoid bending the bit. Replace worn or damaged bits quickly to prevent accidents.
Final Checks
After drilling a rivet out, final checks are crucial. They ensure the job is done right. These steps help prevent problems later. Check the hole carefully. Get ready to install a new rivet properly.
Inspecting The Hole
Look closely at the drilled hole. Make sure it is clean and smooth. Remove any metal shavings or debris. Check for cracks or damage around the hole. The hole should be the right size for the new rivet. A rough or damaged hole can cause weak joints.
Preparing For New Rivet Installation
Choose the correct size and type of rivet. Clean the hole and surrounding area. Align the parts to be joined perfectly. Secure the pieces so they do not move. Use tools that fit the rivet and hole size. Proper preparation makes the new rivet strong and lasting.
Credit: www.kitplanes.com
Frequently Asked Questions
How Do You Safely Drill A Rivet Out?
To safely drill a rivet out, use a drill bit slightly smaller than the rivet head. Secure the material, drill carefully through the center, and remove the rivet once the head is detached. Wear safety goggles to protect your eyes from metal shavings.
What Tools Are Needed To Drill Out A Rivet?
You need a power drill, a drill bit matching the rivet size, safety goggles, and a punch or hammer. These tools help you drill precisely and safely remove the rivet without damaging the surrounding material.
Can Drilling Out A Rivet Damage The Material?
Yes, drilling can damage material if done improperly. Use the right drill bit size, steady pressure, and proper technique to avoid enlarging or deforming the hole. Practice caution to maintain the material’s integrity during rivet removal.
How Long Does It Take To Drill A Rivet Out?
Drilling out a rivet typically takes 1 to 3 minutes depending on rivet size, drill speed, and material thickness. With practice and proper tools, this process becomes quick and efficient for most projects.
Conclusion
Drilling out a rivet takes patience and the right tools. Start with the correct drill bit size for safety. Keep the drill steady to avoid damage. Take breaks to check your progress often. Replace the rivet carefully after removal. This simple process saves time and effort.
Practice these steps to feel more confident. You can handle rivet removal like a pro.