

Are you ready to install a door latch but not sure how to drill the perfect hole? Getting this step right is key to making your door secure and functional.
If you’ve ever struggled with uneven holes or misaligned latches, this guide is made just for you. Keep reading, and you’ll learn simple, clear steps that anyone can follow to drill the right hole every time. By the end, you’ll have the confidence and skills to handle your door latch installation like a pro.
Let’s get started!
Tools And Materials Needed
Drilling a hole for a door latch requires specific tools and materials. Having the right items makes the job easier and ensures a clean, precise hole. Prepare everything before starting to save time and avoid mistakes.
Essential Drill Bits
Select drill bits designed for wood or metal, depending on your door material. A hole saw bit is needed for the latch hole. A spade bit or twist bit works well for smaller pilot holes. Use sharp bits to get smooth cuts and prevent splintering.
Measuring Tools
Accurate measurements are crucial for proper latch placement. Use a tape measure or ruler to mark the hole location. A pencil helps make clear marks on the door surface. A combination square or marking gauge ensures straight, even lines.
Safety Gear
Protect yourself during drilling with safety gear. Wear safety goggles to shield your eyes from dust and debris. Use ear protection if your drill is loud. Gloves can protect your hands but ensure they do not catch in the drill.

Credit: www.youtube.com
Preparing The Door
Preparing the door is the first step to drill a hole for the latch. It ensures the latch fits well and works correctly. Taking time to prepare the door helps avoid mistakes and damage. Follow these steps carefully before drilling.
Marking The Latch Position
Start by deciding where the latch will go. Usually, it sits about 36 inches from the floor. Use a pencil to mark the spot on the door edge. Make sure the mark is straight and clear. This mark guides your drill and keeps the latch aligned.
Measuring Door Thickness
Check the thickness of your door with a tape measure. Most interior doors are 1.375 to 1.75 inches thick. Exterior doors can be thicker. Knowing the thickness helps pick the right latch size and drill bit length. Accurate measuring ensures a perfect fit.
Choosing The Right Drill Bit Size
Select a drill bit that matches the latch size. The latch package usually shows the recommended bit size. Use a spade bit or hole saw for larger holes. Use a smaller bit for pilot holes if needed. The right bit size prevents wood splintering and ensures smooth installation.
Drilling The Latch Hole
Drilling the latch hole is a key step in fitting a door latch properly. This hole holds the latch body in place and must be precise. The process includes setting up the drill, drilling the face bore, and drilling the edge bore. Each step ensures the latch fits smoothly and works well.
Setting Up The Drill
Choose a drill with adjustable speed. Use a drill bit the right size for the latch. Mark the drill points clearly on the door. Secure the door to keep it steady. Safety glasses protect your eyes from wood chips.
Drilling The Face Bore
The face bore is the larger hole on the door’s flat surface. This hole fits the latch body. Hold the drill steady and straight. Drill slowly to avoid splintering the wood. Stop when you reach the right depth for the latch.
Drilling The Edge Bore
The edge bore is the smaller hole on the door’s edge. This hole allows the latch bolt to extend and retract. Align the drill bit with the face bore. Drill carefully to meet the face bore hole. Clean any rough edges for smooth latch movement.
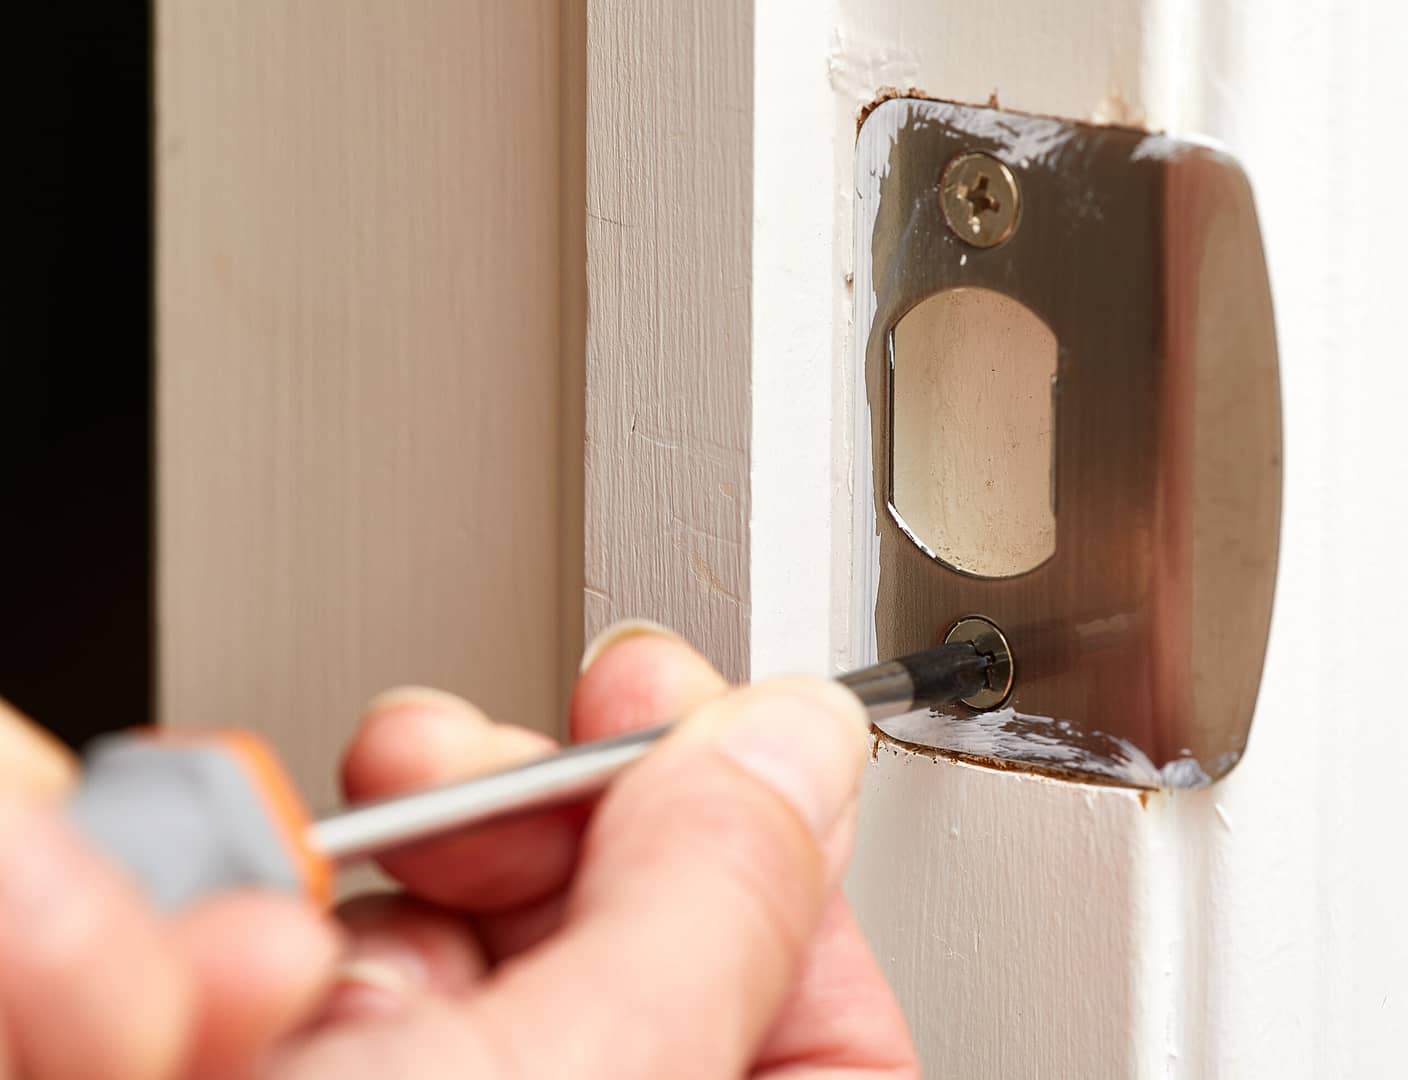
Installing The Latch
Installing the latch is a key step in fitting a door latch. It ensures the door locks and unlocks smoothly. The process involves placing the latch mechanism correctly, securing it with screws, and checking its function. Follow each step carefully for a proper fit.
Fitting The Latch Mechanism
Start by sliding the latch mechanism into the hole drilled on the edge of the door. The angled side of the latch should face the door frame. Make sure it fits snugly without gaps. The latch should sit flush with the door edge for smooth operation.
Securing With Screws
Use the screws provided with the latch to fix it in place. Align the screw holes on the latch plate with the drilled holes on the door. Tighten the screws firmly but avoid over-tightening. This prevents damage to the latch or door.
Testing The Latch Functionality
Push the door to check if the latch moves freely. Use the door handle to extend and retract the latch bolt. It should slide smoothly without sticking. Make sure the door locks securely and opens easily.
Common Mistakes To Avoid
Drilling a hole for a door latch seems simple but can cause problems. Many make common mistakes that lead to poor results. Avoiding these errors saves time and ensures the latch fits well. Here are some frequent mistakes to watch out for.
Misaligned Holes
Misaligned holes cause the latch to not fit properly. The door and frame holes must line up exactly. Mark the spots carefully before drilling. Use a template or measure twice to prevent errors. Misalignment can make the door hard to close or lock.
Using Incorrect Drill Bits
Using the wrong drill bit can damage the door or latch. Choose a bit that matches the size of the latch hole. A wood bit works best for wooden doors. Metal bits are needed for metal doors. The right bit creates a clean, smooth hole.
Ignoring Safety Precautions
Ignoring safety can cause injuries or damage. Always wear safety glasses to protect your eyes. Secure the door so it does not move while drilling. Keep fingers away from the drill bit. Take your time and drill slowly for control.

Credit: www.homedepot.com
Tips For Smooth Drilling
Drilling a hole for a door latch requires care and precision. Smooth drilling makes the job easier and improves the final result. Follow these simple tips to avoid common problems and get a clean hole every time.
Drilling Speed Control
Keep the drill speed slow and steady. Fast speeds can burn the wood or break the drill bit. Slow speed helps you control the drill better. It also reduces heat, which protects the latch area from damage.
Preventing Wood Splintering
Place a piece of tape over the drilling spot. This helps hold the wood fibers in place. Drill slowly and avoid pushing too hard. Clean cuts prevent splinters and give a smooth finish around the hole.
Maintaining Drill Stability
Hold the drill firmly with both hands. Keep it straight and steady while drilling. Avoid tilting the drill to prevent uneven holes. Use a clamp to hold the door steady if needed.
Credit: www.aspire-doors.co.uk
Frequently Asked Questions
What Tools Are Needed To Drill A Door Latch Hole?
You need a drill, hole saw bit, tape measure, pencil, chisel, and screwdriver. These tools help create precise holes for the latch installation.
How Do I Measure The Correct Hole Size For A Door Latch?
Measure the latch’s diameter and backset distance. Mark the door edge and face accurately to ensure the hole fits perfectly.
What Is The Best Drill Bit Size For Door Latch Holes?
Use a 2 1/8-inch hole saw bit for the main hole. A 1-inch spade bit works well for the latch edge hole.
How Do I Avoid Splintering Wood When Drilling Latch Holes?
Drill slowly and use a sharp bit. Placing painter’s tape over the drill area can also reduce splintering.
Conclusion
Drilling a hole for a door latch is simple with the right steps. Measure carefully to avoid mistakes. Use the correct drill bit size for a clean hole. Take your time and work slowly for best results. Safety matters—always wear protective gear.
A well-drilled hole makes installing the latch easier. Practice on scrap wood if unsure. With patience, your door latch will fit perfectly. Keep these tips in mind for a smooth project. You can do this!