

Are you tired of dealing with waterlogged soil or plants that just won’t thrive in your flower pots? One simple fix can make all the difference: drilling holes in your pots.
But how do you do it safely and effectively without cracking or damaging them? In this guide, you’ll discover easy, step-by-step tips that anyone can follow. By the end, you’ll know exactly how to create the perfect drainage for your plants, helping them grow healthier and stronger.
Keep reading to unlock the secret to happier plants and a more beautiful garden!
Credit: www.warporweft.com
Choosing The Right Pot
Choosing the right pot is key to successful gardening. The pot you select affects plant health and growth. It also impacts how easy it is to drill holes for drainage. Picking a pot that fits your needs helps your plants thrive.
Material Matters
Different pot materials handle drilling differently. Plastic pots are soft and easy to drill. Clay pots need a steady hand and sharp drill bits. Metal pots require special drill bits for metal. Consider the pot material before drilling holes.
Size And Shape Considerations
Pot size affects how many holes you need. Larger pots need more holes for proper drainage. Small pots need fewer holes to avoid soil loss. The shape also matters. Wide pots give more space for holes. Narrow pots need careful hole placement.
Tools You’ll Need
Drilling holes in flower pots needs the right tools for a clean job. Using proper tools makes the process safer and easier. Below are key tools you need before starting.
Drill Types
A cordless drill works well for most pots. It is easy to handle and portable. A corded drill offers more power and steady speed. Choose a drill with adjustable speed settings. Low speed helps control the drilling without cracking the pot.
Drill Bits For Pots
Use a masonry bit for clay or ceramic pots. These bits are tough and cut through hard materials. For plastic pots, a standard twist bit works fine. For glass pots, use a diamond-tipped bit to avoid shattering. Always pick the right bit size for drainage holes, usually 1/4 inch or larger.
Safety Gear
Protect your eyes with safety goggles. Dust and small shards can fly during drilling. Wear gloves to protect your hands from sharp edges. A dust mask helps prevent breathing in fine particles. Secure the pot to keep it from moving while you drill.
Preparing The Pot
Preparing the pot is the first step before drilling holes. It helps ensure clean and precise holes. Proper preparation also prevents damage to the pot during drilling.
Cleaning The Surface
Start by cleaning the pot’s surface. Remove dirt, dust, and any residues. Use a damp cloth or sponge for this task. Dry the pot completely before drilling. A clean surface helps the drill bit grip better.
Marking Hole Locations
Decide where to drill the holes. Mark the spots with a pencil or marker. Space the holes evenly for good drainage. Double-check the marks before drilling. Accurate marking makes drilling easier and safer.

Credit: cleverbloom.com
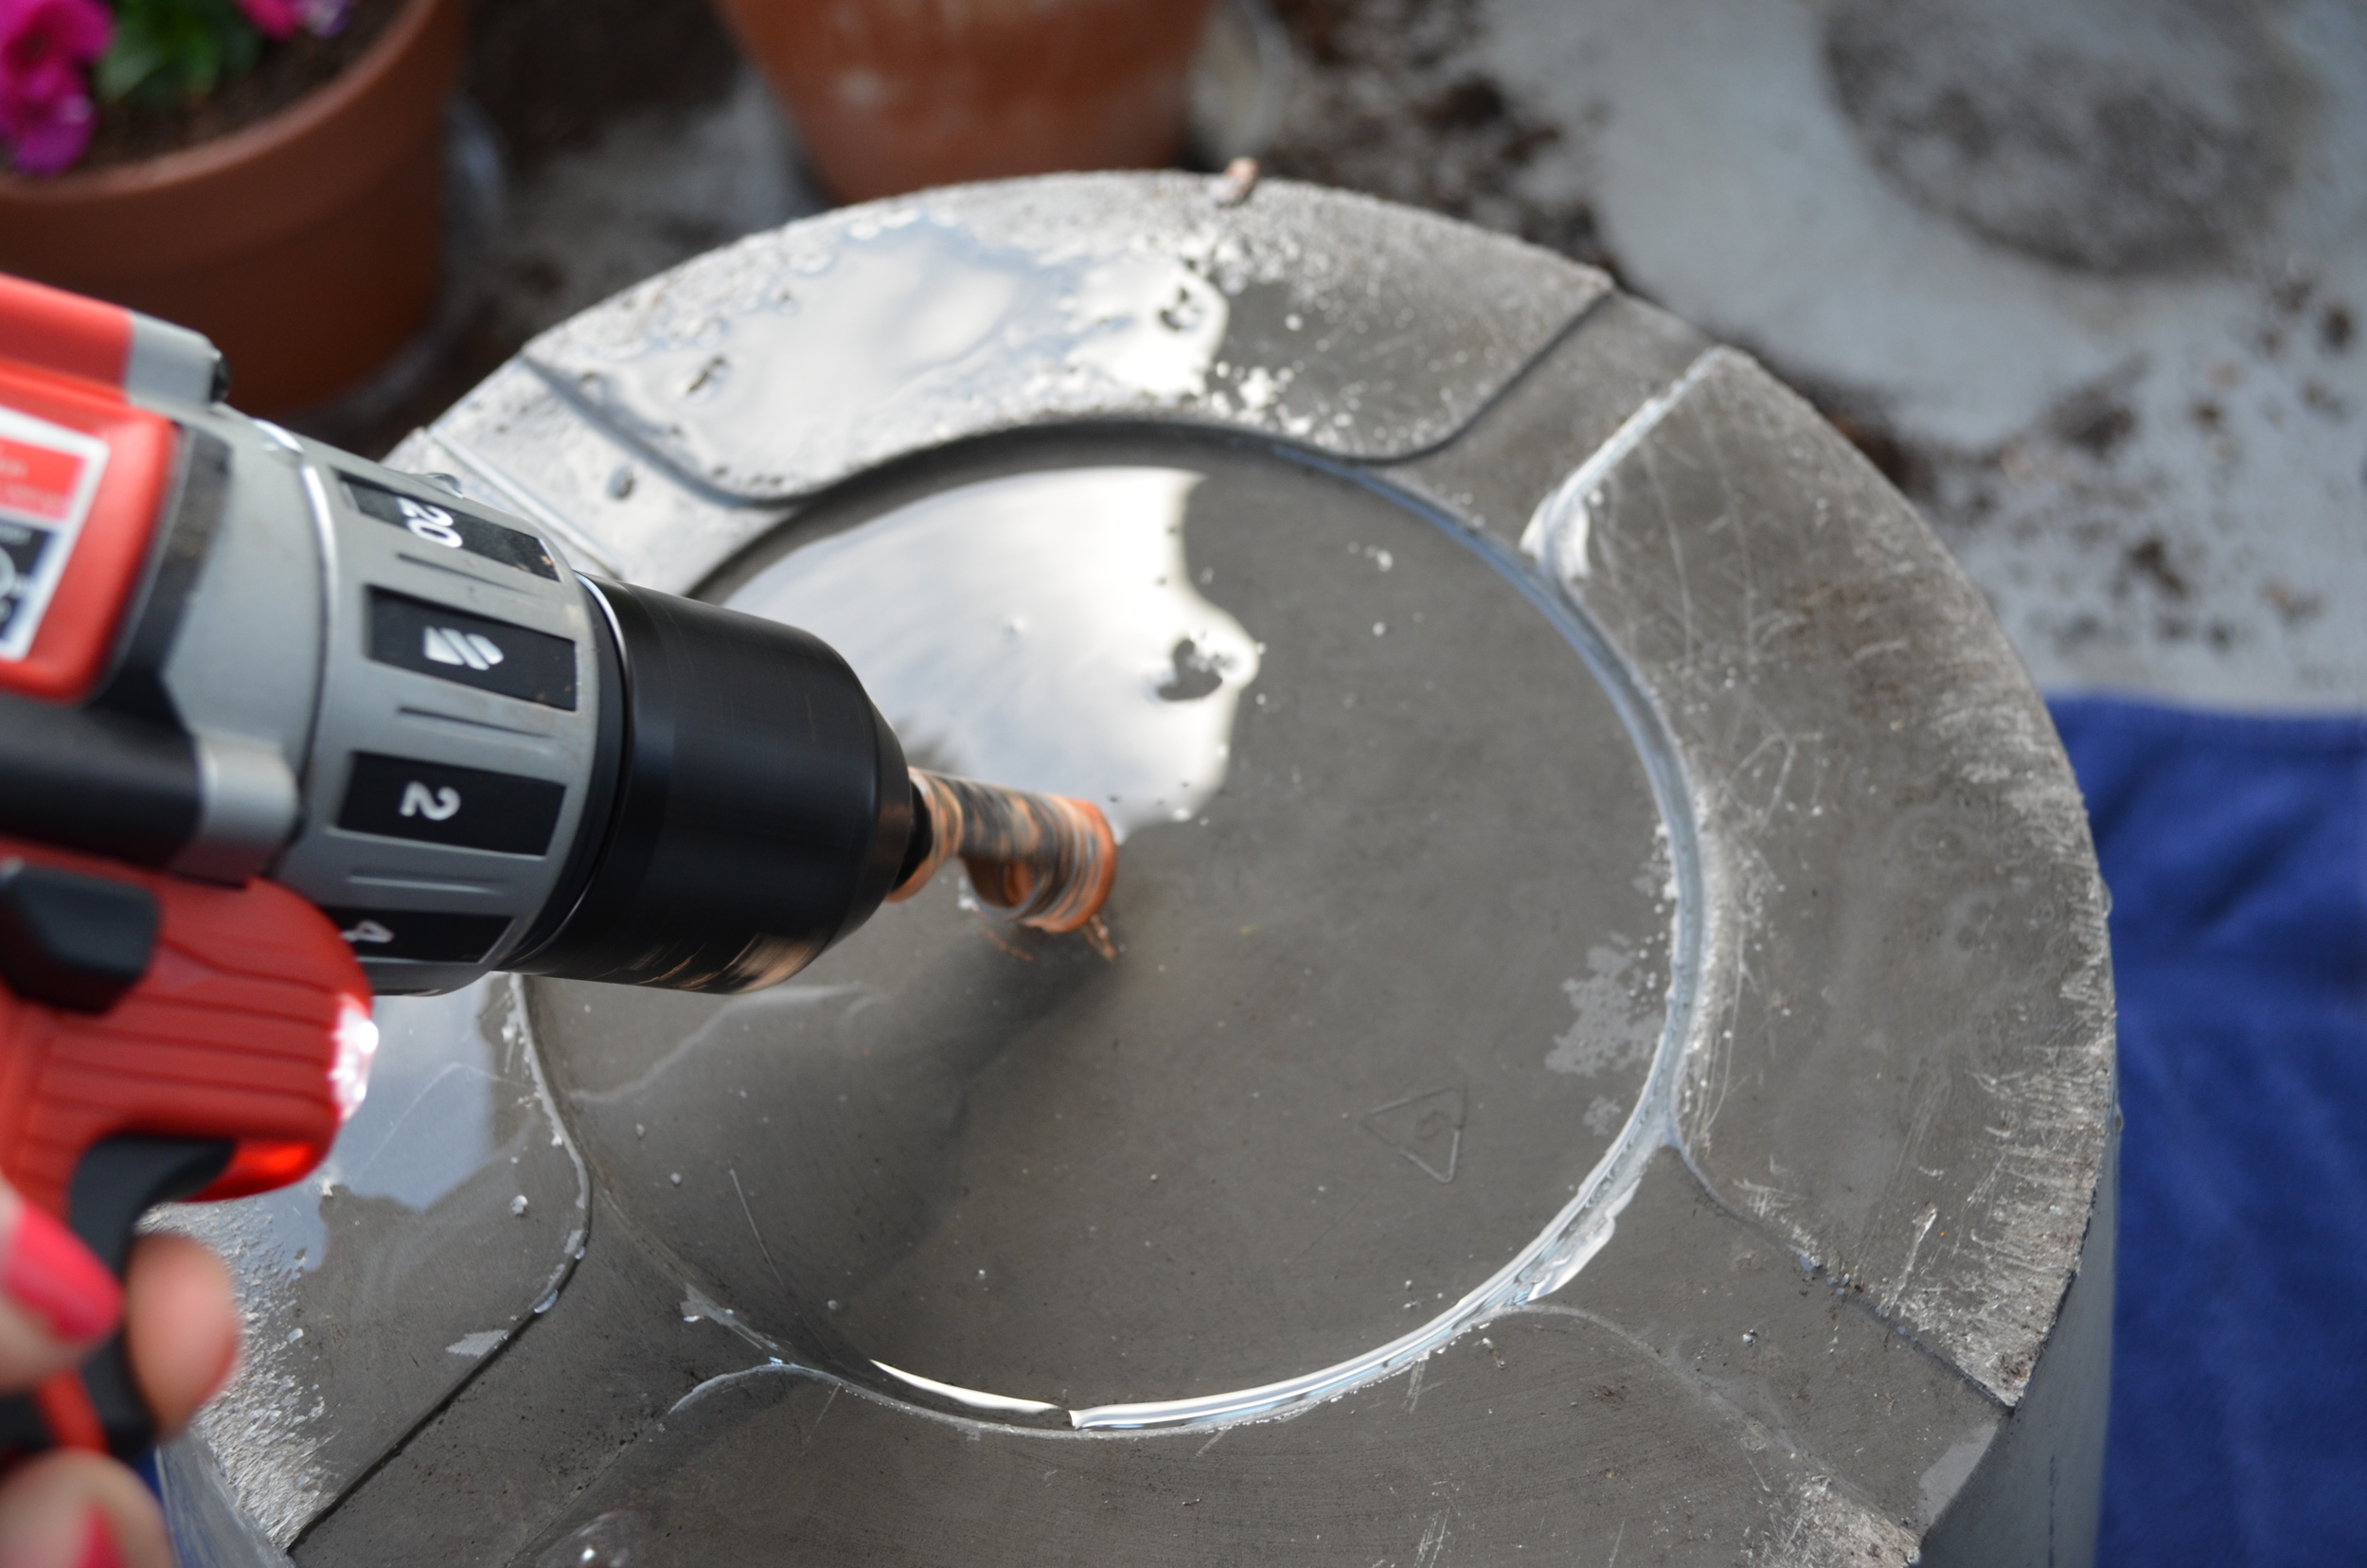
Drilling Techniques
Drilling holes in flower pots needs careful techniques to avoid damage. Choosing the right method helps make clean holes. Proper drilling keeps pots strong and ready for plants.
Setting The Drill Speed
Use a slow drill speed to start. High speeds cause cracks in pots. Slow speed controls the drill better. It helps the bit cut smoothly through material. Adjust speed as you drill deeper.
Applying Pressure Correctly
Press gently on the drill. Too much force breaks the pot. Too little pressure makes the bit slip. Steady, even pressure works best. Let the drill do most of the work.
Avoiding Cracks And Breaks
Place tape over the drilling spot. Tape reduces slipping and cracking. Drill halfway, then pause to cool. Use water to keep the bit cool. Slow drilling and cooling prevent breaks.
Creating Perfect Drainage
Creating perfect drainage in flower pots is key to healthy plants. Drainage holes let excess water escape. This stops water from pooling at the bottom. Pooled water can cause root rot and kill plants.
Choosing the right number and size of holes makes a big difference. It ensures water drains well but soil stays in place. Good drainage helps roots get air and grow strong.
Number Of Holes Needed
Most flower pots need at least one drainage hole. Larger pots should have two or three holes. Small pots can work with one hole only. More holes speed up water drainage. But too many holes can let soil wash out.
Check the pot size before drilling holes. For pots under 12 inches, use one hole. For bigger pots, add extra holes. Spread holes evenly across the bottom for balance.
Hole Size Recommendations
Hole size depends on pot material and plant type. Usually, holes between ¼ inch and ½ inch work well. Small holes stop soil from escaping. Large holes drain water faster but need a mesh or screen to hold soil.
Use a drill bit that matches the hole size you want. Drill slowly to avoid cracking the pot. Test drainage by watering after drilling. Adjust hole size or number if needed.
Post-drilling Care
After drilling holes in flower pots, proper care is important. It helps keep the pot strong and safe for plants. Taking a few simple steps can protect the pot from cracks and sharp edges. These steps also help water flow smoothly without leaks or damage.
Smoothing Rough Edges
Drilled holes often have sharp or rough edges. These can hurt your hands or damage roots. Use sandpaper or a file to smooth these edges. Rub gently around the hole until it feels even and soft. This makes the pot safer to handle and better for plants.
Sealing And Reinforcing Holes
Sealing the holes can stop cracks from spreading. Apply a bit of waterproof sealant around each hole. Let it dry completely before using the pot. For extra strength, add a small ring of silicone or glue inside the hole. This helps keep the pot sturdy and water-tight.
Alternative Drainage Solutions
Not all flower pots need holes drilled for drainage. Some pots are made from materials that do not allow easy drilling. Others may be decorative and you want to protect them from damage. In these cases, alternative drainage methods help keep plants healthy.
These solutions stop water from sitting at the bottom. They prevent root rot and improve air flow inside the pot. Here are two simple ways to improve drainage without drilling holes.
Using Pebbles Or Mesh
Place a layer of small pebbles at the bottom of your pot. This layer creates space for water to collect below the soil. The roots stay above the water, reducing the chance of rot.
Adding a piece of mesh or landscape fabric on top of the pebbles stops soil from falling through. It keeps soil from clogging the drainage space. Use coarse mesh or plastic screen for best results.
Self-watering Pot Options
Self-watering pots come with built-in water reservoirs. They supply water to plants slowly through a wick or special soil. These pots keep moisture levels steady without excess water.
They also avoid the need for holes because excess water stays in the reservoir. This design works well for indoor plants or those needing consistent moisture. Choose self-watering pots for easy care and less mess.
Common Mistakes To Avoid
Drilling holes in flower pots seems easy but many make avoidable mistakes. These errors can cause damage to the pot or create unsafe conditions. Knowing what to avoid helps you get the best result and keep safe.
Drilling Without Safety
Not wearing safety goggles is risky. Small chips can fly and hurt your eyes. Gloves protect your hands from sharp edges. Always work in a well-ventilated area to avoid breathing dust.
Ignoring Pot Material
Different pots need different drill bits. Clay pots crack easily without the right bit. Plastic pots require a slower drill speed to avoid melting. Glass pots need special care and tools.
Skipping Hole Placement Planning
Random holes weaken the pot structure. Plan holes at the pot’s base for proper drainage. Avoid placing holes too close to the edges to prevent cracks. Measure carefully before you start drilling.
:max_bytes(150000):strip_icc()/SPR-how-to-drill-a-hole-in-a-ceramic-pot-8584910-hero-2-2704ad1325bb40e78b52b23ef57b827b.jpg)
Credit: www.thespruce.com
Frequently Asked Questions
How Do I Safely Drill Holes In Ceramic Flower Pots?
Use a diamond-tipped drill bit and water to cool the surface. Drill slowly to avoid cracks. Wear safety glasses and gloves for protection.
What Drill Bit Is Best For Flower Pots?
A diamond or carbide-tipped drill bit works best. These bits can penetrate hard materials like ceramic or terracotta without damage.
How Many Drainage Holes Should I Drill In A Flower Pot?
Typically, 2 to 4 holes are ideal. This ensures proper water drainage and prevents waterlogging, which can harm plant roots.
Can I Drill Holes In Plastic Flower Pots?
Yes, use a standard twist drill bit. Drill at low speed and apply gentle pressure to avoid cracking the plastic.
Conclusion
Drilling holes in flower pots helps plants stay healthy. Water drains well and roots get air. Use the right drill bit for your pot type. Take your time and be careful. A simple step can improve plant growth a lot.
Now, your pots are ready for planting. Try it yourself and see the difference. Gardening becomes easier and more fun this way. Keep practicing to get better at drilling holes. Your plants will thank you with beautiful blooms.