

Drilling holes in porcelain tile can seem tricky and even risky if you’ve never done it before. You might worry about cracking the tile or making a messy job out of it.
But what if you could learn the exact steps to drill clean, precise holes without damaging your tiles? This guide will walk you through simple, effective techniques that anyone can follow. By the end, you’ll feel confident tackling your project and adding hooks, fixtures, or outlets exactly where you want them—no stress, no mistakes.
Ready to master this skill and save time and money on your home improvements? Let’s dive in!
Choosing The Right Tools
Choosing the right tools is key to drilling clean holes in porcelain tile. Porcelain is hard and brittle. Wrong tools can cause cracks or chips. Use tools that match the tile’s toughness. This ensures smooth drilling and protects your tile.
Selecting The Drill
Pick a drill with variable speed control. A cordless drill works well for most jobs. A hammer drill can break the tile easily, so avoid it. Use low speed to keep control and avoid damage. A drill with a comfortable grip helps steady your hand.
Types Of Drill Bits For Porcelain
Use diamond-tipped drill bits for best results. They cut through porcelain without cracking it. Carbide-tipped bits also work but wear out faster. Avoid regular steel bits; they can cause tile damage. Start drilling with a small bit, then use a bigger one.
Safety Gear Essentials
Wear safety goggles to protect your eyes from dust and debris. Use a dust mask to avoid inhaling fine particles. Gloves protect your hands from sharp edges. Ear protection helps if you drill for long periods. Keep your work area clean and well-lit for safety.
Credit: ceramiccity.ie
Preparing The Tile Surface
Preparing the tile surface is the first step to drill holes in porcelain tile without damage. It helps the drill bit stay in place and prevents cracks. Proper preparation also makes the drilling process smoother and safer.
Cleaning The Tile
Start by cleaning the tile surface thoroughly. Remove dust, dirt, and grease with a damp cloth. Dry the tile completely to avoid slipping during drilling. A clean surface gives better grip for the drill bit.
Marking The Drill Spot
Use a pencil or marker to mark the exact spot for drilling. Make a small dot to guide the drill bit. Accurate marking ensures you drill in the right place without mistakes.
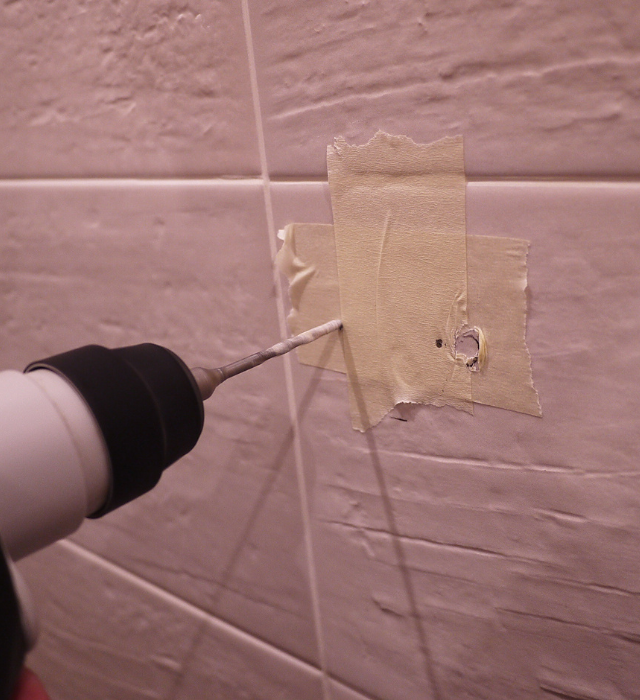
Using Tape To Prevent Slipping
Place a piece of masking tape over the marked spot. The tape stops the drill bit from sliding on the smooth tile. It also reduces the risk of cracking the tile during drilling.
Drilling Techniques
Drilling holes in porcelain tile requires careful techniques to avoid cracks. Porcelain is very hard and brittle. Using the right method protects your tile and makes the job easier. Focus on three key steps to drill clean holes safely.
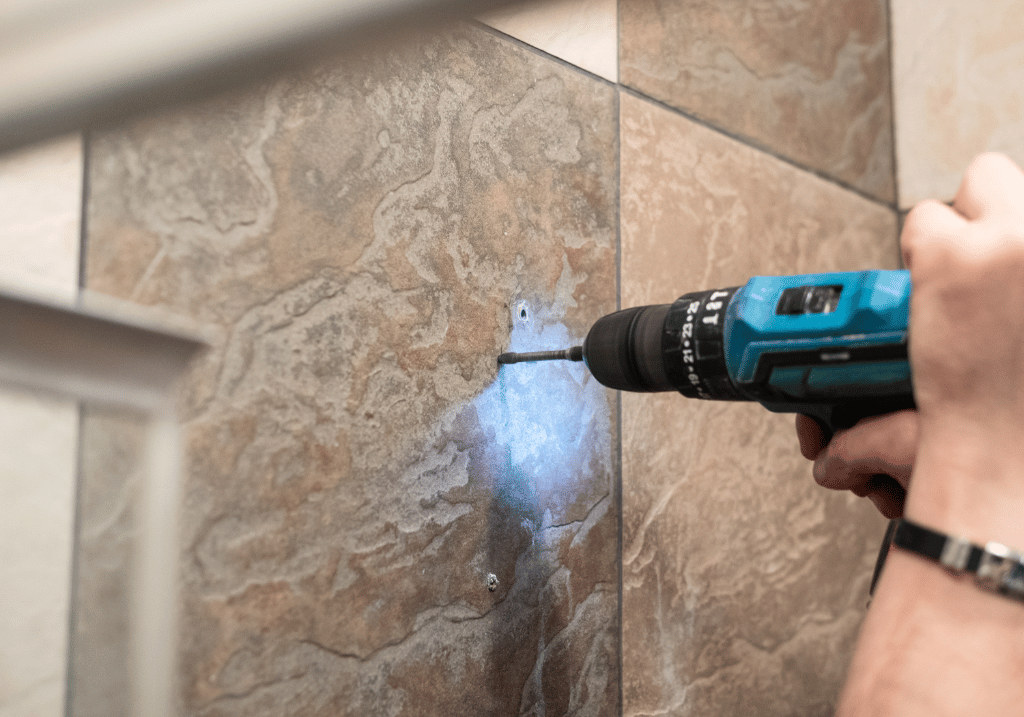
Starting With A Pilot Hole
Begin by making a small pilot hole with a carbide-tipped bit. This hole guides the larger drill bit. It helps prevent the drill from slipping on the shiny surface. Keep the drill steady and start slowly. Mark the spot clearly before you begin.
Controlling Drill Speed
Use a low drill speed to avoid overheating the tile. High speeds create friction and cause cracks. Slow drilling gives more control and better results. Let the drill bit do the work without forcing it. Cool the area with water to reduce heat.
Applying Proper Pressure
Apply gentle, steady pressure while drilling. Too much force can break the tile. Press just enough to keep the bit moving forward. If you feel resistance, pause and adjust. Patience is important to protect your tile.
Credit: ceramiccity.ie
Avoiding Common Mistakes
Drilling holes in porcelain tile can be tricky. Mistakes cause cracks, slips, or heat damage. Avoiding these common errors helps ensure a clean, precise hole. Pay attention to the right tools and techniques. Small steps lead to big success.
Preventing Tile Cracks
Porcelain tiles are hard but brittle. Too much pressure breaks them easily. Use a slow drill speed for control. Start with a small pilot hole. Support the tile from underneath to reduce stress. Avoid hammer drills; they cause cracks fast.
Dealing With Heat Build-up
Drilling creates heat, which can crack tiles. Keep the drill bit cool by pausing often. Spray water on the drill area to cool it. Use diamond drill bits designed for porcelain. Heat weakens the tile and dulls the bit quickly.
Handling Drill Bit Slippage
Slippage ruins the tile surface and wastes time. Mark the spot with masking tape to add grip. Use a center punch to create a small dent. Hold the drill steady and start slowly. A stable drill angle stops the bit from sliding.
Finishing Touches
After drilling holes in porcelain tile, the job is not done yet. Finishing touches make the hole look clean and professional. These steps protect the tile and improve the overall appearance. Take time to clean, smooth, and seal for the best results.
Cleaning Up Debris
Remove all dust and small pieces from the hole. Use a soft brush or a vacuum cleaner for this task. Cleaning prevents dirt build-up and helps the next steps work better. Make sure the hole is dry before moving on.
Smoothing Rough Edges
Check the hole edges for any sharp or rough parts. Use a fine sandpaper or a nail file gently around the hole. This prevents cracks and makes the hole safer to handle. Take care not to press too hard on the tile.
Sealing The Hole
Apply a clear sealant around the hole to protect the tile. Sealing stops water from entering and causing damage. Use a small brush to spread the sealant evenly. Let it dry completely before using the tile area.

Credit: www.instructables.com
Frequently Asked Questions
What Is The Best Drill Bit For Porcelain Tile?
The best drill bit for porcelain tile is a diamond-tipped or carbide-tipped bit. These bits cut through hard surfaces smoothly and prevent cracking. Using the right bit ensures clean holes without damaging the tile.
How Do I Prevent Tile From Cracking When Drilling?
To prevent cracking, use a slow drill speed and apply gentle pressure. Start with a small pilot hole and use masking tape on the tile surface to reduce slipping. Cooling the bit with water also helps avoid overheating and cracks.
Can I Drill Porcelain Tile Without A Drill Guide?
Yes, but using a drill guide improves accuracy and stability. Without it, be extra careful to keep the drill steady and straight. A guide helps maintain control and prevents the bit from slipping or damaging the tile.
How Long Does It Take To Drill A Hole In Porcelain Tile?
Drilling a hole in porcelain tile typically takes 2 to 5 minutes. The time depends on the tile’s thickness and drill bit quality. Patience and steady drilling speed ensure a clean hole without damage.
Conclusion
Drilling holes in porcelain tile takes care and the right tools. Use a diamond drill bit and keep the drill steady. Always cool the area with water to avoid cracks. Take your time and avoid rushing the process. Small steps lead to better results and fewer mistakes.
With practice, drilling porcelain tile becomes easier and safer. Stay patient and follow these tips for success. Your tile will stay intact, and your project will look great.