

Are you planning to hang shelves, install fixtures, or add decorations on your ceramic tiles but unsure how to drill into them without cracking or damaging the surface? Drilling into ceramic tiles might seem tricky, but with the right approach and tools, you can do it safely and easily.
In this guide, you’ll discover simple, step-by-step techniques to drill clean holes in your tiles without stress. Keep reading, and you’ll gain the confidence to tackle your project like a pro!

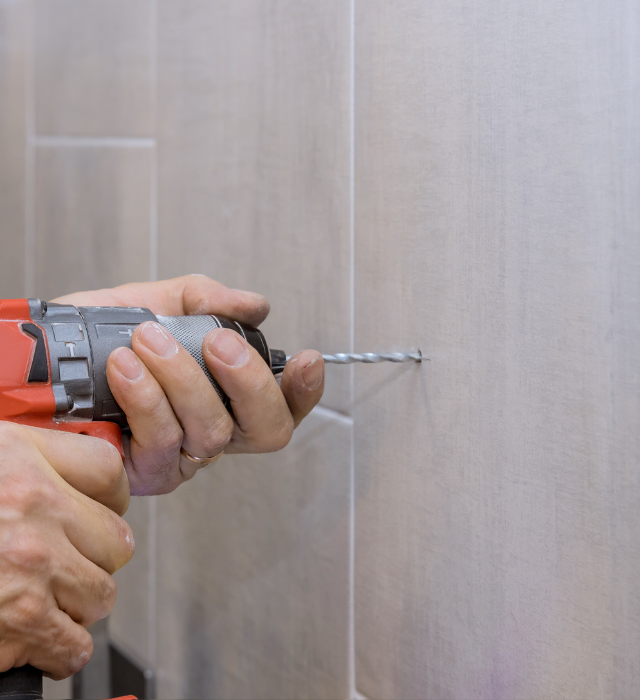
Credit: danslelakehouse.com
Tools You Need
Drilling into ceramic tiles needs the right tools to avoid cracks or damage. Using proper equipment makes the job easier and safer. Prepare your tools before starting to save time and reduce mistakes.
Types Of Drill Bits
Choose a drill bit designed for ceramic tiles. Carbide-tipped or diamond-tipped bits work best. These bits cut through tile without cracking it. Avoid regular metal drill bits; they can cause chips. Use a small pilot bit first to mark the spot. This helps guide the larger drill bit smoothly.
Safety Gear Essentials
Wear safety glasses to protect your eyes from dust and shards. Use a dust mask to avoid breathing fine particles. Gloves help protect your hands from sharp edges and heat. Keep ear protection nearby if your drill is loud. Proper safety gear keeps you safe during the drilling process.
Preparing The Tile Surface
Preparing the tile surface is a key step before drilling. It helps avoid cracks and keeps the drill steady. Taking time to prepare ensures a clean and accurate hole.
Marking The Drill Spot
Start by choosing the exact spot to drill. Use a pencil or a marker to make a small dot. This mark guides the drill bit and prevents mistakes. Keep the mark light to avoid damage to the tile surface.
Using Tape To Prevent Slips
Place a piece of masking tape over the marked spot. The tape adds grip and stops the drill bit from slipping. It also helps protect the tile surface from scratches. This simple trick makes drilling safer and more precise.
Drilling Techniques
Drilling into ceramic tiles needs careful technique. Tiles can crack easily. Using the right method helps avoid damage. It also makes the job faster and cleaner. Below are key drilling techniques for best results.
Choosing The Right Drill Speed
Use a slow drill speed for ceramic tiles. High speed can cause cracks. Start with a low setting and increase slightly if needed. Keep the drill steady and controlled. Slow speed helps the bit cut smoothly.
Applying Steady Pressure
Press the drill gently but firmly. Too much force breaks the tile. Too little pressure slows the process. Keep a constant, even pressure. Let the drill bit do the work without pushing hard.
Cooling The Drill Bit
Heat builds up quickly when drilling tiles. This can damage both tile and bit. Use water or a wet cloth to cool the bit. Stop occasionally to cool it down. Cooling helps the drill bit last longer.
Handling Common Challenges
Drilling into ceramic tiles can be tricky. Many face problems like cracks, slippage, and mistakes. Knowing how to handle these common issues saves time and effort. It also protects your tiles and tools. This section guides you through simple tips for each challenge.
Avoiding Tile Cracks
Cracks happen when pressure is too high or uneven. Use a slow drill speed to reduce heat and stress. Start with a small pilot hole before drilling larger ones. Place masking tape on the tile to stop the drill from slipping. Let the drill do the work. Do not push hard.
Dealing With Slippage
Slippage causes uneven holes and tile damage. Use a marker or tape to mark the exact spot. A small indentation helps the drill grip the surface. Hold the drill steady and straight. Begin drilling at low speed. Keep the drill bit sharp for better control.
Fixing Mistakes
Mistakes happen, but some fixes are easy. Small chips around the hole can be filled with clear epoxy or tile filler. If the hole is off-center, cover it with a decorative tile or wall plate. For bigger cracks, replace the tile if possible. Always clean the area before fixing.
After Drilling Care
After drilling into ceramic tiles, proper care is essential to keep the surface strong and clean. Small cracks or leftover debris can cause damage later. Taking time to clean and seal the hole helps protect your tiles and makes your project look neat.
Cleaning Debris
Remove dust and small bits left from drilling. Use a soft brush or cloth to wipe the area. Avoid water at first to stop dust from spreading. Clear tiles help paint or sealant stick better. Cleaning also prevents scratching the tile surface later.
Sealing The Hole
Apply a sealant to protect the drilled hole from moisture. Use silicone or a clear tile sealant for the best results. This stops water from seeping in and causing damage. Sealing also keeps the hole smooth and helps screws or anchors hold tight. Let the sealant dry fully before using the tile.
Credit: ceramiccity.ie
Tips For Different Tile Types
Drilling into ceramic tiles requires care and the right approach. Different tile types need specific tips to avoid cracks or damage. Understanding your tile type helps you drill safely and effectively.
Glazed Tiles
Glazed tiles have a shiny, smooth surface. Use a carbide-tipped drill bit for best results. Start drilling slowly to prevent cracking the glaze. Use masking tape on the spot to keep the drill steady. Keep the drill bit cool by pausing often or using water.
Porcelain Tiles
Porcelain tiles are very hard and dense. Use a diamond-tipped drill bit for this type. Drill at low speed with gentle pressure. Avoid pushing too hard to stop the tile from breaking. Cooling the drill bit with water helps prevent overheating.
Natural Stone Tiles
Natural stone tiles like marble or granite need extra care. Use a diamond core drill bit to protect the stone. Drill slowly and steadily to avoid chips or cracks. Keep the area wet to reduce dust and heat. Take breaks often to keep the drill and tile cool.
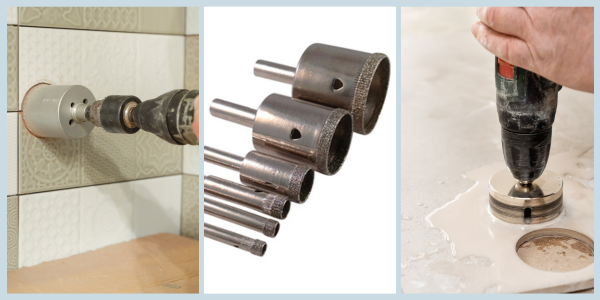
Credit: eternaltools.com
Frequently Asked Questions
What Tools Do I Need To Drill Ceramic Tiles?
You need a drill with a carbide or diamond-tipped bit. Use masking tape to prevent slipping. A slow drill speed and steady pressure are essential for clean holes without cracks.
How Do I Prevent Ceramic Tiles From Cracking?
Use a piece of masking tape over the drilling spot. Drill slowly and steadily without applying too much pressure. Let the drill bit do the work to avoid cracks.
Can I Use A Regular Drill Bit On Ceramic Tiles?
No, regular bits will damage tiles. Use a carbide or diamond-tipped drill bit designed for ceramic. These bits ensure smooth, precise holes without cracking the tile.
What Drill Speed Is Best For Ceramic Tiles?
Use a low drill speed to avoid overheating and cracking. Start drilling slowly, then increase speed slightly if needed. High speeds cause tile damage and reduce control.
Conclusion
Drilling into ceramic tiles takes care and the right tools. Use a tile drill bit and start slowly. Keep the drill steady and avoid too much pressure. Cooling the bit with water helps prevent cracks. Take your time and follow these steps.
You will get clean holes without breaking the tile. This skill saves money and avoids damage. Practice makes the task easier and safer. Now, you can hang shelves or pictures on tiled walls with confidence.