

If you’ve ever tried to hang something heavy on your wall, you know how frustrating it can be when the screws just won’t hold. The secret to a strong and secure mount is drilling into wall studs—the sturdy wooden beams behind your drywall.
But how do you find these studs, and how do you drill into them safely and effectively? You’ll discover simple, step-by-step tips that anyone can follow. By the end, you’ll feel confident tackling your next project and finally get that shelf or picture frame hanging just right.
Ready to learn how to drill into wall studs like a pro? Let’s dive in.
Tools Needed For Drilling
Drilling into wall studs needs the right tools. Using proper tools makes the job easier and safer. It helps you drill straight and avoid damage. Here is what you need before starting your project.
Choosing The Right Drill
Select a drill that fits your needs. A cordless drill offers good mobility. Corded drills provide constant power. Choose one with adjustable speed for better control. A drill with a comfortable grip reduces hand fatigue.
Selecting Drill Bits
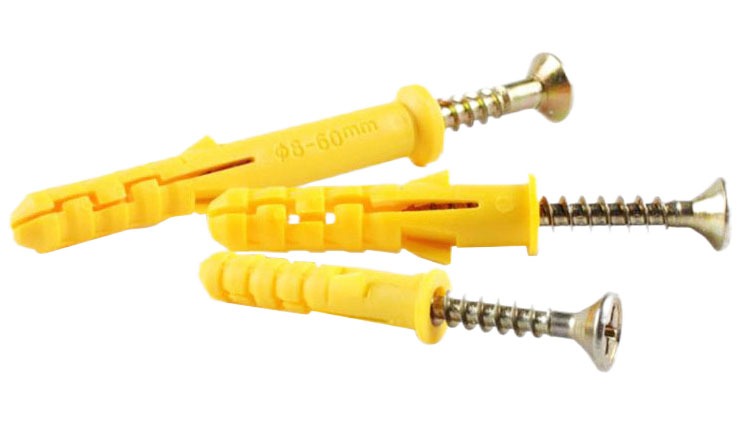
Pick drill bits made for wood since studs are wooden. A spade bit or twist bit works well. Make sure the bit size matches your screws. Sharp bits cut clean holes and prevent splintering.
Additional Helpful Tools
Use a stud finder to locate studs behind walls. A level ensures your holes are straight. Tape measure helps mark exact drilling points. Safety glasses protect your eyes from dust and debris.

Credit: www.wikihow.com
Locating Wall Studs
Locating wall studs is the first and most important step before drilling into walls. Studs are vertical wooden beams behind drywall that provide strong support. Drilling into these studs ensures stability for hanging heavy items. Finding studs saves time and prevents damage to walls.
There are tools and simple tricks to find studs easily. Proper marking of stud positions helps drill holes accurately. Below are easy methods to locate wall studs for your projects.
Using A Stud Finder
A stud finder is a small device that detects wood or metal behind drywall. Hold it flat against the wall and slowly move horizontally. The device will beep or light up when it finds a stud.
Stud finders work by sensing changes in density or metal nails. They are very accurate and fast for locating studs. Buy a basic model to save effort and avoid mistakes.
Alternative Methods To Find Studs
Stud finders are not the only way to find studs. You can tap the wall and listen for a solid sound. Hollow sounds mean no stud, while a firm sound means a stud is behind.
Look for electrical outlets or light switches on walls. Studs are usually near these fixtures. Measure about 16 or 24 inches from the outlet to find other studs.
Check baseboards or crown molding for nail or screw heads. They often mark stud locations. Use a small nail or thin drill bit to test the wall gently.
Marking Stud Positions
Once you find a stud, mark its position on the wall with a pencil. Make small marks at the top and bottom of the stud area. Connect these marks with a vertical line for clear guidance.
Marking helps keep your drill holes straight and aligned. It prevents mistakes and saves time during installation. Use bright pencil marks or painter’s tape for better visibility.
Preparing To Drill
Preparing to drill into wall studs requires careful steps to avoid damage and ensure safety. Taking time before drilling helps you work smoothly and get the best results. Follow these steps to prepare properly.
Safety Precautions
Wear safety glasses to protect your eyes from dust and debris. Use ear protection if your drill is loud. Keep your work area clean and free from tripping hazards. Make sure your drill is in good condition and the bit is sharp. Always unplug the drill when changing bits.
Marking Drill Points
Find the exact spot on the stud where you want to drill. Use a pencil to mark the point clearly. Measure twice to avoid mistakes. Marking the spot helps you drill straight and steady. Use a level to keep your marks even on the wall.
Checking For Obstacles Behind The Wall
Use a stud finder to locate studs and avoid pipes or wires. Move the finder slowly to scan the wall area. Check electrical outlets and switches near your drill spot. Avoid drilling near plumbing pipes to prevent leaks. Confirm no hidden hazards before you start drilling.
Credit: www.kenenghardware.com
Drilling Techniques
Drilling into wall studs requires careful technique to avoid damage and ensure a secure hold. Using the right drilling methods helps you work safely and efficiently. Focus on drill speed, angle, pressure, and depth to get the best results.
Setting The Drill Speed
Choose a low to medium drill speed for wall studs. High speed can overheat the drill bit and wood. Start slow to find the stud and keep the drill steady. Adjust speed as needed to keep control and avoid splintering.
Drilling At The Correct Angle
Hold the drill straight, perpendicular to the wall. This angle helps the bit enter the stud evenly. Avoid tilting the drill, which can cause uneven holes or damage to the stud. A steady hand creates clean, precise holes.
Controlling Pressure And Depth
Apply steady, gentle pressure on the drill. Too much force can crack the wood or break the bit. Let the drill do the work. Stop drilling as soon as the bit passes through the stud to avoid hitting wires or pipes behind.
Handling Common Issues
Drilling into wall studs often comes with challenges. These common issues can slow down your work or cause mistakes. Knowing how to handle these problems helps keep your project smooth and damage-free. Below are tips for dealing with hard wood, fixing holes, and protecting your walls.
Dealing With Hard Or Knotty Wood
Studs sometimes have knots or hard patches. These spots make drilling tough. Use a drill bit designed for wood. Start with a smaller bit to make a pilot hole. Drill slowly and apply steady pressure. Avoid forcing the drill, which can break the bit or wood. Take breaks to cool the drill and bit.
Fixing Misaligned Holes
Misaligned holes happen if you miss the stud or drill at the wrong angle. To fix this, fill the hole with wood filler or putty. Let it dry fully. Sand the area smooth. You can then drill again in the right place. Use a stud finder and measure carefully to avoid this problem.
Avoiding Wall Damage
Wall damage comes from drilling too deep or hitting pipes and wires. Use a stud finder with wire detection. Mark the stud edges clearly. Drill slowly and stop if you feel resistance. Use tape on the drill bit to mark depth. This prevents drilling too far and damaging the wall.
Finishing Touches
After drilling into wall studs, the final steps matter a lot. These finishing touches ensure your work looks clean and holds strong. Taking time here makes a big difference in the result and durability.
Cleaning Up Debris
Remove dust and small wood pieces from the hole and surrounding area. Use a brush or cloth to clear the surface. This helps screws or anchors fit better. A clean hole prevents problems later.
Inserting Anchors Or Screws
Choose the right anchors or screws for your wall type and weight needs. Insert anchors carefully if the wall is hollow. Screw in slowly and straight to avoid damage. Tighten just enough to hold firmly.
Ensuring Stability
Test the mounted item by gently pushing or pulling it. Check if screws or anchors stay secure without wobbling. Tighten or adjust if needed for extra strength. Stability keeps your items safe and lasting longer.
Credit: www.familyhandyman.com
Frequently Asked Questions
How Do I Find Wall Studs For Drilling?
Use a stud finder or tap the wall to locate studs. Studs are typically 16 or 24 inches apart. Mark the stud locations before drilling for accuracy and safety.
What Drill Bit Size Is Best For Wall Studs?
Use a drill bit slightly smaller than your screw diameter. Typically, a 1/8 to 3/16 inch bit works well for pilot holes in studs. This prevents wood splitting and ensures a secure hold.
Can I Drill Into Wall Studs Without A Stud Finder?
Yes, you can tap the wall and listen for a solid sound or look for electrical outlets and switches, which often attach to studs. Measuring 16 or 24 inches from these points helps locate studs.
Why Is Drilling Into Wall Studs Important?
Drilling into studs provides strong support for heavy items. It prevents damage to drywall and ensures your mounted objects stay securely in place over time.
Conclusion
Drilling into wall studs ensures a strong and secure hold. Always find the stud location before you start. Use a stud finder or tap the wall lightly. Mark the spot clearly for accurate drilling. Choose the right drill bit size for your screws.
Drill slowly and steadily to avoid mistakes. A well-drilled stud keeps shelves and fixtures safe. Practice makes the process easier over time. Follow these simple steps for a successful project. Your walls will thank you with lasting support.