

If you’ve ever struggled to load a bit into your Milwaukee hammer drill, you’re not alone. It might seem tricky at first, but once you know the right steps, it becomes quick and easy.
Getting this right means your drill works smoothly and safely every time you use it. In this guide, you’ll discover exactly how to load a bit in your Milwaukee hammer drill with confidence. Keep reading, and you’ll be ready to tackle any project like a pro.
Choose The Right Bit
Choosing the right bit is important for a Milwaukee hammer drill. It helps the drill work well and last longer. The right bit also makes your job easier. Using the wrong bit can damage the drill or the material you work on. Here are some tips to help you pick the best bit.
Types Of Bits For Hammer Drills
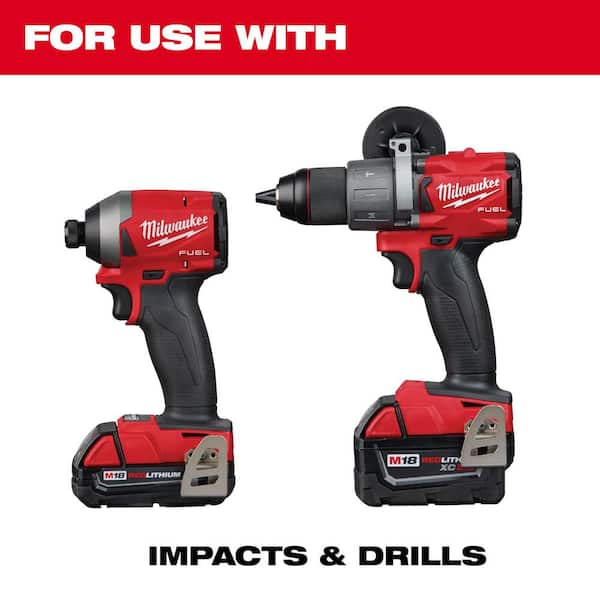
Hammer drills use special bits made for tough jobs. Masonry bits have a strong tip to drill into bricks, stone, or concrete. SDS bits fit the hammer drill’s chuck and hold tight during use. Standard drill bits work for wood or metal but are not made for hammer action. Choose bits designed for hammer drills for best results.
Selecting Based On Material
Different materials need different bits. Use masonry bits for hard materials like concrete and brick. For wood, select wood drill bits with sharp points. Metal needs bits made from high-speed steel or cobalt. Using the right bit keeps holes clean and prevents bit wear. Always check the material before choosing your bit.
Credit: www.homedepot.com
Prepare The Drill
Start by unplugging the drill or removing the battery for safety. Check that the drill chuck is clean and open wide enough to fit the bit. Keep your workspace clear and steady the drill before loading the bit.
Preparing your Milwaukee hammer drill is the first step to load a bit safely. Proper preparation ensures the drill works well and prevents accidents. It is important to take simple steps before inserting the drill bit.
Check the drill for any damage or dirt. Clean the chuck area to remove dust and debris. This helps the bit fit tightly and work correctly. A clean drill makes the task easier and safer.
Safety Precautions
Safety comes first. Always wear safety glasses to protect your eyes from flying debris. Use gloves to protect your hands from sharp edges on the bit or drill. Keep your work area clean and free of clutter. These steps help avoid injuries and make your work smoother.
Power Off And Unplug
Make sure the drill is turned off before loading the bit. Unplug the drill from the power source to avoid accidental starts. This step is very important for your safety. Never try to change the bit while the drill is powered on. It prevents electric shock and accidental injuries.
Open The Chuck
Opening the chuck is the first step to load a bit into your Milwaukee hammer drill. It allows you to insert or remove the drill bit easily. Knowing how to open the chuck correctly helps avoid damage and ensures the bit fits tightly.
The process depends on the chuck type your drill has. Identifying the chuck type helps you open it the right way. Next, loosening the chuck properly prepares it for the bit change.
Identify The Chuck Type
Most Milwaukee hammer drills have either a keyless or keyed chuck. A keyless chuck turns by hand to open or close. A keyed chuck uses a special tool called a chuck key. Check your drill to see which type it uses. This step is important to avoid forcing the chuck and causing damage.
Loosen The Chuck Properly
For a keyless chuck, hold the drill firmly. Turn the chuck counterclockwise by hand to open it. It should spin smoothly without much force. For a keyed chuck, insert the chuck key into the hole. Turn the key counterclockwise to loosen the jaws. Loosen the chuck enough to fit the drill bit easily. Avoid over-loosening, which can cause the bit to fall out.
Insert The Bit
Inserting the bit into your Milwaukee hammer drill is a simple but important step. It ensures the drill works correctly and safely. This part explains how to place the bit properly for smooth operation.
Positioning The Bit Correctly
Hold the drill firmly and open the chuck by turning it counterclockwise. Align the bit straight with the chuck opening. Push the bit into the chuck as far as it will go. Check that the bit is centered and straight. This helps the drill work without wobbling.
Ensure Firm Placement
Turn the chuck clockwise to tighten it around the bit. Use your hand to make it tight at first. Then, give the drill a few gentle shakes to test if the bit stays in place. If it moves, tighten the chuck more. A firm bit prevents slipping and keeps your work safe.
Tighten The Chuck
Tightening the chuck on your Milwaukee hammer drill is key to holding the drill bit securely. It stops the bit from slipping during use. A tight chuck means better control and safer drilling. You must know how to tighten it properly for smooth work.
Manual Vs. Keyed Chuck
Milwaukee hammer drills come with two main chuck types: manual and keyed. A manual chuck tightens by hand. You twist it to lock the bit. It’s quick and easy for small jobs.
A keyed chuck uses a special key to tighten. The key fits into holes on the chuck. Turn the key to grip the bit firmly. This method offers stronger hold for heavy drilling.
Secure The Bit Firmly
Insert the drill bit into the chuck as deep as possible. Turn the chuck clockwise to tighten it. Make sure the bit does not wobble. Check by pulling the bit gently. If it moves, tighten the chuck more.
For keyed chucks, use the key on all holes. Tighten evenly around the chuck. This prevents the bit from loosening during work. A firm bit improves drilling accuracy and safety.
Credit: www.reddit.com
Test The Bit Installation
Testing the bit installation is an important step after loading a bit into your Milwaukee hammer drill. This ensures the bit is secure and ready for use. A quick test helps avoid accidents and damage to your drill or workpiece. Follow these simple steps to check the bit installation properly.
Power On And Test Spin
First, plug in or power on your Milwaukee hammer drill. Hold the drill firmly with both hands. Press the trigger gently to start the drill at a low speed. Watch the bit as it begins to spin. The bit should rotate smoothly without any wobbling or shaking. If the bit spins unevenly, stop immediately and check the installation again.
Check For Stability
Next, feel the drill’s grip and bit for any unusual movement. The bit must stay firmly in place during spinning. Try to wiggle the bit with your hand carefully. It should not move or loosen. If you notice any instability, turn off the drill and re-tighten the chuck. A stable bit keeps your work safe and accurate.
Tips For Efficient Bit Loading
Loading a bit in a Milwaukee hammer drill can be quick and easy. Following simple tips helps make the process smooth. Proper bit loading saves time and improves your work quality. These tips ensure your drill works well every time.
Regular Maintenance
Keep the chuck clean and free from dust. Wipe it with a dry cloth after each use. Check for rust or dirt that may block the bit. Lubricate the chuck occasionally to keep it moving smoothly. Proper maintenance stops bits from getting stuck or slipping.
Using The Right Accessories
Choose bits made for hammer drills to avoid damage. Use the correct size for your drill’s chuck. Avoid worn or damaged bits that can cause problems. Using the right accessories helps bits load faster and stay secure. It also extends the life of your drill and bits.

Credit: www.youtube.com
Frequently Asked Questions
How Do I Insert A Bit In A Milwaukee Hammer Drill?
To insert a bit, first unlock the chuck by turning it counterclockwise. Then, insert the bit straight into the chuck. Finally, tighten the chuck by turning it clockwise until the bit is secure and won’t wobble during use.
What Type Of Bit Fits Milwaukee Hammer Drills?
Milwaukee hammer drills typically use SDS-plus or standard drill bits. Make sure to check your drill model. Using the correct bit type ensures better performance and prevents damage to the tool or the bit.
How Tight Should The Chuck Be On A Hammer Drill?
The chuck should be tightened firmly to hold the bit securely. Avoid overtightening, which can damage the chuck or bit. A snug fit prevents slippage and ensures efficient drilling.
Can I Use Regular Drill Bits In A Milwaukee Hammer Drill?
Yes, you can use regular drill bits if your hammer drill has a standard chuck. For SDS chuck models, use SDS-compatible bits only for proper fitting and safety.
Conclusion
Loading a bit in a Milwaukee hammer drill is simple and quick. Just follow the steps carefully to avoid mistakes. Make sure the drill is off before you start. Insert the bit firmly and tighten it well. This helps you work safely and get the best results.
Practice a few times to feel confident using your drill. With these tips, you can handle your drill like a pro. Keep your tools ready and enjoy your projects without stress.