

Are you ready to take your electronics projects to the next level? Making your own PCB drill press can save you time, money, and give you precise control over your circuit boards.
Imagine drilling perfect holes every time without relying on expensive tools or services. In this guide, you’ll discover simple steps to build a drill press tailored for your PCB needs. Whether you’re a hobbyist or just starting out, this easy-to-follow process will empower you to create professional-quality boards right at home.
Keep reading, and you’ll soon have a reliable tool that makes your projects smoother and more enjoyable.
Choosing The Right Drill Press Type
Choosing the right drill press type is key to making a good PCB drill press. The drill press must fit your workspace and drilling needs. The wrong type can make your work harder or less precise. This section explains the main types and features to help you pick the best one.
Bench Vs. Floor Models
Bench drill presses sit on a table or workbench. They are smaller and save space. Ideal for small PCBs and light tasks. Easier to move and store. Floor models stand on the ground. They are bigger and heavier. Provide more power and stability. Best for larger PCBs and frequent use. Choose bench if space is tight or use is light. Pick floor if you need strength and steady drilling.
Essential Features For Pcb Drilling
Look for a drill press with adjustable speed settings. Different PCB materials need different speeds. A fine depth control is important for precise holes. The drill press should have a stable base to avoid wobbling. A small chuck size is better for tiny drill bits. Also, check for an easy-to-use on/off switch. A clear work light helps see the drilling area. These features improve accuracy and safety in PCB drilling.
Gathering Materials And Tools
Gathering materials and tools is the first step to build a PCB drill press. The right parts make the process smooth and efficient. Preparing everything before starting saves time and prevents mistakes.
Focus on quality parts. Choose items that fit your design and budget. Also, prepare safety gear to protect yourself during work.
Drill Components Needed
Start with a small, precise drill motor. A Dremel tool works well for PCB drilling. Add a drill bit holder to secure bits tightly. Choose drill bits designed for PCB material. A stable base or frame is essential. It keeps the drill steady and accurate. Include a vertical guide or column for straight drilling. A power switch or control module helps manage the tool easily.
Safety Equipment Checklist
Wear safety glasses to protect your eyes from dust and debris. Use a dust mask to avoid breathing fine particles. Gloves protect your hands from sharp edges and heat. Ear protection reduces noise from the drill motor. Ensure your workspace is well-lit and ventilated. Keep a first aid kit nearby for emergencies.
Building The Drill Press Base
Building the drill press base is a crucial step. A strong base keeps the drill steady. It helps avoid mistakes while drilling holes in the PCB. This section guides you through making a solid base.
Selecting A Stable Base Material
Choose a material that does not move or shake easily. Wood and metal are good options. Wood is easier to work with and cheaper. Metal offers more durability but needs more tools. The base should be heavy enough to hold the drill firmly.
Flatness is important. The surface must be smooth and even. This helps keep the PCB steady during drilling. Avoid materials that bend or warp under pressure.
Assembling The Base Frame
Start by cutting the base material to the right size. Make sure it is large enough to support the drill and PCB. Next, attach side supports to keep the base stable. Use screws or strong glue to hold parts together.
Check the frame for wobbling. Tighten screws or add extra supports if needed. The frame should not move when you press down. A firm base helps you drill precise holes every time.
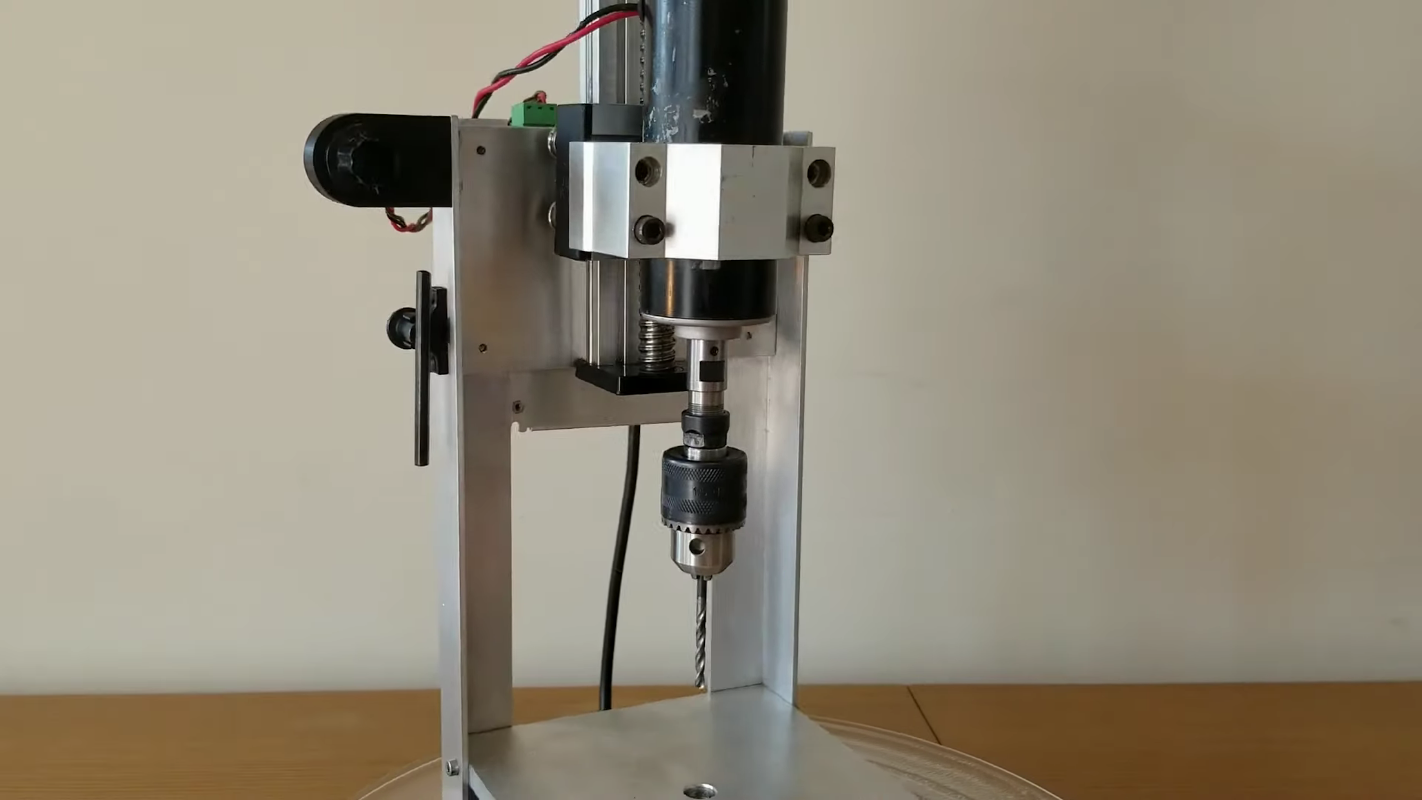
Installing The Drill Motor And Chuck
Installing the drill motor and chuck is a key step in building a PCB drill press. This part controls the drilling speed and precision. Proper installation ensures smooth operation and accurate holes on your circuit board.
Choose the right motor and attach it firmly. The chuck must hold drill bits tightly for clean drilling. Follow clear steps to mount both securely.
Motor Mounting Options
Select a motor that fits your drill press size and power needs. Common types include DC motors or small AC motors.
Mounting methods vary. Use a bracket or custom frame to hold the motor in place. The mount should reduce vibration and align the motor shaft with the drill spindle.
Secure the motor with screws or bolts. Double-check the alignment before tightening all fasteners. A stable motor improves drilling accuracy and tool life.
Attaching The Drill Chuck
The drill chuck connects the drill bit to the motor shaft. Choose a chuck size that fits your drill bits.
Insert the chuck onto the motor shaft. Some chucks screw on, others press fit. Use a wrench or hand tighten depending on the design.
Test the chuck by rotating it by hand. It should spin freely without wobble. Tighten the chuck to hold bits firmly during drilling.
Adding Adjustable Height And Depth Controls
Adding adjustable height and depth controls to your PCB drill press improves accuracy. It lets you set the drill bit at the exact position. This helps avoid drilling too deep or too shallow. These controls make the drilling process easier and safer.
Mechanisms For Vertical Movement
Vertical movement controls let you raise or lower the drill head smoothly. You can use a rack and pinion system for this. A threaded rod with a handle also works well. These mechanisms provide steady and controlled motion. This ensures precise positioning of the drill bit over the PCB.
Setting Precise Drilling Depth
Depth control stops the drill at the right point. Use a depth stop collar on the drill bit shaft. It prevents the bit from going too deep into the board. Another way is to use an adjustable stop block on the drill press frame. This allows quick changes in depth for different projects. Accurate depth control protects your PCB from damage.
Creating A Pcb Holder And Clamping System
Creating a PCB holder and clamping system is key for precise drilling. It keeps the board steady and stops any movement. A well-built holder saves time and improves accuracy. This part focuses on making a secure fixture and flexible clamps.
Designing A Secure Pcb Fixture
Start by choosing strong materials like wood or metal for the base. The fixture should fit the PCB size exactly to avoid wobbling. Add side supports to hold the board firmly in place. Make sure the surface is flat to keep the PCB level. Small rubber pads can help prevent slipping during drilling. The fixture should be easy to place and remove without damaging the board.
Adjustable Clamps For Various Sizes
Use clamps that can change to fit different PCB sizes. Sliding or screw clamps work well for this. Make the clamp arms wide enough to cover the board edges without blocking drill spots. Soft tips on clamps protect the PCB from scratches. Check that clamps hold the board tightly but do not bend it. Adjustable clamps increase the drill press’s flexibility for many projects.
Calibrating The Drill Press For Accuracy
Calibrating the drill press is a key step to ensure precise holes on your PCB. Accurate drilling avoids damage and keeps your circuit boards neat. This process requires careful adjustment of the drill bit and testing to confirm the setup. Taking time to calibrate saves frustration and material waste later.
Aligning The Drill Bit
Start by placing the drill bit into the chuck securely. Check the bit is straight and not loose. Lower the bit to the PCB surface gently. Observe if the bit hits the intended spot exactly. Use a magnifying glass if needed for better view. Adjust the bit position by loosening the chuck slightly and moving the bit. Tighten the chuck again and recheck alignment. Repeat until the bit centers perfectly over the mark.
Testing And Fine-tuning
Use a scrap PCB or similar material for test drilling. Make a small hole and inspect its position and size. If the hole is off-center, adjust the bit or table position slightly. Check the depth of the hole to avoid drilling through layers unintentionally. Test multiple points across the board to ensure uniform accuracy. Make small changes and test again after each adjustment. Confirm the drill press consistently makes precise holes before starting your main work.
Credit: hackaday.com
Operating Tips For Precision Drilling
Operating a PCB drill press needs care and attention. Precision drilling depends on how well you control the machine. Small mistakes can ruin your PCB board. Follow these tips to get clean, accurate holes every time.
Drill Speed Settings
Choose the right speed for your drill bit and material. Too fast can burn or melt the board. Too slow can cause rough holes and bit wear. Use a medium speed for small bits. Lower speeds suit larger bits or thick boards. Adjust speed based on how the drill feels and sounds.
Proper Drilling Techniques
Hold the PCB firmly to avoid movement. Use a clamp or fixture for stability. Start drilling slowly to avoid slipping. Keep the drill bit straight and steady. Do not push too hard; let the drill bit cut gently. Lift the bit occasionally to clear debris and cool the drill. Check holes often to ensure accuracy.
Maintaining Your Pcb Drill Press
Maintaining your PCB drill press is key to its long life and steady performance. Small care steps keep it running smooth and precise. Neglect can cause wear and errors in drilling.
Simple habits help avoid big problems. Clean parts and check moving pieces often. Keep the drill press ready for every PCB project.
Regular Cleaning And Lubrication
Dust and metal bits can build up on the drill press. Wipe down surfaces after every use. Use a soft cloth and mild cleaner. Remove chips from drill bits and work area.
Lubricate moving parts with light machine oil. Focus on the spindle, gears, and any sliding joints. Oil reduces friction and stops rust. Avoid using too much oil; a drop or two is enough.
Troubleshooting Common Issues
Drill bits that wobble or break may need replacement or tightening. Check the chuck for a firm grip. Loose parts can cause inaccurate holes.
Listen for strange noises. Grinding or squeaking means parts need cleaning or oiling. If the motor slows down, check the power source and connections.
Test the drill press before each job. Catch small problems early to avoid damage. Regular checks ensure smooth, accurate drilling every time.

Credit: thefickletinkerer.wordpress.com

Credit: play.fallows.ca
Frequently Asked Questions
What Tools Do I Need To Make A Pcb Drill Press?
To make a PCB drill press, you’ll need a motor, drill chuck, frame, power supply, and a control switch. Basic tools include a drill bit set, screws, nuts, and a mounting base for stability.
How Do I Ensure Precise Drilling On Pcbs?
Use a stable frame and a fine-adjustment mechanism to ensure precise drilling. Secure the PCB firmly to prevent movement. Choose the correct drill bit size for accurate holes.
Can I Use A Standard Drill For Pcb Drilling?
Standard drills can work but lack precision. A dedicated PCB drill press offers better control, accuracy, and prevents damage to the board. It’s safer and more efficient for delicate PCB work.
What Safety Tips Should I Follow When Building A Pcb Drill Press?
Always wear safety glasses and work in a well-lit area. Ensure all electrical connections are insulated. Keep fingers away from the drill bit and secure the PCB tightly before drilling.
Conclusion
Building a PCB drill press can save time and improve your work. It needs basic tools and some patience. Follow each step carefully for the best results. A good drill press helps make clean, accurate holes. It also protects your PCBs from damage.
Practice makes perfect, so try drilling on scrap boards first. With this tool, your PCB projects will look more professional. Keep your workspace safe and organized while working. Enjoy the process and learn as you go. This simple machine adds value to your electronics skills.