

Are you tired of spending extra money on expensive boot polishers or struggling to get that perfect shine on your boots? What if you could create your own cordless drill boot polisher quickly and easily at home?
This simple DIY tool will save you time, effort, and give your boots a professional finish every time. Keep reading, and you’ll discover step-by-step how to turn your cordless drill into a powerful boot polisher that works like a charm.
Your boots will thank you!
Materials Needed
Gathering the right materials is the first step to make a cordless drill boot polisher. The tools and supplies you choose affect how well your polisher works. Focus on quality and compatibility. This section covers the main materials you need to get started.
Choosing The Right Drill
Select a cordless drill with a comfortable grip and good battery life. Choose a drill with variable speed control for better polishing results. A drill with at least 12 volts power is ideal for this task. Avoid drills that are too heavy or bulky to handle easily.
Selecting Polishing Pads
Pick soft polishing pads made from foam or microfiber. These pads prevent damage to your boots while polishing. Choose pads that fit your drill’s chuck size, usually 1/4 inch or 1/2 inch. Different pad sizes help reach tight spots and larger surfaces.
Other Essential Supplies
Have polishing compound or cream ready for the best shine. Use a backing plate to attach the polishing pads to the drill securely. Keep clean cloths handy for wiping excess polish from boots. A small brush helps clean dirt before polishing.
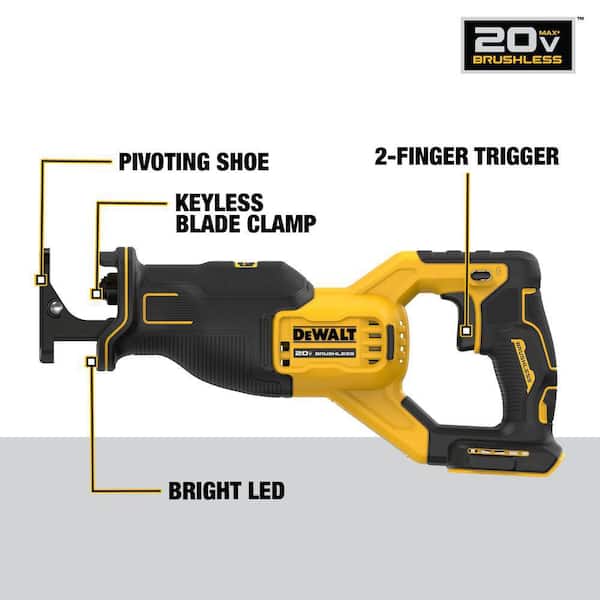
Credit: www.homedepot.com
Preparing The Drill
Preparing the drill is a key step to create a cordless drill boot polisher. This ensures the tool works safely and efficiently. A well-prepared drill lasts longer and delivers better results. Follow these steps carefully to get your drill ready for polishing boots.
Cleaning And Inspecting
Start by cleaning the drill to remove dust and dirt. Use a dry cloth or brush to wipe the surface. Check the drill for any damage or loose parts. Look at the chuck, switch, and battery area. Tighten any loose screws to avoid problems during use. Make sure the battery is fully charged for smooth operation.
Attaching The Polishing Pad
Choose a polishing pad that fits your drill chuck. Most pads have a shank size of 1/4 inch to fit standard drills. Insert the pad’s shank into the drill chuck firmly. Tighten the chuck by turning it clockwise until the pad is secure. Avoid over-tightening to prevent damage. Test the attachment by gently running the drill at low speed. The pad should spin evenly without wobbling.
Creating The Polishing Attachment
Creating the polishing attachment is a key step in making your cordless drill boot polisher. This attachment holds the polishing pads firmly. It allows the drill to clean and shine your boots efficiently. The process is simple and requires basic materials. Follow these steps to make a strong and effective polishing tool.
Cutting And Shaping Pads
Start by selecting soft polishing pads or old microfiber cloths. Cut them into round shapes about 3 to 4 inches wide. The size depends on your drill and boot size. Use scissors or a sharp blade for clean edges. Round pads work best for even polishing. Avoid rough or hard materials to protect your boots. Make sure the pads are not too thick. Thin pads spin faster and polish better.
Securing Pads To The Drill
Attach the pads to a flat piece of wood or plastic. This piece acts as a base for the pads. Use strong glue or double-sided tape to fix the pads. Let the glue dry completely before use. Next, connect the base to the drill’s chuck. Use a screw or bolt that fits tightly. Check for any wobbling or loose parts. A secure connection keeps the polishing smooth and safe. Your drill is now ready to polish boots quickly.

Credit: www.dgmindia.in
Polishing Techniques
Polishing techniques play a key role in making your cordless drill boot polisher effective. Using the right methods keeps your boots shiny and well-maintained. It also protects the material from damage and extends the life of your footwear.
Learning proper polishing steps helps you get the best shine with less effort. Each boot material needs a slightly different approach. Knowing these details will improve your results and keep your boots looking great.
Safety Tips
Always wear safety glasses to protect your eyes from flying debris. Use gloves to avoid skin irritation from polish or dust. Keep your work area clean and well-lit. Make sure the drill speed is low to prevent damage. Unplug the drill when changing polishing attachments. Avoid loose clothing that can get caught in the drill. Work slowly and carefully to maintain control.
Effective Polishing Movements
Use slow, circular motions for even polishing. Move the polisher gently over the boot surface. Avoid pressing too hard to prevent scratches. Focus on small sections at a time for better coverage. Keep the drill moving to avoid heat build-up. Use back-and-forth strokes on tough spots. Finish with light, quick strokes for a smooth shine.
Handling Different Boot Materials
For leather boots, use soft cloth attachments and mild polish. Suede boots need a gentle brush without liquid polish. Rubber boots require a stiff brush and water-based cleaner. Avoid harsh chemicals on delicate fabrics. Test polish on a small area first. Adjust drill speed based on material hardness. Clean boots before polishing for best results.
Maintenance And Care
Proper maintenance and care keep your cordless drill boot polisher working well. Clean tools last longer and work better. Small steps help avoid damage and save money. Follow these tips to maintain your polisher and its parts.
Cleaning The Polisher
Remove dirt and dust after each use. Use a soft cloth to wipe the drill and polisher pads. Avoid water near the motor or battery area. For tough stains, use a damp cloth and dry immediately. Check the pads often for wear and replace if needed. Clean pads polish better and protect your boots.
Storing The Drill And Accessories
Store your drill and accessories in a dry place. Keep them away from direct sunlight and moisture. Use a case or box to keep parts organized and safe. Remove the battery if you won’t use the drill for a long time. Charging the battery fully before storage helps keep it healthy. Proper storage extends the life of your polisher and drill.
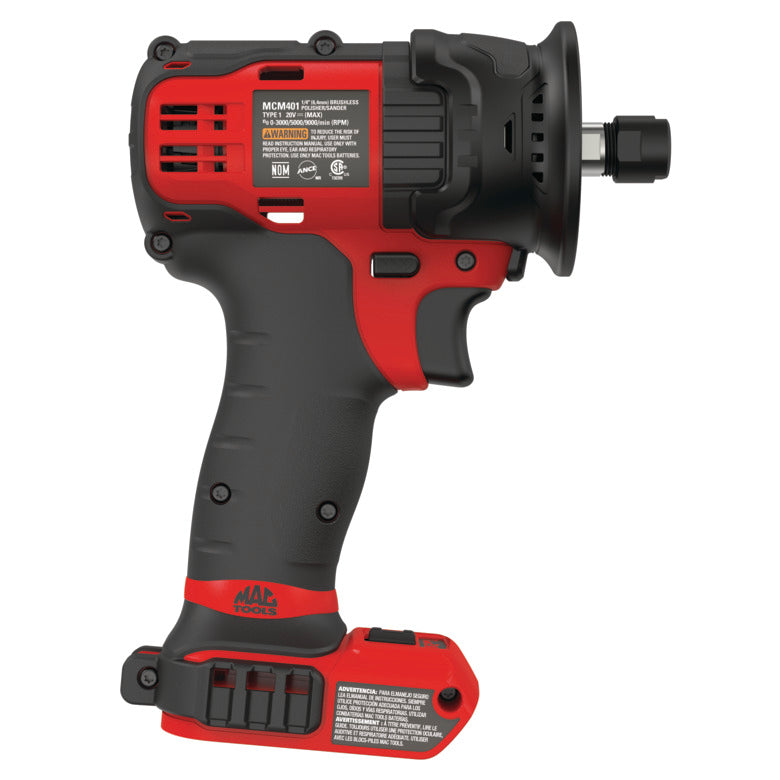
Credit: www.mactools.com
Troubleshooting Common Issues
Troubleshooting common problems helps you keep your cordless drill boot polisher working well. Small issues can stop your tool from giving a smooth polish. Fixing these problems fast saves time and effort. Learn simple ways to solve two usual problems below.
Dealing With Uneven Polishing
Uneven polishing can spoil your boots’ look. Check the polishing pad first. Dirt or wear can cause uneven results. Clean or replace the pad if needed. Hold the drill steady and move it evenly across the boot. Avoid pressing too hard. Let the polisher do the work. Work in small sections for a consistent shine. Use the right polish type for your boot material. This helps the polish spread evenly and look better.
Fixing Loose Attachments
Loose attachments can be unsafe and reduce polish quality. Turn off the drill before adjusting anything. Tighten the attachment firmly by hand first. Use a wrench or pliers if it stays loose. Check the attachment’s fitting part for damage. Replace worn parts to keep a tight fit. Regularly inspect attachments before each use. This prevents accidents and keeps polishing smooth. Secure attachments improve control and polish quality.
Frequently Asked Questions
How Do I Make A Cordless Drill Boot Polisher?
To make a cordless drill boot polisher, attach a polishing pad to your drill. Use soft cloth or foam pads, secure them with adhesive or velcro. Operate the drill at low speed to polish boots efficiently and evenly.
What Materials Are Needed For A Drill Boot Polisher?
You need a cordless drill, polishing pads or soft cloths, adhesive or velcro, and leather-safe polish. Optional materials include foam backing and a drill chuck adapter for better attachment and control during polishing.
Can Any Cordless Drill Be Used For Polishing Boots?
Yes, most cordless drills work well if they have adjustable speeds. Low speed settings prevent damage to boots while polishing. Choose a drill with good battery life for longer polishing sessions.
How To Safely Use A Cordless Drill For Boot Polishing?
Always start at low speed to avoid overheating. Use soft polishing pads and apply gentle pressure. Keep the drill moving to prevent uneven polish or damage. Wear protective gloves if needed.
Conclusion
Making your own cordless drill boot polisher saves time and money. The process is simple and uses common materials. You can polish boots quickly without buying expensive tools. This DIY project suits anyone who likes easy home fixes. Try it out and see the difference in your boots.
Keep your shoes shiny with little effort. A small tool can make a big impact. Start polishing today and enjoy cleaner, brighter boots.