

If you’ve ever wanted to turn your drill press into a versatile milling machine, you’re in the right place. Milling with a drill press might sound tricky, but with the right steps, you can achieve precise cuts and shapes without expensive equipment.
Imagine being able to create custom parts or fix something with just the tools you already have. This guide will walk you through everything you need to know to start milling with your drill press safely and effectively. Keep reading—you’re about to unlock a new skill that can save you time, money, and frustration.
Choosing The Right Drill Press
Choosing the right drill press is important for milling projects. The drill press must be strong and precise. It should handle different materials and cuts without problems. Picking the right one saves time and improves your work quality.
Drill Press Types
There are several types of drill presses. Bench-top models are small and fit on a table. They are good for light tasks. Floor models stand on the ground and are bigger. They offer more power and depth. Radial drill presses have an arm that moves side to side. This helps with large pieces. Choose a type that matches your work size and space.
Key Features To Consider
Look for a drill press with adjustable speed settings. Different speeds help cut different materials. Check the chuck size; bigger sizes hold larger bits. A strong motor is important for smooth cutting. The table should tilt and move for better angles. A sturdy base prevents shaking during milling. Safety features like a guard are also useful.
Setting Up For Milling
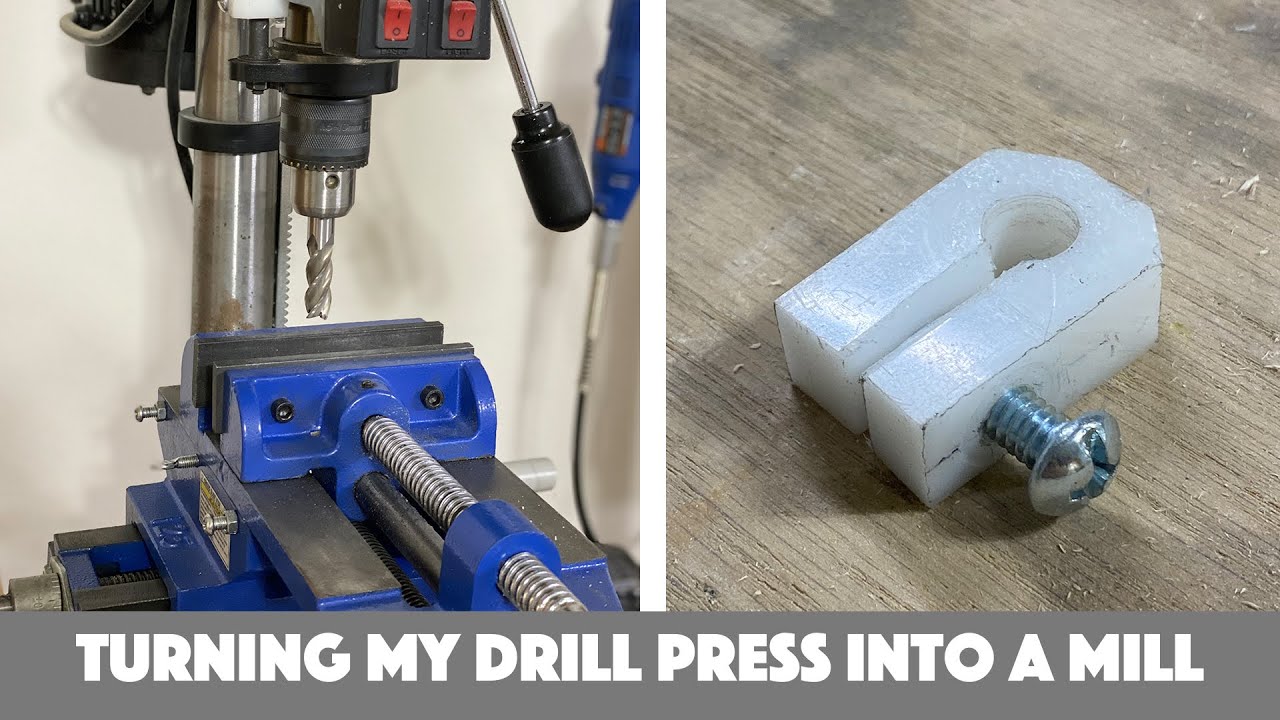
Place the drill press on a firm, level surface. Secure the workpiece tightly using clamps. Adjust the table height to match your project. Use the right milling bit for clean cuts. Set the speed according to the material you use. Keep the area clean to avoid accidents. Proper setup ensures better control and results.

Credit: www.scribd.com
Essential Milling Tools And Accessories
Milling with a drill press needs the right tools and accessories. These tools help you shape materials accurately and safely. Without them, the process becomes hard and risky.
Essential tools include cutters designed for milling, devices to hold your work steady, and safety gear to protect you. Each plays a key role in achieving good results.
Milling Cutters For Drill Press
Milling cutters are special bits that remove material from your workpiece. They come in various shapes and sizes. Choose cutters that fit your drill press and project needs. Common types include end mills, slot drills, and face mills. Sharp cutters make clean cuts and reduce effort.
Workholding Devices
Workholding devices keep your material steady during milling. Clamps, vises, and jigs prevent movement and improve precision. A secure hold reduces errors and protects you from accidents. Pick devices that match the size and shape of your workpiece. Proper workholding also helps produce smooth surfaces.
Safety Gear
Safety gear is vital when milling with a drill press. Wear safety glasses to protect your eyes from chips and dust. Use ear protection to guard against noise. Gloves can protect your hands but avoid loose ones that might catch in moving parts. Always follow safety rules to prevent injuries.
Preparing The Drill Press For Milling
Preparing the drill press for milling is a vital first step. It ensures safety and precision. This process involves a few key actions. Removing the chuck, installing the milling cutter, and adjusting speed settings are essential tasks.
Removing The Chuck
Start by unplugging the drill press for safety. Use the chuck key to loosen the jaws holding the drill bit. Turn the chuck counterclockwise to remove it. Some models may require a special wrench or tool. Keep the chuck in a safe place for future use.
Installing The Milling Cutter
Select the right milling cutter for your project. Insert the cutter shank into the drill press spindle. Tighten the spindle collar securely to hold the cutter. Ensure the cutter is centered and straight. This helps avoid wobbling and uneven cuts.
Adjusting Speed Settings
Check the drill press manual for speed recommendations. Milling usually requires slower speeds than drilling. Adjust the belt or dial to set the correct speed. Lower speeds give better control and reduce cutter wear. Test the speed before starting your milling task.

Credit: www.youtube.com
Securing The Workpiece
Securing the workpiece is a key step when milling with a drill press. A firmly held material prevents slips and ensures precise cuts. Loose workpieces can cause damage or injury. Proper securing boosts accuracy and safety during milling.
Using Vices And Clamps
Use a vice or clamps to hold your workpiece tightly. A drill press vice fits well on the table and grips the material firmly. Clamps can hold irregular shapes or larger pieces. Always choose the right size and type for your workpiece. Tighten them enough to stop any movement without damaging the material.
Aligning The Material
Place the workpiece carefully to match the drill bit’s path. Check its position from all sides before starting. Aligning the material correctly helps in making straight and clean cuts. Use the drill press table’s grooves or markings as guides. Small adjustments can make a big difference in the final result.
Preventing Movement
Prevent any movement by double-checking the clamps or vice. Tap the workpiece lightly to see if it shifts. Use scrap wood or padding between clamps and the workpiece to avoid damage. Secure every side that can move during milling. A steady workpiece means safer and more precise milling.
Milling Techniques With A Drill Press
Milling with a drill press is possible with the right techniques. These methods help you shape and cut materials precisely. You can perform many tasks usually done by a mill, using a drill press. The key is to control the tool and material carefully. This section explains important milling techniques for your drill press.
Controlling Feed Rate
Feed rate means how fast you push the material into the drill bit. Controlling feed rate is important to avoid breaking the bit or damaging the workpiece. Move the material slowly and steadily. Use a clamp or vise to hold the workpiece tight. A slow feed rate gives a cleaner cut and better control.
Making Straight Cuts
Making straight cuts requires a steady hand and proper setup. Use a fence or guide to keep the material aligned. Mark the cutting line clearly on the workpiece. Lower the drill press slowly and keep the bit on the marked line. Check your progress often to stay on track.
Performing Slotting Operations
Slotting means cutting narrow grooves or slots in the material. Use a slotting bit or a thin cutter for this task. Secure the workpiece firmly to prevent movement. Lower the bit slowly and make several shallow passes. Repeat until the slot reaches the desired depth.
Troubleshooting Common Issues
Troubleshooting common issues while milling with a drill press helps keep your work smooth and accurate. Problems like vibration, overheating, and inaccurate cuts can slow you down. Knowing how to fix these issues saves time and effort.
Dealing With Vibration
Vibration makes cutting uneven and can damage the material. Check if the drill press is on a stable surface. Tighten all bolts and screws to reduce movement. Use sharp and balanced milling bits to lower vibration. Slow the drill speed if vibration persists. Adding weight to the base can help stabilize the machine.
Avoiding Overheating
Overheating dulls the milling bit and ruins the material. Use cutting oil or lubricant to keep the bit cool. Take breaks during long cuts to let the machine cool down. Lower the drill speed for harder materials. Keep the milling bit clean to improve heat dissipation. Replace the bit if it shows signs of wear.
Fixing Inaccurate Cuts
Inaccurate cuts spoil your project and waste material. Make sure the workpiece is clamped tightly to prevent movement. Align the milling bit carefully before starting. Check the drill press table for any wobble and fix it. Use a fence or guide to keep cuts straight. Adjust the feed rate to avoid pushing too hard or too fast.
Maintenance Tips For Milling Setup
Maintaining your milling setup is key for smooth and precise work. Regular care keeps the drill press running well. It helps avoid breakdowns and extends tool life. Simple steps can save time and money. Focus on cleaning, checking parts, and storing tools right.
Cleaning And Lubrication
Clean the drill press after every use. Remove metal shavings and dust from all surfaces. Use a soft brush or cloth to wipe parts. Lubricate moving parts with machine oil to reduce wear. Avoid over-lubricating to prevent dirt buildup. Regular cleaning keeps the machine smooth and accurate.
Inspecting Components
Check belts, gears, and bolts often. Look for signs of wear or damage. Tighten loose screws and nuts immediately. Replace worn parts to keep safety and precision. Inspect the spindle and chuck for play or cracks. Early detection of issues prevents bigger problems later.
Storing Tools Properly
Store milling tools in a dry, clean place. Use cases or racks to keep drill bits organized. Avoid stacking parts where they can get damaged. Cover the drill press with a dust cover when not in use. Proper storage prevents rust and keeps tools ready for work.
Credit: www.youtube.com
Frequently Asked Questions
How Do I Mill Metal Using A Drill Press?
To mill metal with a drill press, secure the workpiece firmly. Use a milling attachment or modify the drill press. Operate at low speeds for metal. Move the workpiece slowly for accurate cuts. Always wear safety gear while milling.
What Tools Are Needed For Milling On A Drill Press?
You need a drill press, milling attachment, cutting tools, clamps, and a vise. Proper cutting bits and safety equipment like goggles are essential. A lubricant for metal milling helps. Having measuring tools ensures precise cuts and better milling results.
Can A Drill Press Replace A Milling Machine?
A drill press can perform basic milling with attachments but lacks precision and power of a milling machine. It is suitable for light, small jobs. For complex or heavy milling, a dedicated milling machine is recommended.
What Speed Should I Use For Milling With A Drill Press?
Use low to medium speeds for milling, depending on material hardness. Slower speeds prevent tool damage and overheating. For metals, keep speeds between 200-500 RPM. Always check the drill press manual for recommended milling speeds.
Conclusion
Milling with a drill press is a useful skill anyone can learn. Start slow and keep safety in mind. Use the right tools and take your time with each cut. Practice will improve your results every time. This method saves money and adds flexibility to your work.
Try different materials to see what works best. Soon, milling will feel natural and simple. Enjoy creating precise parts with your drill press. Keep learning and experimenting for better skills.