

Are you struggling to figure out how to put bits in your impact driver quickly and safely? You’re not alone.
Many people find this simple step confusing, which can slow down your work or even cause damage. But once you know the right way, you’ll save time and avoid frustration every time you use your tool. You’ll learn easy, step-by-step instructions that anyone can follow.
Keep reading, and you’ll master this skill in minutes—making your projects smoother and more efficient than ever.
Credit: www.liftingitalia.com
Choosing The Right Bits
Choosing the right bits for your impact driver is key to a smooth and efficient work process. The correct bit helps you work faster and prevents damage to your tool or materials. Not all bits fit or perform the same. Knowing the differences helps you pick the best ones for your tasks.
Types Of Bits For Impact Drivers
Impact drivers use special bits designed to handle high torque. Common types include Phillips, flathead, Torx, and hex bits. Each type fits different screws and bolts. Using the right type avoids slipping and stripping screws.
Impact-rated bits have a stronger design. They last longer under the force of an impact driver. Regular drill bits might break quickly with an impact driver.
Material And Durability
Bits come in many materials like steel, chrome vanadium, and titanium. Steel bits work for general tasks. Chrome vanadium bits are tougher and resist wear. Titanium bits offer extra strength and last longer.
Look for bits labeled “impact rated.” These bits resist breaking and bending. They are made from hardened steel to handle strong impacts.
Size And Compatibility
Bits come in different sizes and shank types. The shank is the part that fits into your impact driver. Most impact drivers use 1/4-inch hex shanks.
Check the size of the screw or bolt before picking a bit. Using the wrong size can damage the screw head or the bit itself. Always match bit size to your fastener.

Credit: www.youtube.com
Preparing Your Impact Driver
Preparing your impact driver is the first step before inserting any bit. It helps ensure safety and smooth operation. Taking time to get ready prevents damage and keeps you safe.
This preparation stage includes important checks and safety steps. Follow these simple actions to get your tool ready for work.
Safety Precautions
Wear safety glasses to protect your eyes. Avoid loose clothing or jewelry near the driver. Keep your workspace clean and well-lit. Use gloves if needed to improve grip. Stay focused and avoid distractions while handling the tool.
Power Off And Unplug
Always turn off the impact driver before changing bits. Remove the battery or unplug the cord if it is corded. This prevents accidental starts that can cause injury. Double-check that the tool is completely off before proceeding.
Inspecting The Chuck
Look closely at the chuck where the bit goes. Make sure it is clean and free of dust or debris. Check for any cracks or damage on the chuck. A damaged chuck can cause the bit to slip or break. Tighten the chuck if it feels loose before inserting the bit.
Inserting The Bit
Inserting a bit into an impact driver is simple and quick. This process helps you use the tool effectively for various tasks. Follow these clear steps to insert the bit properly and safely.
Releasing The Chuck
Start by holding the impact driver firmly. Twist the chuck counterclockwise to loosen it. This action opens the chuck jaws. Keep twisting until the jaws open wide enough. The bit slot will be clear to insert the bit.
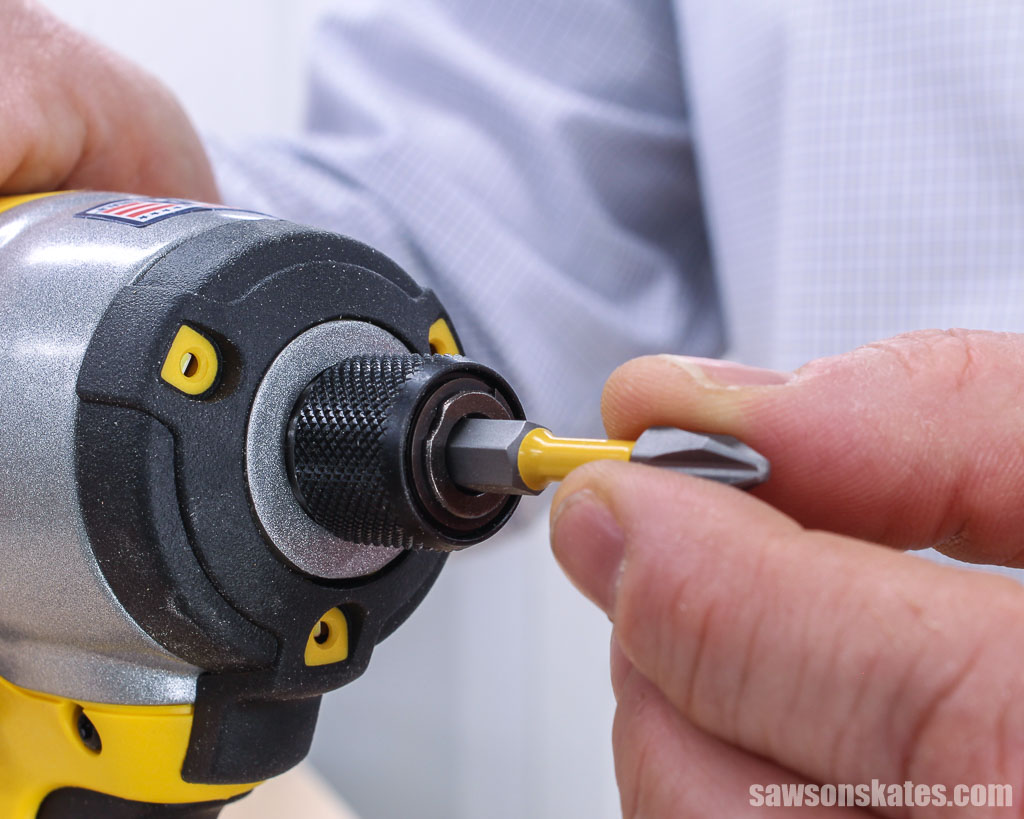
Aligning The Bit
Choose the correct bit for your task. Hold the bit near the chuck opening. Align the bit’s square or hex shank with the chuck slot. Make sure it fits straight and snug. This alignment prevents slipping during use.
Securing The Bit
Push the bit firmly into the chuck. Twist the chuck clockwise to tighten it. The jaws will grip the bit securely. Check the bit by pulling gently to test. Ensure it does not come loose during work.
Testing The Bit Installation
Testing the bit installation is an important step after placing the bit in your impact driver. It helps ensure the bit fits well and works smoothly. This step prevents damage to both the tool and the bit. Follow these simple checks to confirm your installation is correct.
Checking For Proper Fit
Look at the bit and the driver closely. The bit should sit tightly in the chuck or collet. It must not wobble or feel loose. A loose bit can cause slipping during use. Make sure the bit is pushed in fully. A good fit keeps your work safe and steady.
Running A Test Spin
Turn on the impact driver at low speed. Watch the bit spin carefully. It should rotate evenly without shaking. Listen for strange noises or vibrations. These signs show the bit might be loose or not seated correctly. Stop the tool immediately if you notice any issues.
Adjusting If Necessary
If the bit is loose or wobbly, remove it. Clean the bit and the chuck from dust or debris. Reinsert the bit firmly and check the fit again. Tighten the chuck properly if your driver has a locking mechanism. Repeat the test spin until the bit spins smoothly. Proper adjustment keeps your tool working well and safe.
Maintaining Your Bits And Driver
Maintaining your impact driver and its bits keeps them working well and lasting longer. Regular care prevents damage and makes your tasks easier. Small steps like cleaning, storing properly, and checking for wear can save money over time. Proper maintenance helps you avoid problems during work.
Cleaning And Storage Tips
Clean bits after each use. Wipe away dirt, dust, and grease with a dry cloth. Use a small brush for stubborn debris. Store bits in a dry case to stop rust. Keep your impact driver in a cool, dry place. Avoid leaving tools in damp or dirty areas.
Replacing Worn Bits
Check bits often for signs of wear. Look for rounded edges, cracks, or chips. Worn bits slip and damage screws. Replace bits that look damaged or dull. Use new bits to keep your work smooth and safe. Proper bits reduce wear on your driver too.
Regular Tool Maintenance
Inspect your impact driver regularly. Tighten loose parts and check for cracks. Keep the chuck clean and free of debris. Lubricate moving parts as per the manual. Charge batteries fully and store them correctly. Regular care keeps your tool ready and reliable.

Credit: www.reddit.com
Frequently Asked Questions
How Do I Insert Bits Into An Impact Driver?
To insert bits, first pull the collar on the chuck back. Next, align the bit with the hexagonal socket. Push the bit firmly into the chuck until it clicks. Release the collar to lock the bit securely in place.
Can I Use Regular Drill Bits In An Impact Driver?
No, regular drill bits are not recommended. Use impact-rated bits designed for high torque. These bits are stronger and less likely to break during heavy use in an impact driver.
How Do I Remove A Bit From An Impact Driver?
Pull the collar on the chuck back to release the bit. Then, simply pull the bit out. Make sure the driver is off to avoid injury or damage.
What Types Of Bits Work Best With Impact Drivers?
Hex-shank bits are best for impact drivers. They fit securely and prevent slipping. Impact-rated screwdriver and drill bits are designed to handle high torque and last longer.
Conclusion
Putting bits in an impact driver is simple and quick. Just open the chuck, insert the bit, and push firmly. Make sure the bit fits tightly to avoid slipping. Using the right bit keeps your work safe and efficient. Practice this a few times to feel confident.
Now, you can handle your impact driver with ease. Keep your tools ready, and enjoy your projects.