

If your cordless drill feels like it’s losing power or making unusual noises, it might be time to re grease it. Keeping your drill properly lubricated is key to making it run smoothly and last longer.
In this guide, you’ll learn exactly how to re grease your cordless drill quickly and easily, even if you’ve never done it before. By the end, you’ll have the confidence to maintain your drill like a pro—and save money on repairs or replacements.
Ready to bring your drill back to life? Let’s get started.

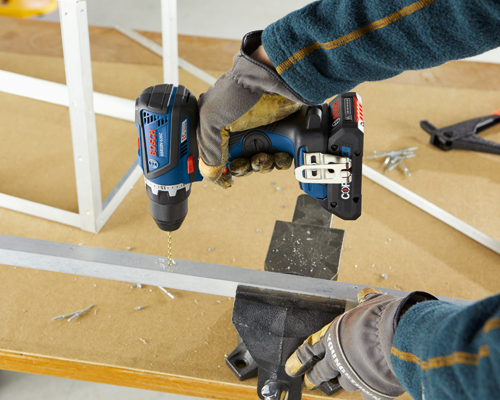
Credit: stonedesignbysantos.com
Signs Your Drill Needs Regreasing
Knowing the signs your cordless drill needs regreasing can save you time and money. Grease keeps the drill parts moving smoothly. Without enough grease, the drill may stop working well. Watch for changes in how your drill feels and sounds. These hints tell you it needs care soon.
Reduced Performance
The drill may slow down during use. It might struggle to drill through materials it used to handle easily. Reduced power means the internal parts are not moving smoothly. Lack of grease causes more friction inside the drill. This friction lowers the drill’s efficiency and speed.
Unusual Noises
Listen for grinding or squeaking sounds. These noises are not normal for a cordless drill. They happen when metal parts rub without enough grease. The noise can increase as you continue to use the drill. Strange sounds are a clear sign to check the grease level.
Overheating Issues
The drill may get hot quickly during use. Overheating happens because the parts are working harder than usual. Without grease, friction creates extra heat inside the drill. This heat can damage the motor and shorten the drill’s life. Overheating means it’s time to regrease your tool.
Tools And Materials Needed
Before you start greasing your cordless drill, gather the right tools and materials. Using the correct items makes the task easier and safer. It also helps protect your drill from damage. Below is a list of what you need.
Types Of Grease
Choose a grease made for power tools or machinery. Lithium-based grease is common and works well. It stays thick under heat and reduces friction. Avoid oils or sprays that can drip or wear off fast. Good grease keeps your drill running smooth and lasts longer.
Essential Tools
You will need a small screwdriver to open the drill casing. A clean cloth helps wipe old grease and dirt. A small brush or toothpick can apply grease in tight spots. Keep a container to hold screws so none get lost. Having these tools ready saves time and effort.
Safety Gear
Wear safety glasses to protect your eyes from dust and grease. Use gloves to keep your hands clean and safe. A mask can stop you from breathing dust or fumes. Safety gear protects you while working and keeps the job neat.
Preparing Your Drill
Preparing your cordless drill is a key step before adding new grease. Proper preparation helps keep the drill safe and makes the process easier. Take your time with each step to avoid damage. Clean and organized work ensures better results and longer tool life.
Removing The Battery
First, remove the battery from your cordless drill. This stops power from running through the tool. Press the release buttons on the battery pack. Pull the battery out gently. Keep the battery away from dirt and moisture during the process.
Cleaning The Exterior
Next, clean the drill’s outside surface. Use a dry cloth or a soft brush. Remove dust, grease, and dirt. Avoid water or liquid cleaners. Dirt on the outside can enter inside when you open the drill. Clean surfaces help you see screws and parts clearly.
Disassembling The Drill
Now, take apart the drill carefully. Find the screws that hold the casing together. Use the correct screwdriver for these screws. Keep screws in a safe place to avoid losing them. Slowly open the drill’s body. Be gentle with wires and small parts inside.
Credit: stonedesignbysantos.com
Applying Grease To Key Components
Applying grease to the key components of a cordless drill helps it run smoothly. Grease reduces friction and prevents parts from wearing out. Proper greasing keeps the drill working longer and saves repair costs.
Focus on the gears and bearings, as these parts need the most lubrication. Use the right amount of grease and apply it carefully. This section explains how to find these parts and grease them correctly.
Locating Gears And Bearings
Open the drill casing carefully to see inside. The gears are usually near the motor and chuck. Bearings support the rotating parts and sit close to the gears. Find all moving parts that touch each other. These need grease to work well.
Proper Greasing Techniques
Use a small brush or your finger to apply grease. Spread it evenly on the gears and bearings. Rotate the parts slowly to spread the grease inside. Avoid leaving thick layers. A thin, even coat works best for smooth motion.
Avoiding Overgreasing
Too much grease can cause problems. It attracts dust and dirt, which wear down parts. Excess grease may leak and make the drill messy. Use just enough to cover the surfaces lightly. Check for leaks and clean off extra grease.
Reassembling The Drill
Reassembling the cordless drill is a crucial step after greasing. Proper assembly ensures smooth operation and extends the drill’s life. Take your time to put each part back carefully. Follow the order in which you disassembled the drill. Keep parts clean and use the right tools for the job.
Putting Components Back
Start by placing the internal parts in their original positions. Insert the motor and gearbox gently. Align gears and shafts carefully to avoid damage. Make sure the grease stays where it should. Place the drill casing halves together without forcing them. Check that no wires are pinched or out of place.
Securing Screws And Parts
Use the correct screws for each spot. Tighten screws evenly and firmly, but do not over-tighten. Over-tightening can crack the plastic housing. Keep screws organized during disassembly to avoid confusion. Secure any small parts, like springs or clips, that hold components in place. Double-check all screws before moving on.
Testing Functionality
After reassembly, test the drill before full use. Insert the battery and switch the drill on. Listen for unusual sounds or vibrations. Check that the chuck spins smoothly. Test forward and reverse functions. If anything feels wrong, open the drill and check again. Proper testing prevents damage and ensures safety.
Maintenance Tips For Longevity
Maintaining a cordless drill properly helps it last longer and work better. Simple steps keep the drill in good shape and avoid costly repairs. Regular care protects the motor and gears inside the drill.
Focus on cleaning, storing, and regreasing to extend the drill’s life. These small tasks make a big difference.
Regular Cleaning
Remove dust and debris after every use. Use a soft brush or cloth to clean vents and surfaces. Keep dirt away from moving parts to avoid damage. Clean the chuck and battery contacts to ensure smooth operation.
Proper Storage
Store your drill in a dry, cool place. Avoid damp or dusty areas that can harm the tool. Use the original case or a sturdy box for protection. Keep the battery separate if you do not plan to use the drill soon.
Periodic Regreasing Schedule
Set a regular time for regreasing the drill’s gears. Use the correct grease recommended by the manufacturer. Too little grease causes friction; too much can attract dirt. Check the drill’s manual for specific guidance on how often to regrease.
Credit: www.homedepot.com
Frequently Asked Questions
How Often Should I Re Grease My Cordless Drill?
You should re grease your cordless drill every 6 to 12 months. Frequent use in tough conditions requires more frequent lubrication. Regular greasing ensures smooth operation and extends the drill’s lifespan.
What Type Of Grease Is Best For Cordless Drills?
Use a high-quality lithium-based grease for cordless drills. This grease resists heat, water, and wear. Avoid petroleum-based greases as they can damage plastic and rubber parts inside the drill.
Can I Re Grease A Cordless Drill Without Disassembly?
Partial re greasing without full disassembly is possible if the drill has grease ports. However, thorough cleaning and greasing require opening the drill. Disassembly ensures proper lubrication of all internal components.
What Tools Do I Need To Re Grease A Cordless Drill?
You need a screwdriver, cleaning cloth, brush, and appropriate grease. Also, use gloves to protect your hands. Having a manual helps to identify parts and follow correct re greasing steps.
Conclusion
Regularly greasing your cordless drill keeps it running smoothly. It helps stop parts from wearing out too fast. Use the right grease and follow steps carefully. Clean old grease before adding new for best results. This small task saves money on repairs later.
Your drill will work better and last longer. Simple care makes a big difference in tool life. Keep your drill ready for any job at hand.