

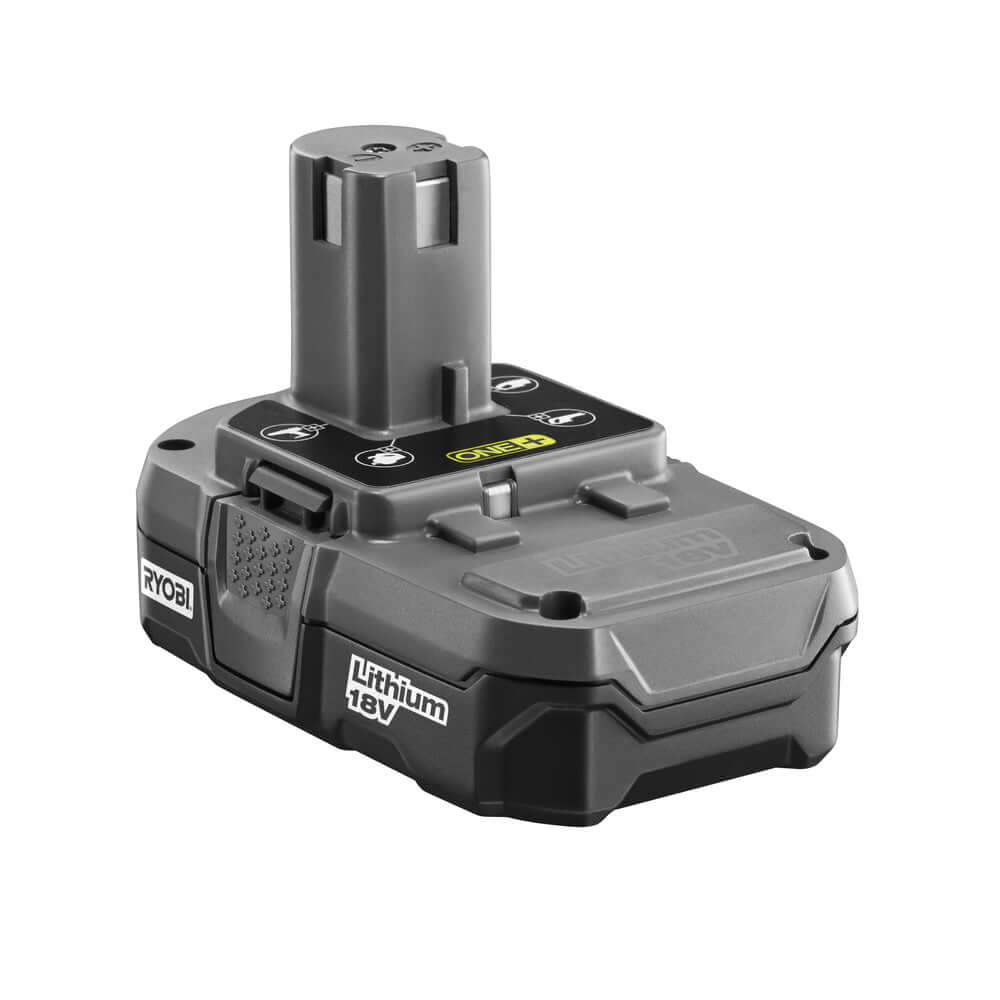
Is your Ryobi 18 Volt cordless drill losing power faster than it used to? You don’t have to buy a new battery or a whole new drill just yet.
Rebuilding your drill’s battery can save you money and bring your tool back to life. In this guide, you’ll learn simple, step-by-step methods to restore your battery’s performance. Keep reading, and by the end, you’ll feel confident tackling this easy fix yourself—no expert skills needed.
Your drill will thank you!
Tools And Materials Needed
Rebuilding a Ryobi 18 Volt cordless drill battery requires specific tools and materials. These help you work safely and efficiently. Preparing all items before starting saves time and avoids mistakes. Below are the key tools and materials needed for this task.
Essential Tools
You need a soldering iron to connect battery cells. A multimeter helps check voltage and continuity. Wire cutters and strippers prepare wires for soldering. Small screwdrivers open the battery case. A heat gun or lighter can shrink heat shrink tubing. Tweezers help handle small parts safely. A work mat or tray keeps parts organized.
Replacement Cells
Use high-quality 18650 lithium-ion cells for best results. Match the original battery’s voltage and capacity. Buy cells from trusted suppliers only. Avoid cheap or unknown brands. New cells ensure longer battery life and safe use. Check each cell’s voltage before installation.
Safety Equipment
Wear safety glasses to protect your eyes from sparks. Use gloves to prevent burns or cuts. Work in a well-ventilated area to avoid inhaling fumes. Keep a fire extinguisher nearby. Avoid metal jewelry to prevent shorts. Follow safety guidelines strictly to avoid accidents.
Identifying Battery Type
Identifying the battery type is the first step in rebuilding your Ryobi 18 Volt cordless drill battery. It helps you understand what you are working with. Knowing the battery model and specs ensures you get the right replacement parts. Understanding the cell configuration shows how the battery is built inside. This knowledge makes the rebuilding process safer and more effective.
Battery Model And Specs
Start by checking the battery label. The model number is usually printed on the side or bottom. This number tells you the exact battery type used in your drill. Look for voltage, capacity (mAh or Ah), and chemistry type (NiCd, NiMH, or Li-ion). These details guide you in choosing the right cells for replacement. Using mismatched specs can damage your drill or reduce performance.
Cell Configuration
Battery packs contain several cells connected in series or parallel. Series connections increase voltage. Parallel connections increase capacity. Count the number of cells inside the pack. Most Ryobi 18 Volt batteries use 15 cells in series (1.2V each for NiCd or NiMH). Understanding this setup helps you rebuild the pack correctly. It ensures your drill runs smoothly and lasts longer.
Disassembling The Battery Pack
Disassembling the battery pack is the first step in rebuilding your Ryobi 18 Volt cordless drill batteries. This process requires care and attention. You need to open the pack without damaging any parts inside. Each part plays a key role in the battery’s performance. Understanding how to remove the outer case and separate the battery cells helps you replace or fix old components.
Removing The Outer Case
Start by turning off the drill and removing the battery pack. Look for screws or clips that hold the case together. Use a screwdriver to remove screws carefully. If there are clips, gently pry them open with a flat tool. Avoid using too much force to prevent cracks. Once the case opens, keep the parts safe for reassembly. You will see the battery cells inside, connected by wires and metal strips.
Separating Battery Cells
Inside the pack, the battery cells are linked in a series or parallel setup. Use a soldering iron to melt the solder points connecting the cells. Work slowly to avoid overheating or damaging the cells. Mark the cells as you remove them to keep track of their order. Check for any swollen or damaged cells and set them aside. Proper separation allows you to test and replace faulty cells easily.

Credit: www.youtube.com
Testing And Selecting Cells
Testing and selecting cells is a vital step in rebuilding your Ryobi 18 Volt cordless drill battery. It ensures that the battery pack works efficiently and lasts longer. Good cells keep the drill running strong and safe. You must check each cell carefully before using it.
Not all cells hold the same power or charge. Some may be weak or damaged. Using poor cells can cause the battery to fail quickly. Testing helps find the healthy cells that give the best performance. This step saves time and money in the long run.
Using A Multimeter
A multimeter measures voltage and helps check each cell’s health. Set the multimeter to DC voltage mode. Touch the probes to the cell terminals carefully. Read the voltage on the screen.
Healthy cells usually show about 3.6 to 3.7 volts. Lower voltage means the cell may be weak or dead. Avoid cells with less than 3.3 volts. Repeat this for every cell in the battery pack.
Choosing Healthy Cells
Pick cells with similar voltages for balanced power. Cells with matching voltage work better together. Avoid cells with bulges, leaks, or rust. These signs show damage and poor condition.
Sort cells by voltage and capacity. Use the strongest cells for rebuilding. This choice improves battery life and drill performance. Proper selection makes your rebuilt battery safer and more reliable.
Replacing Old Cells
Replacing old cells in your Ryobi 18 Volt cordless drill battery is key to restoring its power. Over time, battery cells lose their ability to hold a charge. Swapping out these worn cells with fresh ones can bring new life to your drill. This process requires care and attention to detail.
First, you must remove the old cells safely. Then prepare the new cells for installation. Proper handling ensures your battery works efficiently and lasts longer.
Soldering Techniques
Soldering is essential for joining battery cells correctly. Use a soldering iron with a fine tip for precision. Heat the connection points just enough to melt the solder. Avoid overheating, as it can damage the cells.
Work quickly and steadily. Apply solder to the joint, not the iron. This creates a strong bond and good electrical contact. Keep your workspace clean to prevent shorts or poor connections.
Ensuring Proper Connections
Check each connection carefully after soldering. Loose or weak links can cause battery failure or poor performance. Use a multimeter to test continuity between cells.
Make sure the polarity matches the battery layout. Positive terminals connect to positive, and negative to negative. Secure the cells firmly to avoid movement inside the battery pack.
Proper connections improve safety and extend battery life. Take your time to double-check every joint before reassembling the battery pack.
Reassembling The Battery Pack
Reassembling the battery pack is a key step in rebuilding your Ryobi 18 Volt cordless drill batteries. It ensures the new cells work safely and efficiently. This process requires care and attention to detail to avoid damage and ensure a strong connection.
Start by placing the new cells in the correct order. Make sure all connections are secure before closing the case. Proper reassembly helps your drill perform like new again.
Securing Cells In Place
Arrange the new battery cells exactly as the old ones were positioned. Use electrical tape or a battery holder to keep them tightly together. This prevents movement that can cause damage or poor contact.
Check that the positive and negative ends align properly. Secure any loose wires and spot welds carefully. A stable pack improves battery life and safety.
Closing The Outer Case
After securing the cells, place the battery pack cover back on. Align it properly with the base to avoid gaps. Press firmly to snap it into place.
Use screws to tighten the case securely. This protects the cells from dust and impacts. A well-closed case ensures the battery lasts longer and works reliably.
Charging And Testing Rebuilt Battery
After rebuilding your Ryobi 18 Volt cordless drill battery, charging and testing it is crucial. Proper charging ensures the battery cells work well together. Testing checks if the battery holds power and runs the drill efficiently.
Follow simple steps to charge and test your rebuilt battery safely. This process helps confirm the battery is ready for use and extends its lifespan.
Initial Charging Tips
Start by using the original Ryobi charger. Connect the battery and plug it in. Let it charge fully without interruption. Avoid removing the battery too soon.
Charge in a cool, dry place. Heat can damage the cells. Watch for any unusual signs like swelling or overheating. If this happens, stop charging immediately.
Performance Testing
After charging, test the battery by installing it in your drill. Run the drill at different speeds and under load. Check if the drill runs smoothly without power drops.
Measure how long the battery lasts during use. A rebuilt battery should hold charge close to the original capacity. If it drains quickly, recheck the connections or cells.
Maintenance Tips For Longer Battery Life
Maintaining your Ryobi 18 Volt cordless drill battery properly helps it last longer. Small daily habits keep the battery healthy and reliable. These tips save money and reduce waste. Follow these easy steps to protect your battery’s life and performance.
Proper Charging Habits
Charge the battery only with the Ryobi charger. Avoid using chargers from other brands. Do not let the battery drain completely before charging. Partial charges are better than deep discharges. Remove the battery from the charger once fully charged. Overcharging can reduce battery life. Avoid charging in extreme heat or cold. Room temperature is best for charging.
Storage Recommendations
Store the battery in a cool, dry place. Avoid places with high humidity or direct sunlight. Keep the battery away from metal objects. Remove the battery from the drill when not in use. If storing for a long time, charge the battery to about 50%. Check the battery charge every few months. Recharge if the battery level gets too low. Proper storage prevents damage and helps maintain capacity.
Safety Precautions
Working with Ryobi 18 Volt cordless drill batteries can be risky without the right safety steps. These batteries have powerful cells that need careful handling. Following safety precautions helps avoid accidents and keeps you safe while rebuilding the battery.
Handling Lithium-ion Cells
Lithium-ion cells store a lot of energy. They can catch fire if damaged or shorted. Always wear safety glasses and gloves when handling these cells. Do not crush, bend, or pierce the cells. Keep them away from water and heat sources. Store cells in a cool, dry place to prevent damage.
Avoiding Short Circuits
A short circuit can cause sparks or fire. Avoid touching the cell terminals with metal objects. Use insulated tools when working on the battery pack. Check for exposed wires before starting work. Keep the workspace clean and dry to reduce risks. Double-check connections before testing the rebuilt battery.

Credit: www.ebay.com
Credit: www.mtobattery.com
Frequently Asked Questions
How Do I Rebuild A Ryobi 18v Cordless Drill Battery?
To rebuild, first remove the battery pack and open the casing. Replace faulty cells with new ones, then reassemble carefully. Test the battery for proper voltage and performance before use.
What Tools Are Needed To Rebuild Ryobi Drill Batteries?
You will need a screwdriver, soldering iron, replacement cells, multimeter, and heat shrink tubing. These tools help safely open, test, and replace battery components.
How Long Does It Take To Rebuild Ryobi Drill Batteries?
Rebuilding typically takes 30 to 60 minutes depending on your experience. Proper care during cell replacement ensures safety and battery longevity.
Can Rebuilding Improve Ryobi Battery Life?
Yes, replacing worn-out cells restores capacity and extends battery life. Regular maintenance helps maintain optimal drill performance.
Conclusion
Rebuilding a Ryobi 18 Volt cordless drill battery saves money and reduces waste. You can extend your drill’s life with simple steps. Keep safety in mind and use the right tools. Check each battery cell carefully to avoid issues. This process takes time but is worth the effort.
Now your drill can work like new again. Try it yourself and enjoy the power longer.