

Is your Makita BHP454 cordless drill acting up just when you need it most? Don’t let a small problem stop your project or force you to buy a new tool.
You can fix it yourself, and it’s easier than you think. In this guide, you’ll discover simple steps to repair your drill quickly and safely. Imagine getting your drill back in perfect shape, saving time and money. Keep reading, and you’ll learn exactly how to bring your Makita BHP454 back to life.

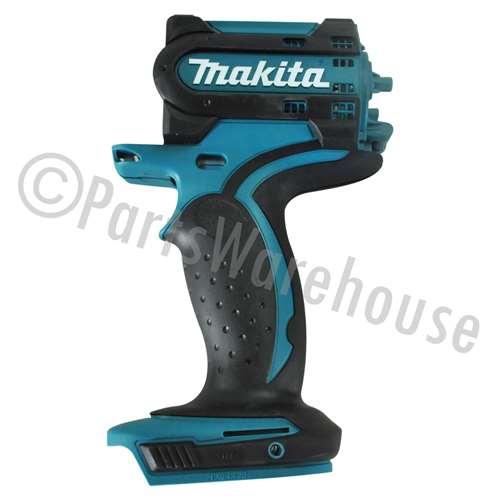
Credit: www.youtube.com
Common Issues With Makita Bhp454
The Makita BHP454 cordless drill is popular for its power and reliability. Still, it can face some common problems that affect performance. Understanding these issues helps in fixing the drill quickly. This guide covers typical troubles and how to spot them early.
Battery Problems
The battery may lose charge quickly or not hold power. This reduces drill runtime and efficiency. Sometimes, the battery contacts get dirty or corroded. Charging issues can also arise from a faulty charger or battery pack. Check connections and try another battery to test.
Motor Malfunctions
The motor might overheat or stop running suddenly. This happens due to worn brushes or internal damage. Dust and debris inside can block motor parts. Listen for unusual sounds or a weak motor. Regular cleaning and replacing brushes can keep the motor working well.
Chuck And Bit Issues
The chuck may not tighten or hold drill bits firmly. Loose bits cause slipping and poor drilling. Dirt or damage inside the chuck prevents it from gripping properly. Clean the chuck and test with different bits. Replace the chuck if it no longer holds bits securely.
Trigger And Switch Failures
The trigger can stick or fail to start the drill. Switch contacts may wear out or break over time. A faulty trigger or switch causes inconsistent power flow. Check for dirt or damage around the trigger area. Replacing the switch or trigger assembly often solves these problems.
Credit: lepaystchad.com
Essential Tools For Repair
Repairing a Makita BHP454 cordless drill needs the right tools. Having essential tools makes the process easier and faster. These tools help you open, test, clean, and fix the drill without damage. Prepare your workspace with these must-have items for a smooth repair job.
Screwdrivers And Wrenches
Screwdrivers are key to opening the drill case. Use a set with different sizes and types, like Phillips and flathead. Wrenches help remove nuts and bolts that hold parts in place. Using the correct size prevents stripping screws or damaging parts.
Multimeter For Electrical Testing
A multimeter checks the drill’s electrical parts. It measures voltage, current, and resistance. This tool helps find battery or motor problems. Testing with a multimeter saves time by spotting faults early. Choose a simple multimeter with easy-to-read settings.
Lubricants And Cleaning Supplies
Lubricants keep moving parts smooth and reduce wear. Use light machine oil or grease made for power tools. Cleaning supplies remove dust and dirt from inside the drill. Use soft brushes, cloths, and alcohol-based cleaners. Clean and lubricate parts before reassembling the drill.
Safety Precautions
Repairing a Makita BHP454 cordless drill requires careful attention to safety. Taking the right precautions protects you and your tool from damage. Safety is the first step before any repair work.
Disconnecting The Battery
Always remove the battery before starting repairs. This stops the drill from turning on by accident. Removing the battery also prevents electric shocks. Check twice to confirm the battery is out.
Working In A Safe Environment
Choose a clean, well-lit workspace. Clear away clutter to avoid accidents. Keep children and pets away from the area. Use a sturdy table to hold the drill steady. Good lighting helps you see small parts clearly.
Proper Handling Of Components
Handle all parts carefully to avoid damage. Use the right tools for screws and bolts. Keep small pieces in a container to prevent loss. Avoid touching electrical contacts with bare hands. Wear gloves if possible to protect your skin.

Credit: www.esseg.eu
Step-by-step Repair Process
Repairing a Makita BHP454 cordless drill requires a clear process. Follow each step carefully for best results. This guide walks you through the main tasks. It helps you fix common problems and replace parts safely.
Removing The Battery And Outer Shell
First, remove the battery pack. Press the release buttons and pull the battery out. This stops any power flow and keeps you safe. Next, use a screwdriver to remove screws from the drill’s outer shell. Carefully separate the shell pieces. Keep screws in a safe place for reassembly.
Inspecting Internal Components
Look inside the drill. Check wires for breaks or burns. Examine the circuit board for damage or corrosion. Spin the motor shaft by hand. Listen for grinding or unusual noises. Check the brushes for wear. Clean dust or dirt using a soft brush or cloth.
Fixing Common Electrical Issues
Loose wires cause many electrical problems. Reconnect any loose wire ends. Use a soldering iron to fix broken joints. Replace blown fuses if present. Test the trigger switch with a multimeter. Replace the switch if it does not work. Ensure all connections are tight and clean.
Replacing The Chuck Or Motor Parts
Remove the chuck by loosening the retaining screw inside. Use an Allen key or screwdriver for this. Pull the chuck off the spindle gently. Replace it with a new chuck if damaged. For motor parts, remove brushes carefully. Install new brushes in the same position. Make sure motor parts fit snugly.
Reassembling The Drill
Put the outer shell back over the internal parts. Align screw holes and tighten screws firmly. Reinsert the battery pack until it clicks in place. Test the drill by pressing the trigger. The drill should start smoothly without noise. Your Makita BHP454 is ready to use again.
Testing After Repair
Testing after repair is an important step to ensure your Makita BHP454 cordless drill works properly. It helps confirm that all parts function as expected. This process also ensures safety before regular use. Follow these simple tests to check the drill’s condition after repair.
Battery Function Check
Start by charging the battery fully. Insert the battery into the drill. Turn on the drill and observe the power level. Check if the drill runs without sudden stops. A healthy battery should hold charge and power the drill steadily.
Motor Performance Test
Switch the drill on and listen carefully. The motor should sound smooth and steady. Test the drill on different speed settings. It should change speeds without noise or hesitation. Run the drill for a few minutes to confirm consistent motor function.
Safety And Operational Checks
Inspect the drill for loose or missing parts. Check the trigger and forward/reverse switch for smooth action. Ensure the drill chuck holds bits firmly. Look for unusual vibrations or sparks during operation. These checks help keep the drill safe to use.
Maintenance Tips To Extend Drill Life
Keeping your Makita BHP454 cordless drill in good shape helps it work longer and better. Simple care steps stop problems early and avoid costly repairs. Follow these key maintenance tips to keep your drill ready for any job.
Regular Cleaning
Dust and dirt can harm your drill’s parts. Clean it after each use. Use a soft cloth to wipe the outside. Blow out dust from vents with compressed air. Avoid water or liquid cleaners to protect the motor. Clean the chuck to keep it gripping tight. Regular cleaning stops damage and keeps the drill running smooth.
Proper Storage
Store your drill in a dry, cool place. Avoid areas with high heat or moisture. Use the original case for safe storage. Keep it away from heavy tools that can cause damage. Proper storage prevents rust and battery problems. It also protects the drill from accidental drops and knocks.
Routine Battery Care
Battery health is key for cordless drills. Charge the battery fully before first use. Avoid letting the battery drain completely. Store batteries in a cool, dry place. Remove the battery from the drill if storing for a long time. Clean battery contacts to keep good power flow. Routine care extends battery life and drill performance.
Frequently Asked Questions
How Do I Troubleshoot A Makita Bhp454 Drill?
Start by checking the battery charge and connections. Inspect the chuck for jams or debris. Test the trigger switch for responsiveness. Clean any dust or dirt. Replace worn-out parts if necessary. Always refer to the user manual for detailed troubleshooting tips.
What Causes A Makita Bhp454 Drill Not To Start?
Common causes include a dead battery, faulty trigger switch, or motor issues. Ensure the battery is fully charged and properly connected. Check for any internal damage or loose wires. If problems persist, consult a professional technician or authorized service center.
How Can I Replace The Makita Bhp454 Drill Battery?
Remove the old battery by pressing the release buttons and sliding it out. Align the new battery with the terminals and slide it into place until it clicks. Use only compatible Makita batteries to ensure safety and performance.
How Do I Fix A Makita Bhp454 Drill Chuck?
If the chuck is stuck, apply a lubricant and gently tap it to loosen. Use a chuck key or wrench to open it fully. Clean the inside thoroughly and remove any debris. Replace the chuck if it’s damaged or worn out.
Conclusion
Repairing your Makita BHP454 cordless drill saves money and extends its life. Follow each step carefully to avoid mistakes. Check parts and connections to find issues quickly. Use the right tools and work in a safe place. Taking your time helps ensure the drill works well again.
Regular care keeps it ready for your next project. Keep this guide handy for future repairs and maintenance. Your drill will serve you longer with simple repairs.