

Is your Milwaukee cordless drill not working like it used to? If you’re facing issues with the motor, replacing it might be the solution you need.
Knowing how to replace the Milwaukee cordless drill motor 23 30 0590 can save you time and money, and get your drill back to peak performance quickly. In this guide, you’ll find simple, step-by-step instructions that anyone can follow—even if you’re not a tech expert.
Ready to bring your drill back to life? Let’s dive in and make your tool work like new again.
Tools And Materials Needed
Replacing the motor of a Milwaukee Cordless Drill 23 30 0590 requires certain tools and materials. Having these ready makes the task easier and safer. Each tool plays a key role in the process. The right materials ensure the new motor fits and works well.
Prepare your workspace with good lighting and a clean surface. Organize tools within reach. This helps avoid mistakes and speeds up the work.
Basic Hand Tools
Start with a set of screwdrivers, both flathead and Phillips. These help remove screws from the drill casing. A small wrench or socket set is useful for bolts. Needle-nose pliers assist in handling small parts and wires.
Replacement Motor
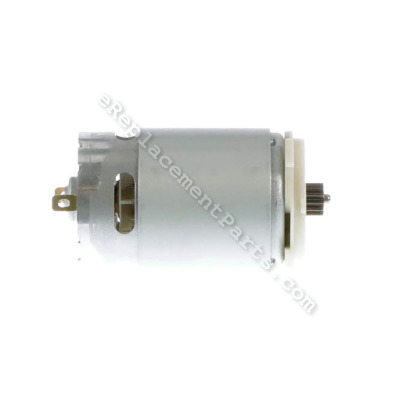
Use the exact motor model 23 30 0590 for proper fit. Check the motor’s condition before installation. A compatible motor guarantees the drill runs smoothly after repair.
Electrical Tape And Wire Connectors
Electrical tape secures wire connections safely. Wire connectors help join wires without loose ends. These materials protect from electrical shorts and maintain power flow.
Cleaning Supplies
Keep a soft cloth and isopropyl alcohol nearby. Clean the drill parts before assembly. Dust and dirt removal improves contact and motor performance.
Safety Equipment
Wear safety glasses to protect your eyes. Use gloves to avoid cuts and scratches. Safety gear prevents injuries during motor replacement.

Credit: greatlakespowertools.com
Safety Precautions
Replacing the Milwaukee cordless drill motor 23-30-0590 requires careful attention to safety. Taking safety steps protects you from accidents and tool damage. Follow these precautions closely before and during the replacement process.
Never rush the work. Staying calm helps avoid mistakes. Use the right tools and work in a clean, well-lit area. These small actions make a big difference.
Disconnect The Battery
Always remove the battery pack before starting. This stops the drill from turning on by accident. Without power, you can safely handle the drill’s parts.
Wear Protective Gear
Wear safety glasses to protect your eyes from dust and debris. Gloves can protect your hands from sharp edges and heat. Dress comfortably but avoid loose clothing.
Use Proper Tools
Select screwdrivers and pliers that fit the drill’s screws and parts. Using wrong tools can strip screws or break parts. Proper tools make the job easier and safer.
Keep Your Workspace Organized
Clear your work surface of clutter. Arrange screws and small parts in containers. This prevents losing pieces and keeps the area safe.
Handle The Motor Carefully
The motor is delicate. Avoid dropping or hitting it. Hold it firmly but gently during removal and installation.
Avoid Working Under Stress
Do not work if tired or distracted. Clear focus helps prevent errors. Take breaks if you feel tired or frustrated.
Removing The Drill Housing
Removing the drill housing is the first step to access the motor inside your Milwaukee cordless drill model 23-30-0590. This process requires careful handling to avoid damage. The housing holds all key components together. Taking it apart lets you reach the motor and replace it safely.
Follow these steps closely. Work on a clean surface and keep track of small parts. This will make reassembly easier and ensure the drill works properly after repair.
Removing Screws
Begin by locating all screws on the drill housing. Use the correct screwdriver to avoid stripping them. Remove each screw and set them aside in a safe place. Some screws might be hidden under labels or rubber grips. Check carefully and remove those too.
Separating Housing Halves
After removing the screws, gently pull the housing halves apart. Use a plastic pry tool if needed to avoid scratching the plastic. Do not force the halves if they feel stuck. Look for any clips or tabs holding the pieces together and release them carefully. Once separated, you will see the motor and other parts inside.
Credit: www.ereplacementparts.com
Disconnecting The Motor
Disconnecting the motor is the first important step in replacing your Milwaukee cordless drill motor 23 30 0590. It lets you work safely and avoid damage to the drill. Take your time and follow each step carefully. This part of the process involves unplugging wiring connections and removing motor mounts.
Unplugging Wiring Connections
Start by locating the wiring connections attached to the motor. These wires supply power to the motor. Carefully pull apart each connector. Avoid pulling on the wires themselves to prevent damage. Use a small tool if needed to gently pry connectors loose. Make sure all wires are fully disconnected before moving on.
Removing Motor Mounts
Next, find the motor mounts holding the motor in place. These mounts are usually screws or bolts. Use the correct screwdriver or wrench to remove them. Keep the mounts in a safe place for reassembly. Once all mounts are removed, carefully lift the motor out of the drill housing. Avoid forcing it to prevent breaking other parts.
Installing The New Motor
Installing the new motor in your Milwaukee cordless drill is a key step for proper function. Handle the motor carefully to avoid damage. Follow each step slowly to ensure the motor fits and works well.
Positioning The Replacement Motor
Place the new motor in the drill’s motor housing gently. Align it with the gear and mounting points. Check that the motor sits flat and does not move. Secure it by tightening screws or clips as needed. Proper positioning helps the drill run smoothly and last longer.
Reconnecting Wiring
Match the wires from the drill to the new motor terminals by color or label. Connect each wire firmly to avoid loose contacts. Use a small screwdriver if screws hold the wires. Keep wires neat to prevent damage or short circuits. Double-check all connections before closing the drill casing.
Credit: www.ereplacementparts.com
Reassembling The Drill
Reassembling the Milwaukee cordless drill motor is a careful process. It needs attention to detail to ensure the drill works well again. Each part must fit correctly. This section guides you through putting the drill back together with clear steps.
Aligning Housing Halves
Start by placing the motor and internal parts inside one half of the drill housing. Hold the other half close. Check that all wires and components sit properly. Gently bring the two halves together. Make sure the edges match perfectly. Avoid forcing the parts. Proper alignment prevents damage and ensures smooth operation.
Securing With Screws
After the housing halves are aligned, find the screw holes. Insert the screws carefully into each hole. Use a screwdriver with the right size and type. Tighten the screws firmly but not too hard. Over-tightening can crack the plastic. Check all screws are secure. This step keeps the drill sturdy and safe to use.
Testing The Drill
Testing the drill after replacing the Milwaukee cordless drill motor 23 30 0590 is crucial. It ensures the drill works properly and safely. This step helps catch any issues early. Testing also confirms the motor is installed correctly.
Preparing The Drill For Testing
First, insert a fully charged battery into the drill. Check that the battery fits tightly. Make sure the drill chuck is empty and free of debris. Hold the drill firmly to avoid slipping during testing.
Running The Drill Without Load
Turn on the drill and let it run without a drill bit. Listen for unusual sounds like grinding or rattling. Watch for smooth spinning of the chuck. Any strange noise means double-check the motor installation.
Testing The Drill Under Load
Insert a drill bit into the chuck. Use the drill on a piece of scrap wood or plastic. Apply light pressure and run the drill at low speed. Check for steady power and no stalling. If the drill stalls, the motor may need adjustment.
Checking The Drill’s Speed And Torque
Test the drill at different speed settings. Notice if the speed changes smoothly. Feel the torque by gently pressing the drill bit into the material. A good motor provides consistent torque without jerking.
Inspecting For Heat And Vibration
After running the drill for a few minutes, touch the motor area. It should be warm but not hot. Excessive heat can indicate a problem. Also, feel for unusual vibration. Strong vibration may mean the motor is not aligned properly.
Troubleshooting Common Issues
Troubleshooting common issues with the Milwaukee cordless drill motor 23 30 0590 helps save time and money. Understanding basic problems allows for quick fixes and better tool care. This section covers common motor problems and simple solutions to get your drill running smoothly again.
Motor Not Running
Check the battery charge first. A dead battery can stop the motor from running. Inspect the trigger switch for damage or dirt. Dirt can block connections inside the drill. Test the motor brushes; worn brushes cause power loss. Replace brushes if they look worn or broken.
Unusual Noises
Strange sounds often mean motor parts are loose or worn out. Listen for grinding or rattling noises during use. These sounds suggest bearings or gears need attention. Clean the drill’s interior to remove dust and debris. Tighten any loose screws or parts to reduce noise.
Battery Connection Problems
Loose or dirty battery contacts can cause connection issues. Clean the battery terminals and drill contacts with a dry cloth. Ensure the battery fits snugly in the drill slot. Check for corrosion on the contacts and remove it carefully. A secure connection helps the motor receive full power.
Frequently Asked Questions
How Do I Identify Milwaukee Drill Motor 23 30 0590?
Look for the model number 23 30 0590 on the motor casing. It matches Milwaukee cordless drill motors for accurate replacement.
What Tools Are Needed To Replace The Milwaukee Drill Motor?
You need a screwdriver, pliers, and a soldering iron to remove and install the motor safely.
How Long Does It Take To Replace The Motor?
Replacing the motor usually takes 20 to 30 minutes with basic technical skills and proper tools.
Can I Replace The Motor Myself Safely?
Yes, follow safety precautions like unplugging and wearing gloves to replace the motor without risk.
Conclusion
Replacing the Milwaukee cordless drill motor 23 30 0590 is simple. Follow the steps carefully for best results. Take your time and work safely. A new motor brings your drill back to life. Now, you can continue your projects with ease.
Keep tools clean and maintained to avoid issues. This guide helps you save money and effort. Enjoy using your drill again, like new.