

If you own a Hitachi cordless drill, you know how handy it is for all your DIY projects. But what happens when it stops working or needs a good cleaning?
Taking your drill apart might sound tricky, but with the right steps, you can do it yourself. In this guide, you’ll learn exactly how to safely and easily take your Hitachi cordless drill apart. Whether you want to fix a problem, replace a part, or just understand how it works, this article will walk you through every step.
Keep reading, and soon you’ll feel confident handling your drill like a pro.
Tools Needed
Taking apart a Hitachi cordless drill requires the right tools. Having these tools ready makes the process easier and safer. Each tool plays a specific role in disassembling the drill without damage.
Use tools that fit well and work smoothly. This helps avoid stripping screws or damaging parts. Prepare your workspace with good light and a clean surface to keep track of small pieces.
Screwdrivers
Screwdrivers are the main tools for opening the drill. Use a set with different sizes and types. Phillips and flathead screwdrivers are most common for cordless drills. Choose the screwdriver that fits the screw head exactly. This prevents slipping and damage to screws or drill parts.
Pliers
Pliers help to grip and pull small parts. Needle-nose pliers are useful for reaching tight spots. They allow precise control when removing pins or connectors. Use pliers gently to avoid breaking delicate parts inside the drill.
Safety Gear
Safety gear protects you during the process. Wear safety glasses to guard your eyes from dust and small debris. Use gloves to protect your hands from sharp edges. Keep a clean workspace to avoid accidents and keep parts organized.
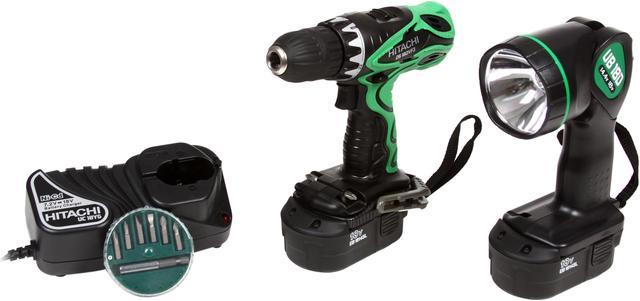
Credit: www.newegg.com
Preparing The Drill
Start by removing the battery to ensure safety. Gather necessary tools like screwdrivers and a small container for screws. Clean the drill’s surface to avoid dirt inside during disassembly.
Remove The Battery
Start by taking out the battery from the drill. This step stops any power flow. It keeps you safe while working on the drill. Press the release buttons on the battery pack. Gently pull the battery away from the drill body. Place the battery in a safe spot away from your workspace.
Clear The Workspace
Find a clean, flat surface to work on. Remove any clutter or items that might block your work. Use a cloth to wipe dust or dirt off the area. Good lighting helps you see small parts clearly. Have a small container ready for screws and tiny pieces. This prevents losing important components during the process.
Removing The Outer Shell
Removing the outer shell of a Hitachi cordless drill is the first step to access its inner parts. This process needs care and patience. Follow the steps below to avoid damage to the tool and make reassembly easier.
Handle the drill gently during this process. Keep track of all screws and small parts. This will help you put the drill back together correctly.
Locate Screws
Turn the drill over and look for all screws on the outer shell. They are usually on the handle and near the battery area. Use a bright light to find hidden screws in small holes or under labels.
Check both sides of the drill. Some screws might be under stickers or rubber covers. Use a small screwdriver to avoid stripping the screws.
Unscrew The Housing
Use a Phillips or flathead screwdriver that fits the screws well. Turn each screw counterclockwise to remove it. Keep the screws in a small container to avoid losing them.
Do not force any screw. If it is stuck, try a little oil or a different screwdriver. Be patient to prevent damage to the screw heads or drill body.
Separate The Shell
Once all screws are out, gently pull apart the two halves of the shell. Start from the back or handle area and work your way around. Use a plastic opening tool if needed to avoid scratching the plastic.
Do not pull too hard. The shell may still have small clips holding it together. Carefully release these clips to open the drill fully.
Disassembling Internal Components
Disassembling the internal parts of your Hitachi cordless drill helps in repairing and cleaning. It needs careful handling to avoid damage. Follow these steps to take apart the main components inside the drill.
Take Out The Motor
First, locate the motor inside the drill housing. It usually sits near the center of the tool. Use a screwdriver to remove screws holding the motor in place. Gently lift the motor out without forcing it. Handle it carefully to avoid breaking any wires or parts.
Disconnect Wiring
After removing the motor, the wires need disconnection. Note where each wire connects before unplugging. Use a small tool to release wire clips or connectors. Avoid pulling wires directly. Keep the wires organized for easy reassembly later.
Remove The Chuck
The chuck is the part that holds the drill bit. To remove it, open the chuck jaws fully. Look for a screw inside the chuck and unscrew it. You may need to hold the chuck firmly while unscrewing. Once loose, pull the chuck straight off the drill shaft carefully.
Handling The Trigger And Switch
Handling the trigger and switch is key when taking apart a Hitachi cordless drill. These parts control the drill’s power and speed. Careful steps help avoid damage and keep the drill working well. Follow clear instructions to access and detach these components safely.
Accessing The Trigger
Start by removing the drill’s outer casing screws. Keep them in a safe place. Gently separate the casing halves without forcing. Look for the trigger inside the handle area. It connects to small wires and fits into the drill body. Note how the trigger sits before removing it. This helps during reassembly.
Detaching The Switch
Locate the switch attached near the trigger. The switch controls the drill’s on/off function. Carefully disconnect the wires linked to the switch. Use a small tool to release clips holding the switch in place. Avoid pulling on wires directly. Once loose, remove the switch from the drill. Store it safely to prevent damage.
Credit: www.liftingitalia.com
Cleaning And Inspecting Parts
Cleaning and inspecting parts is an important step after taking your Hitachi cordless drill apart. Dirt and dust can build up inside and cause the drill to work poorly. Careful inspection helps find worn or broken parts early. This saves time and money later.
Take your time to clean each part carefully. Use soft brushes and cloths to avoid damage. Check every piece closely for signs of wear or damage. Replace parts if needed for safe and smooth drill operation.
Clean Components
Remove all dust and dirt from each component. Use a dry cloth or soft brush to clean small crevices. Avoid using water, which can cause rust. Compressed air works well for hard-to-reach areas. Clean contacts and metal parts gently to keep them working well.
Check For Wear And Damage
Look closely at gears, switches, and the motor. Check for cracks, rust, or worn teeth on gears. Make sure wires and connectors are intact and not frayed. Test moving parts to see if they spin smoothly. Replace any part that looks damaged or worn out.
Reassembling The Drill
Reassembling your Hitachi cordless drill is a careful process. Take your time to ensure all parts fit correctly. Proper assembly guarantees the drill works safely and efficiently.
Reinstall Internal Parts
Begin by placing the internal parts back in order. Align each piece exactly where it was removed. Small components like springs and screws must go in their right spots. Use a clean surface to keep parts organized. Avoid forcing any pieces, as this can cause damage.
Close The Housing
Once all parts are inside, bring the two halves of the housing together. Check that no wires or parts are caught between the covers. Press the housing gently but firmly until it snaps into place. Secure it with the screws you removed earlier. Tighten screws evenly to avoid gaps or cracks.
Test The Drill
Insert the battery and turn on the drill. Listen for unusual noises or vibrations. Test the drill bit by running it at low speed first. Confirm the trigger and direction switch work smoothly. If the drill runs well, your reassembly is successful. If not, open it again and check for mistakes.

Credit: www.liftingitalia.com
Safety Tips
Taking apart a Hitachi cordless drill requires care and attention. Safety must be your top priority. Follow these safety tips to avoid injury and damage during the process.
Handle Batteries Carefully
Remove the battery before starting any work on the drill. Batteries store power and can cause shocks or sparks. Avoid short-circuiting the battery terminals. Keep the battery away from metal objects. Use gloves if possible. Store batteries in a dry and cool place. Dispose of old or damaged batteries properly to prevent accidents.
Avoid Electrical Hazards
Ensure the drill is completely powered off before disassembling. Use insulated tools to reduce the risk of electric shock. Check the drill for any damaged wires or parts. Do not touch internal components with wet hands. Work in a dry, well-lit area. Keep children and pets away while working on the drill. Always follow the manufacturer’s instructions for safety guidelines.
Frequently Asked Questions
How Do I Safely Disassemble A Hitachi Cordless Drill?
First, remove the battery to avoid accidents. Use the correct screwdriver to unscrew all visible screws. Gently separate the drill casing without forcing it. Follow a step-by-step guide to avoid damaging internal components.
What Tools Are Needed To Take Apart A Hitachi Drill?
You will need a Phillips screwdriver, a flathead screwdriver, and possibly a Torx driver. A small pry tool helps open snap-fit parts carefully. Ensure you have a clean workspace to organize screws and parts.
Can I Repair A Hitachi Cordless Drill After Disassembly?
Yes, disassembling allows you to clean, replace, or fix internal parts like the motor or switch. Proper diagnosis and careful handling improve repair success. Always use compatible replacement parts for best results.
How Do I Avoid Damaging Parts When Opening The Drill?
Work slowly and use the right tools. Avoid using excessive force on plastic clips and screws. Keep track of each part’s position to ensure proper reassembly. Using a magnetic mat can help organize small screws.
Conclusion
Taking apart a Hitachi cordless drill is simpler than it seems. Follow each step carefully and use the right tools. Keep track of small parts to avoid losing them. Work slowly and stay safe throughout the process. This guide helps you understand how your drill works inside.
You can fix or clean parts as needed. Practice makes the task easier over time. Remember, patience is key for a successful repair.