
Attaching baseboards without a nail gun is simple and cost-effective. This guide walks you through the necessary tools, preparation, and techniques to securely install baseboards using manual methods. Whether you’re a DIY beginner or just want to save on tools, you’ll find practical tips here.
Key Takeaways
- Use the right tools: A hammer, finishing nails, a measuring tape, and a level are essential for a clean, professional look.
- Prepare your workspace: Clear the area and measure accurately before starting to ensure perfect cuts and placement.
- Cut baseboards properly: Use a miter saw or hand saw to make precise angled cuts for corners and joints.
- Attach with finishing nails: Hammer nails in strategically to secure the baseboard firmly without the need for a nail gun.
- Use adhesives for added hold: Construction adhesive can supplement nails for extra stability, especially on uneven surfaces.
- Finish with caulk and paint: Fill nail holes with wood filler, sand smooth, and paint for a seamless finish.
Introduction
Attaching baseboards is a common task in home improvement projects. While a nail gun can make the job faster and easier, it’s not always available or practical. Fortunately, you can still achieve professional-looking results using basic hand tools. In this guide, you’ll learn how to attach baseboards without a nail gun, using simple tools, proper techniques, and some handy tips to ensure your project is a success.
Tools and Materials Needed
Essential Tools
- Hammer: A standard claw hammer works well for driving nails.
- Finishing nails: 2.5 to 3 inches long, suitable for baseboards.
- Measuring tape: For accurate measurements.
- Level: To ensure the baseboards are straight.
- Saw (miter or hand saw): For cutting baseboards to length and angles.
- Wood filler or caulk: To hide nail holes and seams.
- Sandpaper: For smoothing filler and edges.
- Paint or stain: To finish the baseboards.
Materials
- Baseboards: Choose your preferred style and size.
- Construction adhesive (optional): For extra hold.
- Painter’s tape: To protect surfaces during painting.
Preparation Before Installation
Measure and Plan
Carefully measure the length of each wall where you’ll install baseboards. Add a few extra inches to your measurements to account for cuts. Draft a plan for corner joints—inside corners typically require miter cuts, while outside corners may need coping or special cuts.
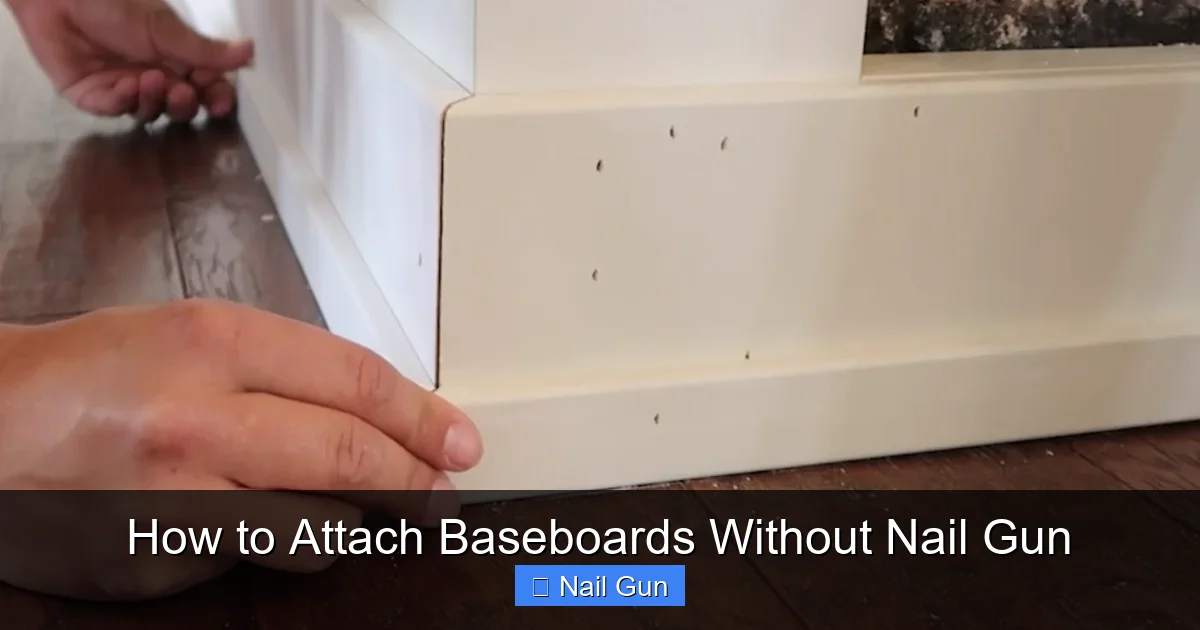
Visual guide about How to Attach Baseboards Without Nail Gun
Image source: timberandtwinehome.com
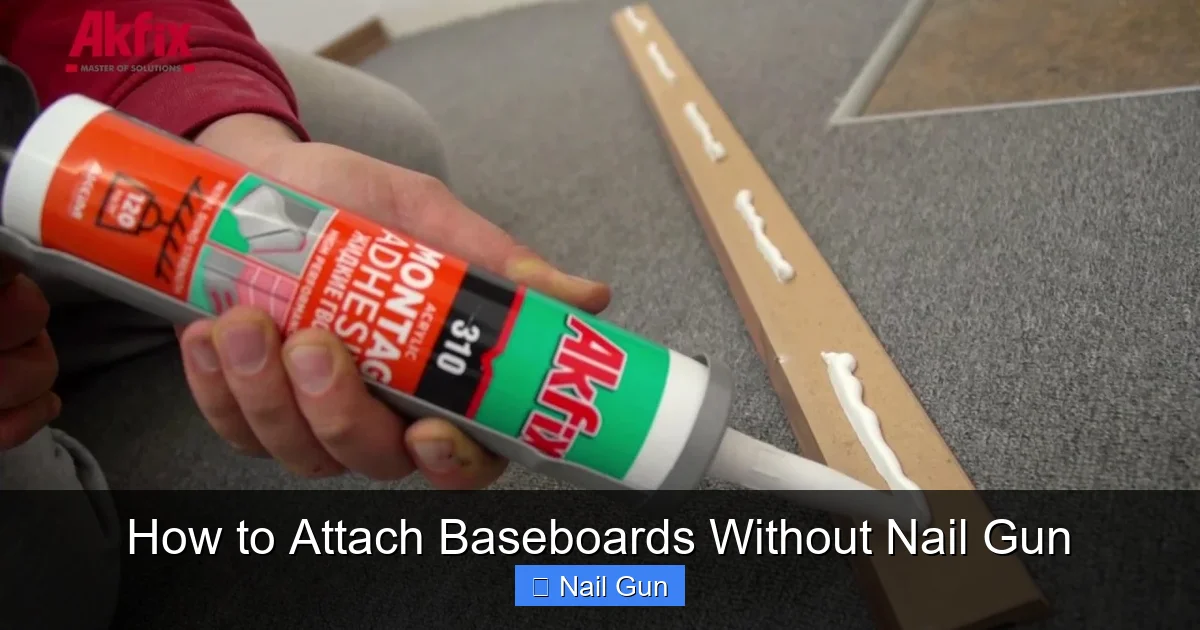
Visual guide about How to Attach Baseboards Without Nail Gun
Image source: i.ytimg.com
Cutting the Baseboards
Use a miter saw or hand saw to cut the baseboards to length and angles. For inside corners, cut at a 45-degree angle so they fit snugly together. For outside corners, cut at complementary angles or use coping techniques.
Preparing the Surface
Ensure the wall surface is clean, dry, and free of debris. If the wall or floor is uneven, consider shimming or leveling before attaching the baseboards.
Step-by-Step Installation Guide
Step 1: Mark the Wall
Hold the baseboard against the wall at the desired height. Use a pencil to mark the wall where the top edge of the baseboard will sit. Use a level to draw a straight line for guidance.
Step 2: Cut and Test Fit
Cut the baseboards to length, making sure to test fit each piece. Adjust cuts as needed for a tight fit in corners and along walls.
Step 3: Apply Adhesive (Optional)
If extra stability is desired, apply a thin line of construction adhesive along the back of the baseboard. Press the board firmly against the wall, aligning it with your markings.
Step 4: Attach the Baseboards
Driving Nails
- Start at one end of the wall and drive a finishing nail through the baseboard into the wall stud. Use a hammer to tap the nail in gently.
- Place nails approximately every 16 inches along the length of the baseboard. Focus on studs for maximum hold.
- For corners, nail at an angle to ensure a secure fit.
Tip:
Use a nail set to countersink nails just below the surface of the wood, making it easier to fill and sand later.
Step 5: Fill Nail Holes and Seams
Use wood filler or spackle to fill nail holes and any gaps at joints. Let it dry according to product instructions, then sand smooth.
Step 6: Finish and Paint
Paint or stain the baseboards for a finished look. Use painter’s tape to protect walls and floors. After the paint dries, inspect for any imperfections and touch up as needed.
Practical Tips and Tricks
- Work with a partner: Having someone hold long pieces steady makes installation easier.
- Use a scrap piece of wood: To practice your nailing technique before working on the actual baseboards.
- Maintain consistent nail spacing: To prevent warping or gaps over time.
- Choose quality finishing nails: They hold better and are easier to countersink.
- Patience is key: Take your time aligning and nailing for the best results.
Troubleshooting Common Issues
- Nails not holding: Ensure you’re nailing into studs or solid wall anchors. Use longer nails if necessary.
- Baseboard warping or bending: Store your baseboards flat and acclimate them in the room before installation.
- Gaps at corners: Use coping cuts or apply caulk to fill small gaps for a seamless look.
- Difficulty nailing into drywall: Consider locating wall studs with a stud finder for stronger attachment points.
Conclusion
Attaching baseboards without a nail gun is an achievable DIY project. With the right tools, proper measurements, and patience, you can create a polished, professional finish. Remember to take your time with cuts, placement, and finishing touches. Soon, you’ll have beautifully installed baseboards that enhance your space and showcase your craftsmanship.
Additional Tips
Always wear safety glasses when cutting or hammering. Keep your workspace organized to make the process smoother. And don’t be afraid to ask for help or watch tutorials if you’re unsure about any step. Happy DIY-ing!
🎥 Related Video: How To Install Baseboard Without a Nail Gun or Fasteners!
📺 The Funny Carpenter
A quick look at how to install baseboards without a nail gun. The process involves using a primary long lasting glue, and quick …