
Have you ever found yourself in the middle of a project, only to realize your cordless drill’s charger is missing or broken? It’s frustrating, right?
But what if you could still power up your drill without the original charger? You’ll discover simple, effective ways to charge your cordless drill even when the charger isn’t available. Keep reading, because the solution might be easier than you think—and it could save you time, money, and a lot of stress.
Reasons For Charging Without A Charger
Sometimes, charging a cordless drill without its charger becomes necessary. This can happen for several reasons. Knowing why helps you find safe and effective ways to power your drill.
Some situations leave you without the original charger. Other times, emergencies demand quick charging solutions. Alternative power sources can also come in handy when chargers are not around.
Lost Or Broken Charger
Chargers can get lost or break easily. Without the charger, your drill battery stays empty. Buying a new charger may take time. Charging without the original charger helps keep your work going. It avoids delays caused by waiting for a replacement.
Emergency Situations
Emergencies need quick fixes. You might need to use your drill immediately. No time to find or buy a charger. Charging without the charger can save the day. It keeps your tools ready for urgent tasks.
Using Alternative Power Sources
Sometimes, other power sources are available. Power banks, USB chargers, or car batteries can work. They offer a way to charge without the original charger. Using alternatives can keep your drill powered anywhere. This is helpful during travel or outdoor work.
Credit: www.dailymotion.com
Safety Tips Before Charging
Charging a cordless drill without the original charger requires extra care. Safety must be your top priority to avoid damage or injury. Follow these safety tips before you start charging the battery.
Check Battery Type
Identify the battery type before charging. Common types include NiCd, NiMH, and Li-ion. Each type needs a different charging method. Using the wrong technique can damage the battery or cause hazards. Always read the battery label or manual for details.
Avoid Overheating
Heat can ruin batteries quickly. Charge the battery in a cool, dry place. Avoid direct sunlight or hot surfaces. If the battery feels hot, stop charging immediately. Let it cool down before continuing. Overheating reduces battery life and may cause swelling or leaks.
Handle Batteries Carefully
Batteries contain chemicals that can be harmful. Do not drop or puncture them. Use insulated tools to connect wires safely. Avoid short circuits by keeping metal objects away. Store batteries in a safe spot when not in use. Careful handling ensures safe charging and extends battery life.
Using A Usb Cable For Charging
Charging a cordless drill without its original charger might sound tricky. Using a USB cable is a handy alternative. This method works well for drills with removable batteries. A USB cable can provide power from many common devices. It is important to know how to connect the battery safely. Following clear steps helps avoid damage and keeps you safe.
Identifying Battery Terminals
First, find the battery terminals on the drill’s battery pack. These are small metal contacts where power flows in and out. Usually, there are two terminals: positive (+) and negative (–). The positive terminal connects to the USB cable’s red wire. The negative terminal connects to the black wire. Check the battery carefully to avoid mixing the terminals. Wrong connections can cause short circuits or damage.
Connecting To A Usb Power Source
Use a USB cable with exposed wires or a USB power bank. Strip the cable ends to show the red and black wires. Attach the red wire to the positive battery terminal. Attach the black wire to the negative battery terminal. Make sure the connections are firm and not touching each other. Plug the USB cable into a USB port or power bank. The USB source should provide 5 volts for safe charging.
Charging Time And Monitoring
Charging a drill battery with USB takes longer than using a charger. It usually needs several hours to charge fully. Check the battery during charging for heat or swelling. Stop charging immediately if the battery feels hot. Keep the battery on a fireproof surface while charging. Do not leave the battery unattended during this process. Regular checks prevent accidents and keep the battery healthy.
Charging With A Car Battery
Charging a cordless drill without its charger may seem tricky. Using a car battery is one option. Car batteries supply steady power that can charge your drill’s battery. This method can be useful when you have no charger nearby. It needs care and the right tools to be safe.
Required Tools And Precautions
You need a few tools before starting. Get jumper cables or alligator clips. Use a multimeter to check voltage and connections. Wear gloves to protect your hands from sparks. Work in a dry, open space. Keep metal objects away from the battery terminals. Make sure the drill battery matches the car battery voltage. Safety first to avoid accidents and damage.
Step-by-step Connection
First, turn off your car and remove keys. Connect the red clip to the positive terminal of the car battery. Attach the other red clip to the positive terminal of the drill battery. Next, connect the black clip to the negative terminal of the car battery. Attach the last black clip to the drill battery’s negative terminal. Check connections twice for tightness and correct placement. Let the drill battery charge for 15-30 minutes. Monitor the battery to avoid overheating during charging.
Potential Risks
Using a car battery incorrectly can cause damage. The drill battery may overcharge or catch fire. Sparks may occur while connecting clips. Wrong connections can damage both batteries. The car battery might drain if charging takes too long. Only attempt this if you understand the risks. Always supervise the process for safety.
Power Bank Charging Method
The power bank charging method offers a handy way to charge a cordless drill without its original charger. It uses a portable power source to refill the drill’s battery. This method is useful during outdoor work or emergencies. Understanding which power banks work and how to connect them helps ensure safe and effective charging.
Compatible Power Banks
Choose power banks with an output of 12V or higher. Many cordless drills need 18V, so look for power banks that support this voltage. Check the drill’s battery voltage before selecting a power bank. Some power banks have adjustable voltage settings. Pick those for better compatibility. Avoid low-capacity power banks; they may not fully charge the drill battery.
Connection Setup
Use the correct adapter to connect the power bank to the drill battery. Most cordless drills use a plug or clip connection. Match the power bank output port with the adapter input. Connect the adapter to the drill battery terminals carefully. Ensure polarity is correct to prevent damage. Secure all connections to avoid loose contacts during charging.
Charging Efficiency
Charging speed depends on the power bank’s output current. A higher current means faster charging but check the drill battery limits. Monitor the battery temperature while charging. Stop charging if the battery gets hot. Power bank efficiency varies by brand and model. Full charging might take longer than with the original charger. Use this method mainly as a backup charging option.

Credit: www.youtube.com
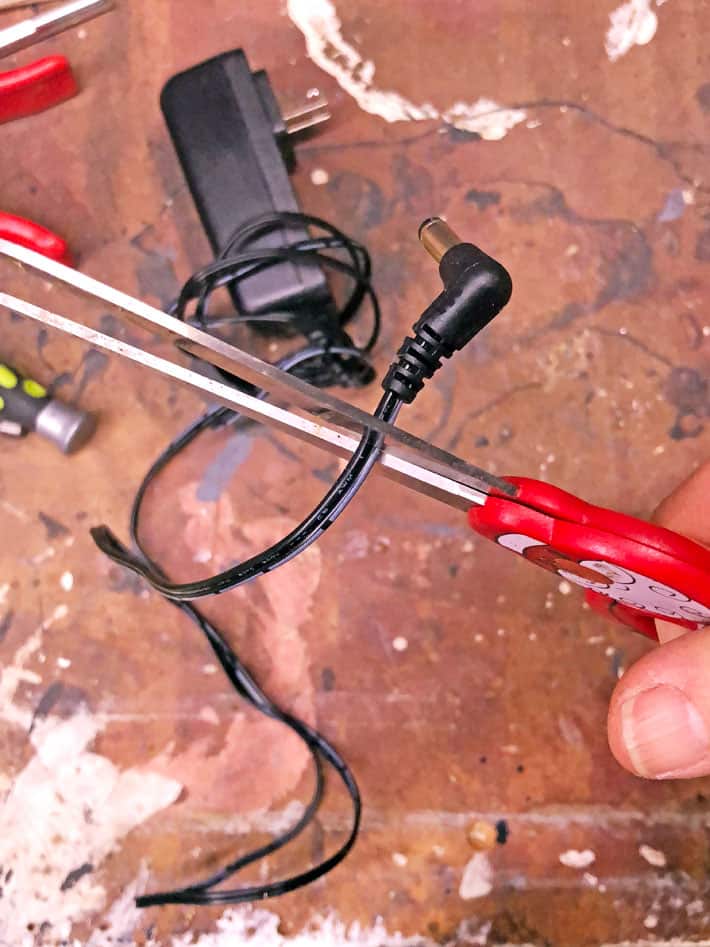
Diy Charger Using A Wall Adapter
Creating a DIY charger using a wall adapter helps when the original charger is missing. This method lets you power your cordless drill safely and quickly. It saves time and avoids buying a new charger. Follow simple steps to select the right adapter and connect it properly.
Selecting The Right Adapter
Choose a wall adapter with the correct voltage for your drill battery. Check the battery label for voltage details. Use an adapter with a similar or slightly lower voltage. Avoid adapters with much higher voltage to prevent damage. Also, ensure the adapter’s current rating meets your battery’s needs. A higher current rating than required is safe.
Wiring Instructions
Cut the adapter’s plug and strip the wires carefully. Identify the positive and negative wires using a multimeter or color codes. Connect the adapter’s positive wire to the battery’s positive terminal. Attach the negative wire to the battery’s negative terminal. Use electrical tape or heat shrink tubing to cover the connections. Make sure all wires are secure and insulated to avoid short circuits.
Testing The Setup
Plug the adapter into the wall socket and monitor the battery. Check for any unusual heat or smells. Use a multimeter to verify the charging voltage at the battery terminals. Let the battery charge for a short time and test the drill’s power. Stop charging if the battery gets very hot or shows signs of damage. This step confirms your DIY charger works safely.
Solar Panel Charging Option
Using a solar panel to charge your cordless drill’s battery is a smart choice. It works without electricity and is great outdoors. Solar energy is clean and free. This method helps when you have no charger or power source nearby.
Choosing A Suitable Solar Panel
Pick a solar panel with enough power to charge the battery. Look for panels that produce 12 volts or more. Check the panel’s wattage; 10 to 20 watts works well for most drill batteries. Portable and compact panels are easier to carry and use outside.
Connecting To The Battery
Use the right connectors to link the solar panel to the battery terminals. Make sure the positive and negative wires match the battery’s terminals. A charge controller can protect the battery from overcharging. Secure connections prevent power loss and ensure safe charging.
Charging Duration
Charging time depends on the battery size and sunlight strength. It usually takes several hours under direct sunlight. Cloudy or shaded areas slow the charging process. Check the battery often to avoid overcharging or damage.
Precautions To Avoid Damage
Charging a cordless drill without its charger needs care to keep the battery safe. Taking the right steps can stop damage and extend battery life. Knowing what to avoid helps protect your tool and saves money on repairs. Follow these simple precautions to charge safely and keep your drill ready for use.
Avoid Overcharging
Overcharging can harm the battery and reduce its lifespan. Stop charging as soon as the battery feels warm or fully charged. Never leave the battery connected to a power source for too long. Use a timer or watch the charging time carefully to avoid extra charging.
Prevent Short Circuits
Short circuits can cause sparks and damage the battery. Make sure wires and connectors do not touch each other. Use insulated tools and avoid charging near water or metal objects. Check for any exposed wires before starting to charge.
Monitor Battery Health
Keep an eye on the battery’s condition during charging. Look for swelling, leaks, or strange smells. Stop charging immediately if you notice any unusual signs. Regularly check the battery for damage to ensure safe charging and good performance.
When To Replace The Battery
Knowing when to replace your cordless drill battery saves time and money. A worn-out battery can cause poor performance and short run time. Detecting signs early helps you avoid frustration and tool downtime. Proper battery care extends tool life but some batteries need replacement after heavy use.
Signs Of Battery Failure
The drill stops working quickly after a full charge. It takes longer than usual to charge. The battery feels hot during or after charging. The drill loses power suddenly while working. The battery does not hold a charge at all. These signs mean the battery may be failing.
Cost Vs. Repair
Replacing a battery costs less than buying a new drill. Repairing a battery is difficult and often not worth it. Buying a new battery ensures better performance and safety. Check prices for original and third-party batteries before buying. A new battery improves drill life and efficiency.
Disposal Guidelines
Do not throw old batteries in the trash. They contain harmful chemicals that pollute the environment. Take old batteries to a recycling center or hazardous waste facility. Many stores accept used batteries for safe disposal. Follow local rules for battery disposal to protect nature.
Credit: www.theartofdoingstuff.com
Frequently Asked Questions
How Can I Charge A Cordless Drill Without Its Charger?
You can use a compatible universal charger, a power bank with adapter, or a car battery adapter. Ensure voltage and connector match to avoid damage. Always follow safety guidelines when using alternative charging methods.
Is It Safe To Charge A Drill With A Phone Charger?
No, phone chargers and drill batteries usually have different voltage and current ratings. Using a phone charger can damage the battery or cause overheating. Always use a charger designed for your drill’s battery type.
Can Solar Panels Charge A Cordless Drill Battery?
Yes, solar panels with the correct voltage and a suitable adapter can charge cordless drill batteries. It’s an eco-friendly option, but charging may be slower than a standard charger. Ensure compatibility before attempting this method.
What Are The Risks Of Charging Without The Original Charger?
Using an incompatible charger can lead to battery damage, overheating, or even fire hazards. It may also void the warranty. Always verify voltage, current, and connector type before using alternative charging methods.
Conclusion
Charging a cordless drill without its charger takes some care. Use safe methods and proper tools to avoid damage. Always check the battery type before trying alternative charging ways. Keep your drill ready by planning ahead and having backup options.
This helps you finish tasks without waiting long. Stay safe and follow simple steps for best results. Your drill will stay powered, even without the original charger nearby.