
Have you ever needed to drill a hole that isn’t straight? Maybe you want to follow a curve or create a unique shape, but you’re stuck wondering how to do it without ruining your project.
Drilling a curved hole might sound tricky, but with the right tips and tools, you can master it quickly. In this guide, you’ll discover simple steps that make curved drilling easier than you think. Keep reading, and you’ll learn how to add that perfect curve to your work with confidence and precision.
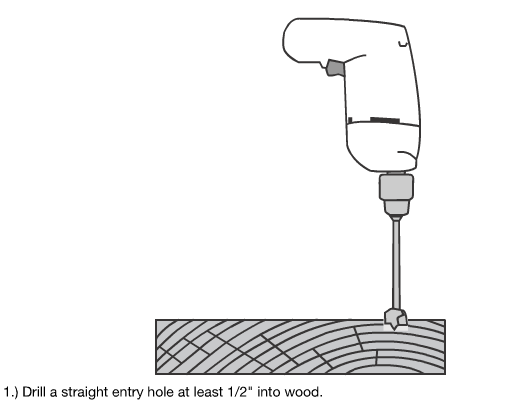
Credit: www.icscuttingtools.com
Tools For Curved Holes
Drilling a curved hole requires the right tools to get smooth and accurate results. Ordinary drills and bits often do not work well for curves. Special equipment helps guide the drill along the curved path. It also prevents the drill from slipping or breaking. Knowing which tools to use makes the job easier and safer.
Choosing The Right Drill Bits
Select drill bits designed for curved or angled holes. Flexible drill bits have a thin, bendable shaft. They can follow curves without bending too much. Choose bits made from strong materials like high-speed steel. This ensures the bit stays sharp and lasts longer. Also, pick bits with the right size for your hole.
Using Flexible Drill Shafts
Flexible drill shafts are long, bendable attachments. They connect to your drill and allow the bit to curve. This tool helps reach tight or awkward spots. It guides the drill bit smoothly along curves. Flexible shafts reduce the risk of breaking the drill bit. Use steady pressure for clean, even holes.
Specialty Drilling Tools
Specialty tools include right-angle drills and spiral bits. Right-angle drills fit into small spaces and turn the bit sideways. Spiral bits have a twisted shape to remove debris quickly. Some tools come with guides to keep the drill steady. These tools improve control and precision on curved surfaces.

Credit: www.youtube.com
Preparing The Workpiece
Preparing the workpiece is the first step to drill a curved hole accurately. It helps guide the drill and keeps the material steady. This preparation makes drilling safer and improves the final result.
Marking The Curve Path
Start by drawing the curve on the workpiece. Use a pencil or marker that shows clearly on the material. A flexible ruler or a curve template helps create smooth lines. Double-check the curve shape before you begin drilling.
Securing The Material
Clamp the workpiece firmly to your workbench. This stops it from moving while drilling. Use strong clamps that hold the edges without damaging the surface. A stable workpiece makes it easier to follow the curve.
Safety Precautions
Wear safety glasses to protect your eyes from dust and debris. Use ear protection if the drill is loud. Keep your hands away from the drill bit. Always work in a clean, well-lit area to avoid accidents.
Techniques For Curved Drilling
Drilling curved holes requires special techniques to control the drill’s path. Straight drilling methods do not work well for curves. Using the right approach helps create smooth, precise curved holes. This section explains key techniques for curved drilling.
Each method focuses on guiding the drill bit along the desired curve. Proper control, speed, and pressure are important to avoid mistakes and damage. These tips help improve your curved drilling skills.
Manual Guiding Methods
Hold the drill firmly and guide it by hand along the curve. Use slow, steady movements to keep the drill on track. Mark the curve clearly on the workpiece before drilling. This visual guide helps maintain accuracy. Take breaks to check progress and adjust your angle if needed. Practice this method on scrap material first to build confidence.
Using Templates And Jigs
Create or buy a template shaped like the curve you need. Attach the template securely to the workpiece. Use a jig to hold the drill steady and follow the template edge. This setup ensures consistent shape and depth. Templates and jigs reduce errors and make curved drilling easier for beginners. They are especially useful for repeating the same curve multiple times.
Adjusting Drill Speed And Pressure
Slow down the drill speed when drilling curves. High speed can cause the bit to slip or break. Apply gentle, even pressure to guide the bit smoothly. Avoid pushing too hard, which can damage the workpiece. Let the drill do the cutting. Adjust speed and pressure based on the material type and drill bit size. Proper control improves the quality of the curved hole.
Common Challenges
Drilling a curved hole is a tricky task with several common challenges. Understanding these problems helps you prepare and avoid mistakes. Each challenge requires careful attention and the right techniques.
Avoiding Drill Bit Breakage
Drill bits can break easily when drilling curves. The bit bends or hits the material at a wrong angle. Use sharp, strong bits designed for curves. Apply steady, gentle pressure. Stop if the bit feels stuck. Slow drilling speed reduces heat and stress. Regularly check the bit for wear or damage.
Maintaining Hole Accuracy
Curved holes can become uneven or off-center. Mark the curve clearly before drilling. Use guides or templates to keep the drill on track. Keep the drill steady and control the speed. Frequent pauses help check progress and alignment. Small adjustments maintain the shape of the hole.
Dealing With Material Variations
Different materials affect how you drill curves. Hard materials need slower drilling and stronger bits. Softer materials may clog the bit or chip easily. Adjust your technique based on material texture and thickness. Test on a scrap piece before the main work. This prevents surprises and damage during drilling.
Finishing Touches
After drilling a curved hole, the finishing touches are important. These steps make your work clean and safe. They also improve the final look and function of the hole. Take time to smooth, clean, and check your work carefully. This helps you get the best results every time.
Smoothing Hole Edges
Rough edges can cause damage or injury. Use fine sandpaper or a small file to smooth the hole edges. Move gently around the curve to keep the shape. Check for any sharp spots and smooth them out. A smooth edge helps parts fit well and prevents cracks.
Cleaning And Inspecting
Remove dust and debris from the hole and work area. Use a soft brush or cloth to clean inside the hole. Look closely for any cracks or mistakes. Fix small problems before using the hole. Clean work improves the strength and appearance of your project.
Tips For Consistent Results
Mark your drilling path clearly before starting. Use guides or templates to keep the curve steady. Drill slowly and check your progress often. Keep your tools sharp and clean for better control. Practice on scrap material to build confidence. These steps help you make perfect curved holes every time.

Credit: www.sciencedirect.com
Frequently Asked Questions
What Tools Are Best For Drilling A Curved Hole?
Specialty drill bits like flexible shaft drills or hole saws with adjustable guides work best. These tools allow controlled, smooth curved drilling.
How Do I Maintain Accuracy When Drilling Curved Holes?
Use a flexible drill bit with a steady hand. Mark the curve clearly and drill slowly to avoid mistakes.
Can I Drill Curved Holes In Metal Or Wood?
Yes, both metal and wood can be drilled curved holes. Choose appropriate drill bits and adjust speed for material type.
What Safety Precautions Are Needed For Curved Hole Drilling?
Wear safety goggles and gloves. Secure the workpiece firmly. Drill at a slow speed to maintain control and avoid accidents.
Conclusion
Drilling a curved hole takes patience and the right tools. Start slow and keep your drill steady. Use guides or flexible bits to help control the curve. Practice on scrap material before working on your final piece. Safety matters—wear goggles and keep your hands clear.
With care and focus, you can create smooth, curved holes. Try different techniques to find what works best for you. Keep practicing, and your skills will improve over time.