
If you love growing plants in ceramic planters, you know how important proper drainage is. Without a drainage hole, your plants can suffer from root rot and poor growth.
But drilling into ceramic can feel tricky and intimidating. Don’t worry—you can do it safely and easily with the right tools and steps. In this guide, you’ll learn exactly how to drill a drainage hole in your ceramic planter so your plants stay healthy and happy.
Keep reading, and soon you’ll have perfectly drained pots ready for your green friends!

Credit: www.youtube.com
Choosing The Right Tools
Choosing the right tools is the first step to drill drainage holes in ceramic planters. The right tools make the task easier and safer. Using the wrong tools can cause cracks or injuries. Focus on tools that work well with hard ceramic surfaces. Prepare well before you start drilling.
Selecting A Drill Bit
Use a diamond-tipped or carbide-tipped drill bit. These bits cut through ceramic without breaking it. Standard wood or metal bits will not work well. Choose a bit size that matches the hole you want. Start small and increase size if needed. Keep the drill bit cool by spraying water during drilling. This prevents overheating and damage to the ceramic.
Safety Gear Essentials
Wear safety glasses to protect your eyes from ceramic dust. Use a dust mask to avoid breathing in small particles. Gloves protect your hands from sharp edges and slips. Consider ear protection if your drill is loud. Work in a well-ventilated area to reduce dust buildup. Safety gear keeps you safe and comfortable during drilling.
Preparing The Planter
Preparing the planter is an important step before drilling a drainage hole. It ensures the process is safe and effective. Taking time to prepare helps avoid cracks or damage to the ceramic.
Careful preparation also protects your tools and improves accuracy. Follow simple steps to get your planter ready for drilling.
Cleaning The Surface
Start by cleaning the planter’s bottom surface. Remove dirt, dust, and any residues. Use a soft cloth with mild soap and water. Dry the area completely with a towel. A clean surface helps the drill bit grip better. It also prevents slipping during drilling. Clean surfaces reduce the risk of cracking the ceramic.
Marking The Drill Spot
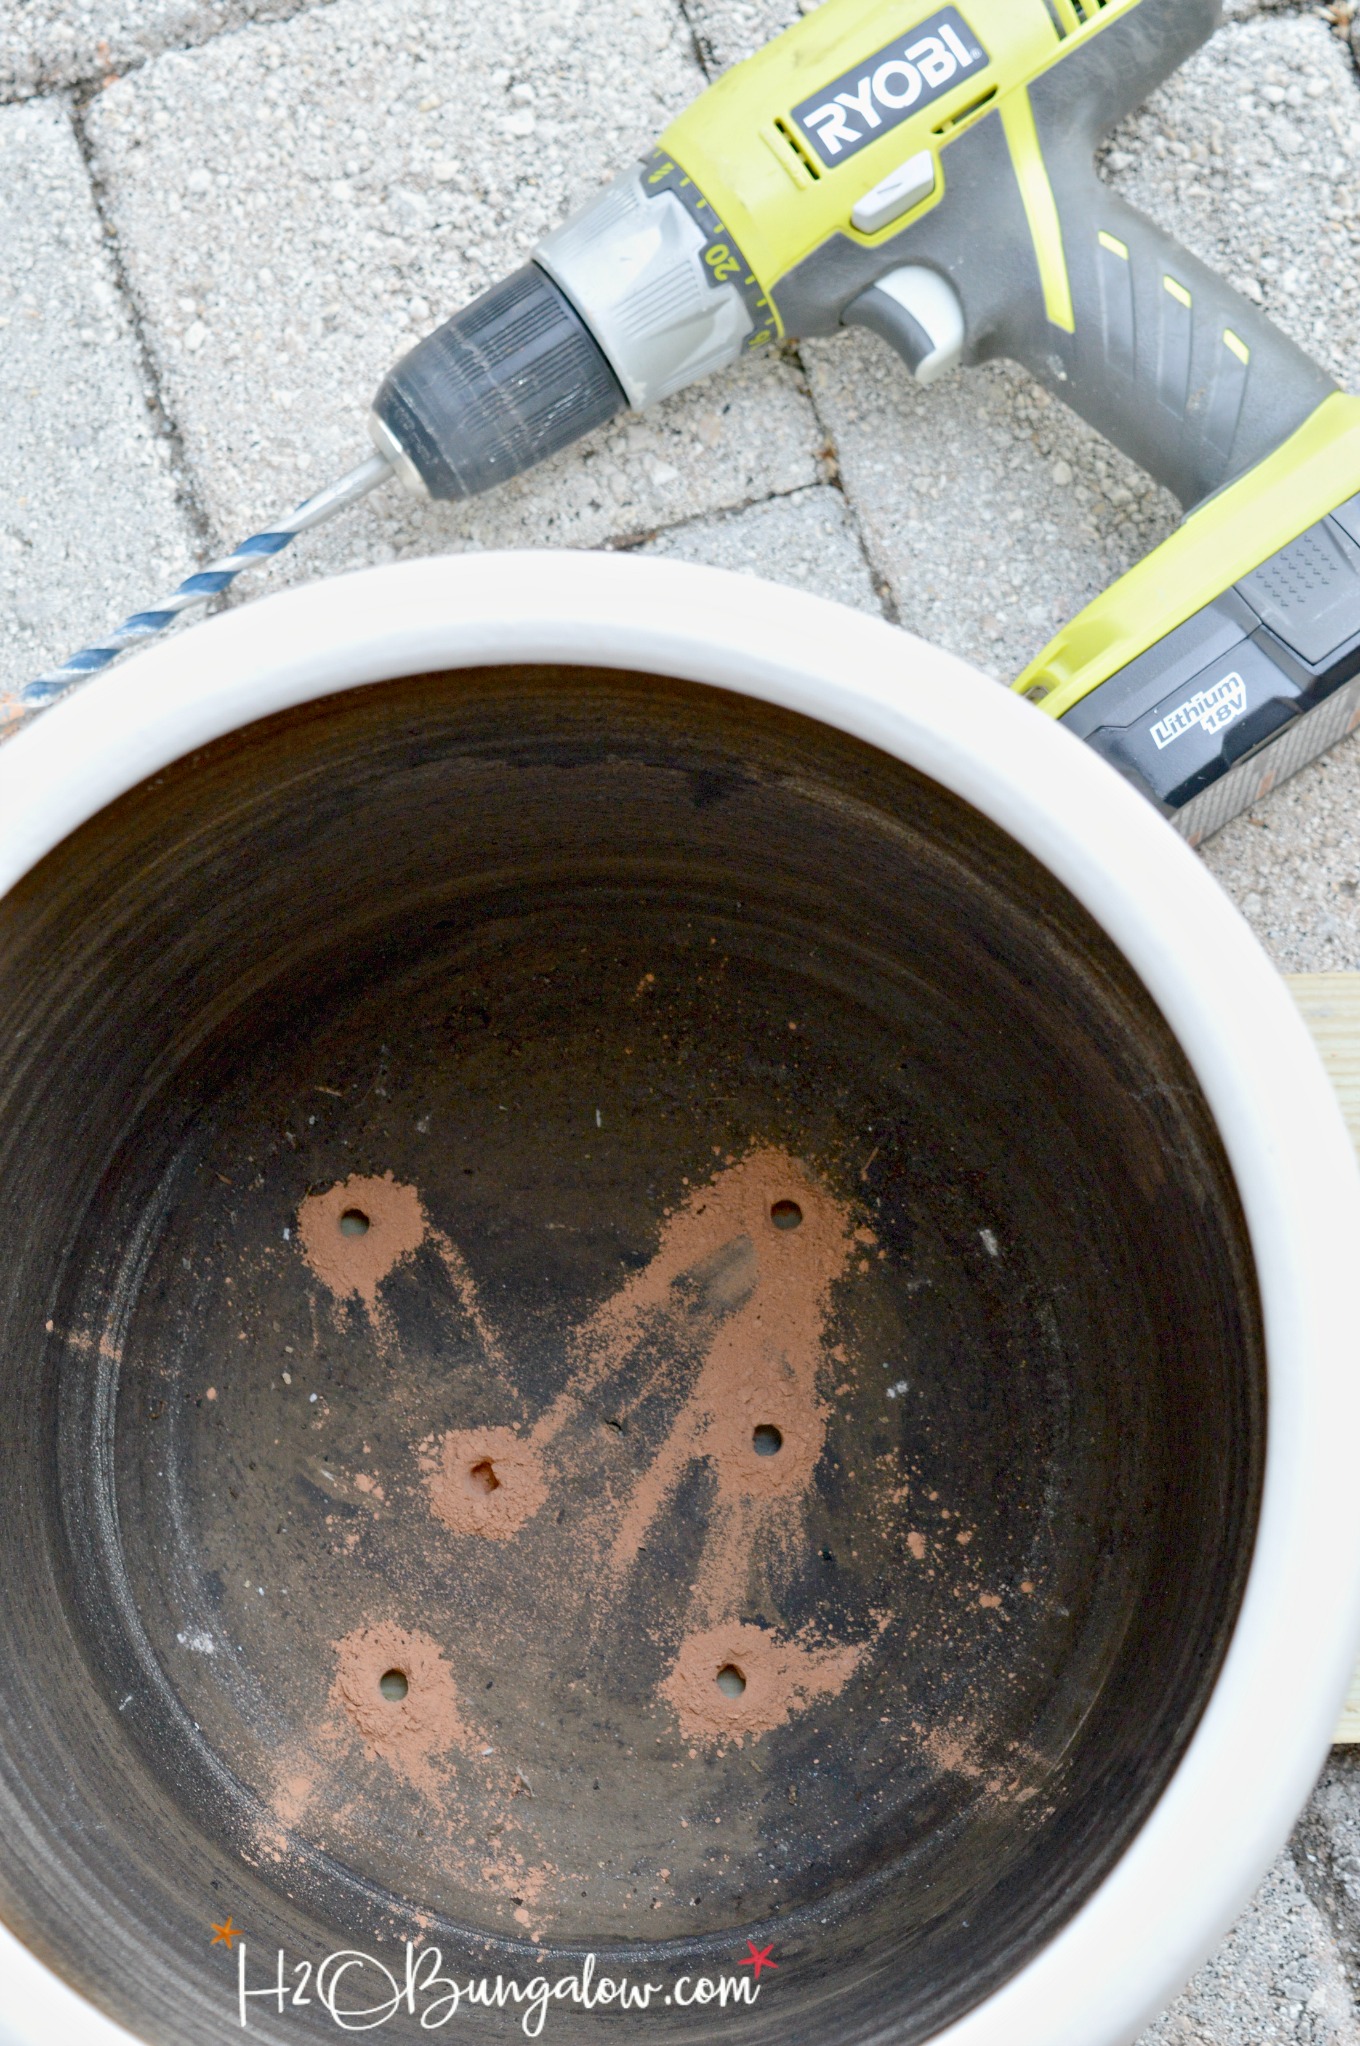
Identify the best spot for the drainage hole. Choose a flat area near the center of the bottom. Use a pencil or marker to make a clear dot. Marking ensures you drill in the right place. Avoid areas near edges to prevent cracks. Double-check the spot before you start drilling. This step helps keep the hole neat and functional.
Drilling Techniques
Drilling a drainage hole in a ceramic planter requires the right technique. The process needs care to avoid cracks or breaks. Using proper methods makes the task easier and safer. Below are key techniques to help you drill smoothly and correctly.
Setting Up The Drill
Choose a drill with a diamond or carbide bit. These bits cut through ceramic without damage. Secure the planter on a flat surface. Use clamps or a towel to keep it steady. Mark the spot where the hole will go. This helps guide the drill and prevents slipping.
Drilling At The Correct Speed
Use a low drill speed to avoid cracking. High speed can cause the ceramic to overheat and break. Start slow and steady, applying gentle pressure. Let the drill bit do the work, no force needed. Keep the speed consistent throughout drilling.
Using Water To Cool The Drill Bit
Water cools the drill bit and ceramic during drilling. Spray water or use a damp sponge near the drill area. This prevents overheating and reduces dust. Cool bits last longer and cut cleaner holes. Keep water flowing lightly while you drill.
Finishing Touches
After drilling a drainage hole in your ceramic planter, the final steps ensure safety and functionality. These finishing touches help protect your plants and extend the life of your planter. Pay close attention to these details for the best results.
Smoothing Rough Edges
Drilling can leave sharp, rough edges around the hole. These edges can crack the planter or hurt your hands. Use fine sandpaper or a diamond file to smooth the rim gently. Take your time and check frequently to avoid removing too much material. A smooth edge prevents chips and keeps the planter sturdy.
Testing Drainage Efficiency
Good drainage is key to healthy plants. Pour water slowly into the planter and watch how it flows out. Water should drain evenly without pooling. If drainage is slow, the hole might be too small or blocked. Clear any debris with a toothpick or small brush. Proper drainage avoids root rot and keeps soil fresh.
Tips To Avoid Common Mistakes
Drilling drainage holes in ceramic planters requires care. Mistakes can cause cracks or damage. Follow these tips to avoid common problems. Work slowly and use the right tools. Protect your planter and make sure water drains well.
Preventing Cracks
Use a drill bit made for ceramics or glass. Start drilling at a low speed. Keep the drill steady and avoid pressing too hard. Place masking tape where you want to drill. This helps stop the drill bit from slipping. Cool the area by spraying water while drilling. Take breaks to prevent heat build-up. Heat can cause cracks in the ceramic.
Maintaining Drill Bit Sharpness
Sharp drill bits cut cleaner holes. Dull bits cause cracks and rough edges. Check your drill bit before starting. Replace it if it looks worn out. Use water or oil to cool the bit. Cooling keeps it sharp longer. Clean the drill bit after each use. This removes dust and ceramic bits. Proper care extends the drill bit’s life and improves your results.

Credit: www.youtube.com
Credit: h2obungalow.com
Frequently Asked Questions
How Do I Safely Drill A Hole In A Ceramic Planter?
Use a diamond-tipped drill bit and keep the area wet. Drill slowly to prevent cracking. Wear safety goggles and gloves for protection.
What Tools Are Needed To Drill Drainage Holes In Ceramic?
You need a power drill, diamond drill bits, masking tape, water spray, safety goggles, and gloves for this task.
How Can I Prevent Ceramic Planter From Cracking?
Use low speed, steady pressure, and keep the drill bit wet. Apply masking tape on the drilling spot to reduce slipping.
What Size Hole Is Ideal For Planter Drainage?
A hole around ½ inch or slightly smaller works well. It allows water to drain without soil loss.
Conclusion
Drilling a drainage hole in your ceramic planter helps plants stay healthy. Take your time and use the right tools for safety. Keep the planter steady to avoid cracks or damage. Always wear protective gear like goggles and gloves. A small hole lets water flow out and stops root rot.
Your plants will grow better with good drainage. Now, you can enjoy gardening with confidence and care. Simple steps make a big difference in plant health. Try it yourself and see the results.