
Have you ever wanted to create your own jewelry or decorations using beautiful crystal stones? Drilling holes in crystal stones might seem tricky, but with the right steps, you can do it safely and easily.
Imagine turning your plain crystals into stunning pendants or unique art pieces that everyone will admire. In this guide, you’ll discover simple tips and tricks to drill perfect holes without cracking or damaging your stones. Keep reading, and you’ll gain the confidence to bring your creative ideas to life!
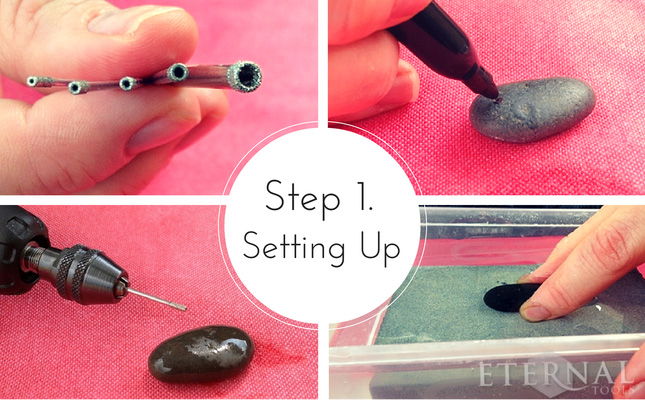
Credit: eternaltools.com
Choosing The Right Tools
Choosing the right tools is key to drilling holes in crystal stones safely and cleanly. The right equipment makes the process easier and protects your crystals from damage. Using unsuitable tools can cause cracks or breaks.
Focus on three main areas: drill bits, drills, and safety gear. Each part plays an important role in the drilling process. Selecting good tools helps you achieve smooth, precise holes every time.
Types Of Drill Bits
Diamond drill bits work best for crystals. They are strong and cut through hard materials gently. Carbide bits can chip crystals, so avoid them. Choose bits with a small diameter for delicate stones. Smaller bits reduce pressure and lower the risk of breaking.
Recommended Drills For Crystals
Use a variable speed drill for better control. Lower speeds prevent overheating and cracking. A handheld rotary tool or a drill press works well. Make sure the drill allows you to adjust speed easily. Consistent, slow drilling gives the best results.
Safety Gear Essentials
Wear safety glasses to protect your eyes from dust and fragments. Use a dust mask to avoid breathing in fine particles. Gloves protect your hands from sharp edges. Work in a well-ventilated space to keep fresh air flowing.
Preparing Crystal Stones
Preparing crystal stones is the first step in drilling holes safely and neatly. Proper preparation protects the stone from cracking or breaking. It also helps you drill the hole exactly where you want it. This section explains how to prepare your crystals for drilling.
Selecting Suitable Crystals
Choose crystals that are strong and free from cracks. Softer stones may break during drilling. Clear or solid-colored crystals usually work best. Avoid stones with many flaws or fractures. The right crystal makes drilling easier and safer.
Marking Drill Points
Use a marker or pencil to mark the exact spot for the hole. Marking helps you stay focused and accurate. Place the mark on a flat or stable surface of the crystal. Check twice before starting to drill to avoid mistakes.
Securing The Stone
Hold the crystal firmly using a clamp or soft cloth. This stops the stone from moving while drilling. Avoid holding the crystal by hand to prevent injury. A steady stone ensures a smooth, clean hole without damage.
Drilling Techniques
Drilling holes in crystal stones requires careful techniques to avoid cracks or damage. Using the right method helps you create clean and precise holes. This section covers key drilling techniques to get the best results.
Follow these steps to protect your crystal and work safely. Each step plays an important role in the drilling process.
Setting The Drill Speed
Use a low drill speed for crystal stones. High speeds create heat and can crack the stone. Keep the drill speed steady to control the process. A speed between 300 and 500 RPM works well. Slow and steady is the best approach.
Using Water For Cooling
Water cools the drill bit and stone during drilling. It prevents overheating and reduces dust. Use a small container of water or spray water gently. Keep the drill bit wet all the time. This step protects the crystal and extends the drill bit’s life.
Applying Proper Pressure
Apply light, even pressure on the drill. Pressing too hard can crack the crystal or break the drill bit. Let the drill do the work. Hold the stone firmly but avoid squeezing it too tight. Gentle and steady pressure gives the best results.
Preventing Damage
Drilling holes in crystal stones requires care to avoid damage. Crystals can crack, chip, or break if handled incorrectly. Taking steps to prevent damage helps keep your stones beautiful and intact.
Understanding common mistakes and proper handling protects your crystals. Learning how to manage cracks and chips also extends the life of your work.
Common Mistakes To Avoid
Using too much pressure can crack the stone. Drilling too fast causes heat, which can break crystals. Skipping water or coolant dries the crystal, increasing break risk. Not using the right drill bit can damage the surface. Moving the drill too much makes uneven holes and chips.
Handling Fragile Crystals
Hold the stone firmly but gently. Use soft cloth or padding under the crystal. Keep the crystal wet during drilling to cool it down. Use slow, steady drilling speed for control. Take breaks to prevent overheating and stress on the stone.
Dealing With Cracks And Chips
Inspect crystals before drilling for existing cracks. Avoid drilling near cracks to stop spreading. Use gentle pressure to reduce chip risk. Small chips can be smoothed with fine sandpaper. If cracks appear, stop drilling and reassess the stone.
Finishing Touches
Finishing touches make your drilled crystal stones look neat and ready to use. This step improves both the look and feel of the stones. It also helps protect the crystals from damage during use. Follow these simple steps to give your stones a smooth and polished finish.
Smoothing Drill Edges
Drilled holes often have sharp or rough edges. Use fine sandpaper or a small diamond file to smooth these edges. Gently rub around the hole until it feels smooth to touch. Take care not to apply too much pressure to avoid cracking the stone.
Cleaning Drilled Crystals
Dust and small stone particles stick inside and around the hole. Clean the crystals by rinsing them in warm water. Use a soft brush to remove dirt inside the hole. Dry the stones with a soft cloth to prevent water spots.
Polishing Tips
Polishing restores shine and smoothness. Use a polishing cloth or a soft buffing pad. Apply a small amount of crystal-safe polish if needed. Rub gently in circular motions for a clear, bright finish. Let the crystals dry completely before handling.

Credit: www.amazon.com
Troubleshooting Common Issues
Drilling holes in crystal stones can be tricky. Several common problems can slow down the process or damage your crystal. This section helps you fix these issues quickly. Read on to learn how to solve the most frequent drilling problems.
Drill Bit Slipping
Drill bit slipping makes it hard to start the hole. It can scratch or damage the crystal surface. To stop slipping, use a small piece of tape on the spot. This gives the drill bit some grip. Also, start drilling slowly. Keep the drill steady and firm.
Overheating Problems
Drilling crystal creates heat. Too much heat can crack or break the stone. To avoid this, use water to cool the drill bit and stone. Pause often to let the drill cool down. Use a low speed setting on the drill. Slow and steady works best.
Uneven Holes
Uneven holes look messy and can weaken the crystal. Keep the drill straight and steady during the process. Use a drill guide or clamp to hold the stone firmly. Check the hole angle often. Correct any tilt before drilling deeper.

Credit: www.youtube.com
Frequently Asked Questions
What Tools Are Best For Drilling Crystal Stones?
Use a diamond-tipped drill bit for precise, clean holes. A rotary tool or drill press works well with water cooling to prevent cracks and overheating.
How Do I Prevent Crystal Stones From Cracking?
Drill slowly and keep the stone wet. Water cools the stone and drill bit, reducing heat and minimizing cracks during drilling.
Can I Drill Holes In All Types Of Crystal Stones?
Most crystals can be drilled, but hardness varies. Softer crystals need gentle handling, while harder ones require diamond bits for effective drilling.
How Large Should The Drill Hole Be In Crystal Stones?
Choose a drill bit size based on your project needs. Common hole sizes range from 1mm to 3mm for jewelry making and crafts.
Conclusion
Drilling holes in crystal stones takes care and patience. Use the right tools and steady hands. Keep the drill speed slow to avoid cracks. Always wear safety gear for protection. Practice on small pieces first to gain confidence. With time, your skills will improve naturally.
Enjoy creating beautiful, unique crystal crafts. Remember, safety and patience make the process easier. Try different techniques to find what works best. Your creativity can shine through every drilled stone. Keep practicing and have fun with your projects!