
Drilling into your backsplash might sound tricky, but with the right approach, you can do it safely and easily. Whether you want to hang a new kitchen accessory or install a light fixture, knowing how to drill without cracking tiles is key.
In this guide, you’ll discover simple steps and expert tips that help you avoid common mistakes. Keep reading, and you’ll gain the confidence to tackle your backsplash project like a pro.
Choosing The Right Tools
Choosing the right tools makes drilling into a backsplash easier and safer. The right drill and bits protect your tiles from cracking. Proper safety gear prevents injuries and dust inhalation. This section covers the best drills, drill bits for various materials, and essential safety gear.
Best Drill Types For Backsplash
Use a cordless drill for easy handling and mobility. A drill with variable speed control helps avoid tile damage. Hammer drills are not suitable unless drilling into concrete behind tiles. A drill with a clutch prevents overdriving screws and damaging the backsplash.
Drill Bits For Different Materials
Use carbide-tipped masonry bits for ceramic or porcelain tiles. Glass drill bits work well for smooth, fragile surfaces. For natural stone backsplash, diamond-tipped bits provide clean holes. Always start with a small pilot bit before using larger sizes.
Safety Gear Essentials
Wear safety goggles to protect eyes from flying debris. Use a dust mask to avoid inhaling tile dust. Gloves protect hands from sharp edges and drill heat. Ear protection helps when drilling loud materials or for long periods.
Credit: www.younghouselove.com
Preparing The Area
Preparing the area before drilling into a backsplash is key for a smooth job. It saves time and stops damage. Careful steps help protect your walls and tools.
Cleaning And Marking Drill Spots
Start by cleaning the backsplash surface. Use a mild cleaner and a soft cloth. Dirt and grease can hide marks and cause mistakes. After cleaning, dry the area well.
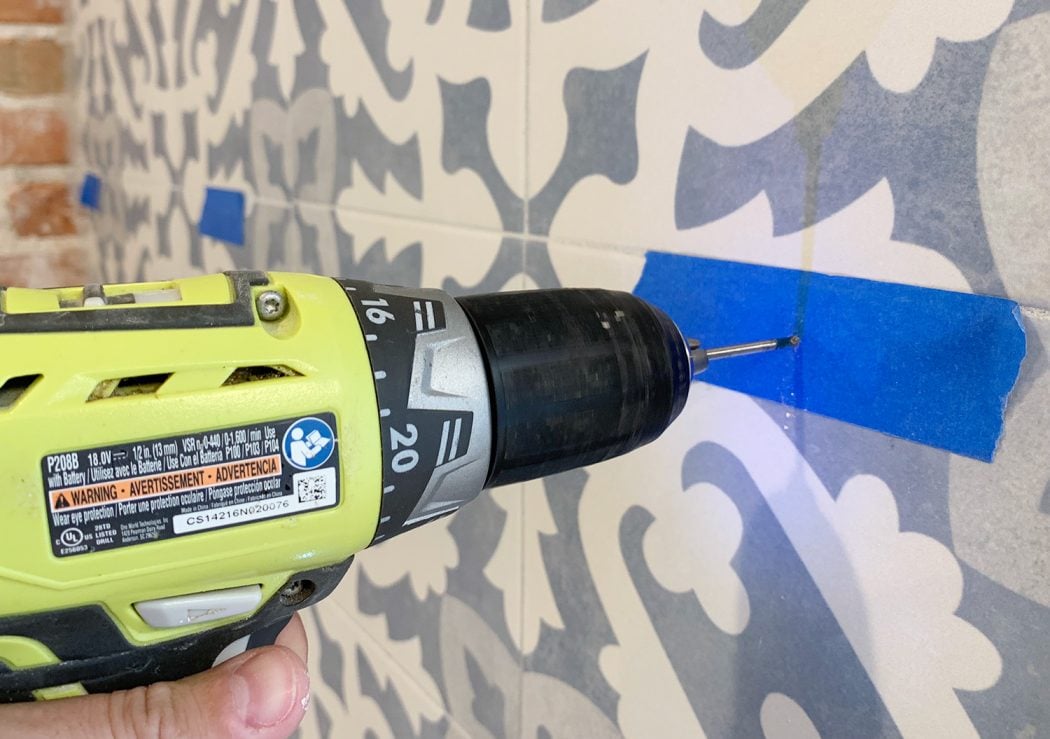
Next, mark the drill spots clearly. Use a pencil or painter’s tape. Make small, visible marks to guide your drill. Double-check measurements before moving on.
Protecting Surrounding Surfaces
Cover countertops and nearby walls with drop cloths or old towels. This stops scratches and dust from spreading. Use painter’s tape to secure coverings and keep edges neat.
Wear safety glasses and gloves to protect yourself. Keep pets and children away from the work area to avoid accidents.
Checking For Hidden Wires And Pipes
Use a stud finder with wire and pipe detection. Scan the backsplash area carefully. Hidden wires or pipes can cause serious damage and injury.
Mark any found wires or pipes on the wall. Avoid drilling near these spots. If unsure, consult a professional before drilling.
Drilling Techniques
Drilling into a backsplash requires careful techniques to avoid damage. The right methods help create clean holes without cracking tiles. Follow simple steps for better control and safety.
Starting With A Pilot Hole
Begin by marking the spot where you want the hole. Use a small drill bit to make a pilot hole. This hole guides the larger bit and prevents slipping. A pilot hole reduces pressure on the tile surface.
Controlling Drill Speed And Pressure
Keep the drill speed low to avoid overheating the tile. Apply gentle, steady pressure without forcing the drill. Let the drill bit do the work. High speed or too much force can crack the backsplash.
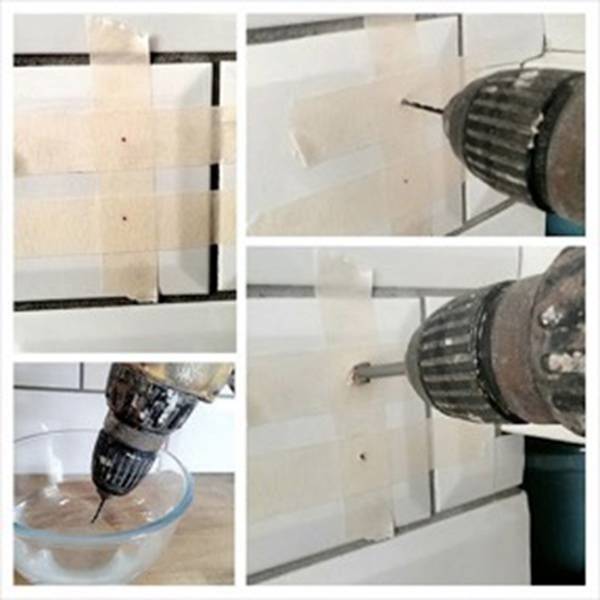
Using Tape To Prevent Cracks
Place a piece of masking or painter’s tape over the drilling spot. The tape holds the drill bit steady and stops the tile from chipping. It also helps mark the exact spot clearly. Remove the tape after drilling for a clean finish.
Credit: ti-nathan.com
Handling Common Challenges
Drilling into a backsplash can be tricky. Tiles are hard and delicate. Small mistakes can cause cracks or chips. Knowing how to handle these common challenges helps you get the job done right. This guide covers dealing with hard tiles, fixing mistakes, and avoiding slippage.
Dealing With Hard Tiles
Tiles can be very tough to drill. Use a drill bit made for tiles, like a carbide or diamond bit. Start with a slow drill speed. Press lightly to avoid cracking the tile. Keep the drill steady and avoid pushing too hard. Use water to cool the bit and stop dust. This will protect both the tile and the bit.
Fixing Mistakes And Chips
Chips or cracks may happen. Small chips can be fixed with tile filler or epoxy putty. Match the color to your tile for a clean look. For bigger cracks, use a tile repair kit. Clean the area before applying any filler. Let it dry fully before sanding or painting. This keeps your backsplash looking neat.
Avoiding Slippage
Slippage can ruin your drilling job. Use masking tape on the tile where you want to drill. The tape stops the bit from sliding. Mark the drilling spot on the tape. Hold the drill steady and start slowly. This method keeps the drill bit in place and prevents damage.
Finishing Touches
After drilling into your backsplash, the job is not quite finished. The finishing touches are important to keep your backsplash neat and safe. These steps help avoid damage and make your work look professional. Follow these simple tips to complete your project with care.
Cleaning Drill Holes
Start by removing dust and debris from the drill holes. Use a small brush or vacuum to clear out loose particles. This cleaning helps fixtures fit better and prevents dirt buildup. Take your time to ensure each hole is clean and smooth.
Sealing And Protecting Edges
Apply a clear sealant around the edges of the holes. This step protects the backsplash from water damage and stains. Use a small brush to spread the sealant evenly. Let it dry fully before moving to the next step. Sealing keeps your backsplash looking fresh for a long time.
Installing Fixtures Securely
Place your fixtures carefully into the cleaned and sealed holes. Tighten screws or anchors firmly but gently. Avoid overtightening, which can crack tiles or damage the backsplash. Check that each fixture is stable and aligned. Secure installation ensures durability and safety.
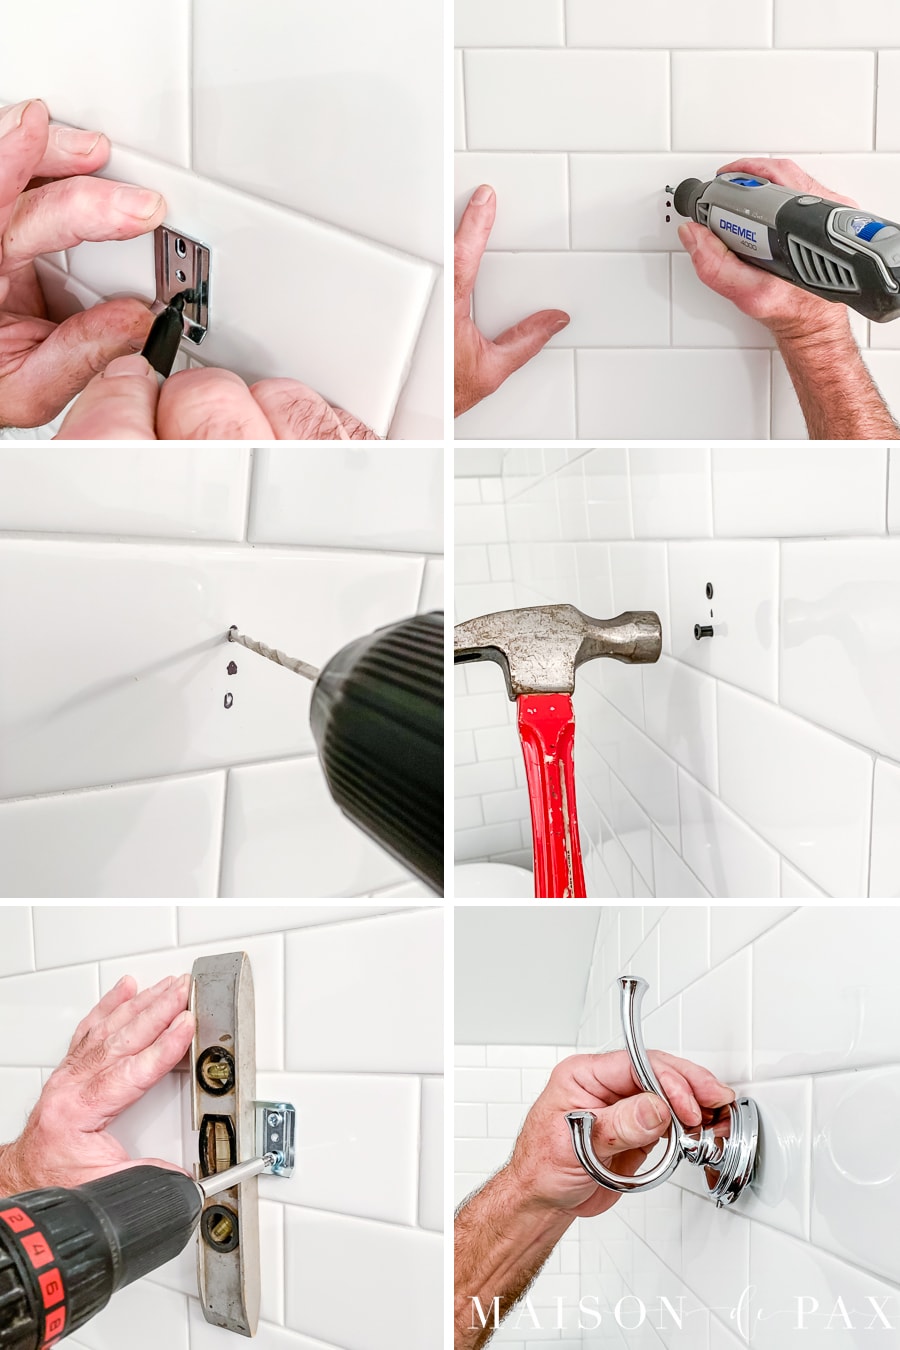
Credit: www.maisondepax.com
Frequently Asked Questions
How Do I Drill Into A Backsplash Without Cracking It?
Use a drill bit designed for tile or glass. Start with a small bit at low speed. Apply gentle, steady pressure and keep the bit cool with water. Avoid sudden force to prevent cracks.
What Drill Bit Is Best For Drilling A Backsplash?
A carbide-tipped masonry bit or a diamond-tipped bit works best. These bits can easily cut through ceramic, glass, or stone tiles without damage. Choose the size based on the hole you need.
Should I Use A Hammer Drill For Backsplash Tiles?
No, avoid using a hammer drill. Hammer action can crack delicate tiles. Use a regular drill with the correct bit and slow speed for safe drilling.
How Can I Prevent Backsplash Tile From Chipping?
Place masking tape over the drilling spot. This helps stabilize the drill bit and reduces slipping. Drill slowly and steadily to minimize chipping and ensure a clean hole.
Conclusion
Drilling into a backsplash can seem tricky at first. With the right tools and steps, it becomes simple. Always measure twice before you drill once. Use a proper drill bit made for tiles. Take your time and apply steady pressure.
Avoid rushing to prevent cracks or damage. Safety gear protects your eyes and hands. Following these tips helps you finish your project well. Now, you can hang shelves or hooks with confidence. Enjoy your improved kitchen space!