
If you own a drill press, you know how important it is to have a sturdy, reliable table to work on. But what if you could build your own drill press table tailored exactly to your needs?
Imagine having a workspace that fits your tools perfectly, improves your accuracy, and makes every project easier. You’ll discover simple, step-by-step instructions to make a drill press table that saves you time and effort. Ready to upgrade your workshop and take control of your drilling projects?
Let’s get started.
Choosing The Right Materials
Choosing the right materials is key for building a strong drill press table. Good materials make the table durable and safe. The right choices help the table last longer and work better.
Focus on wood types and hardware. Both affect the table’s stability and usefulness. Use materials that fit your needs and budget.
Selecting Wood Types
Choose wood that is hard and stable. Hardwood like oak or maple is strong and lasts long. Plywood is also a good choice. It resists warping and is easy to work with. Avoid soft woods like pine; they can dent easily.
Pick wood that is thick enough for support. At least 1 inch thick works well. A smooth surface helps with accurate drilling. Sand the wood before assembly for the best results.
Essential Hardware And Tools
Use strong bolts and screws to hold parts tightly. Metal brackets add extra support. Make sure the hardware fits the wood thickness. Washers help distribute pressure evenly.
Tools needed include a drill, screwdriver, and wrench. A tape measure and square keep everything aligned. Clamps hold pieces steady during assembly. Good tools make the job easier and safer.
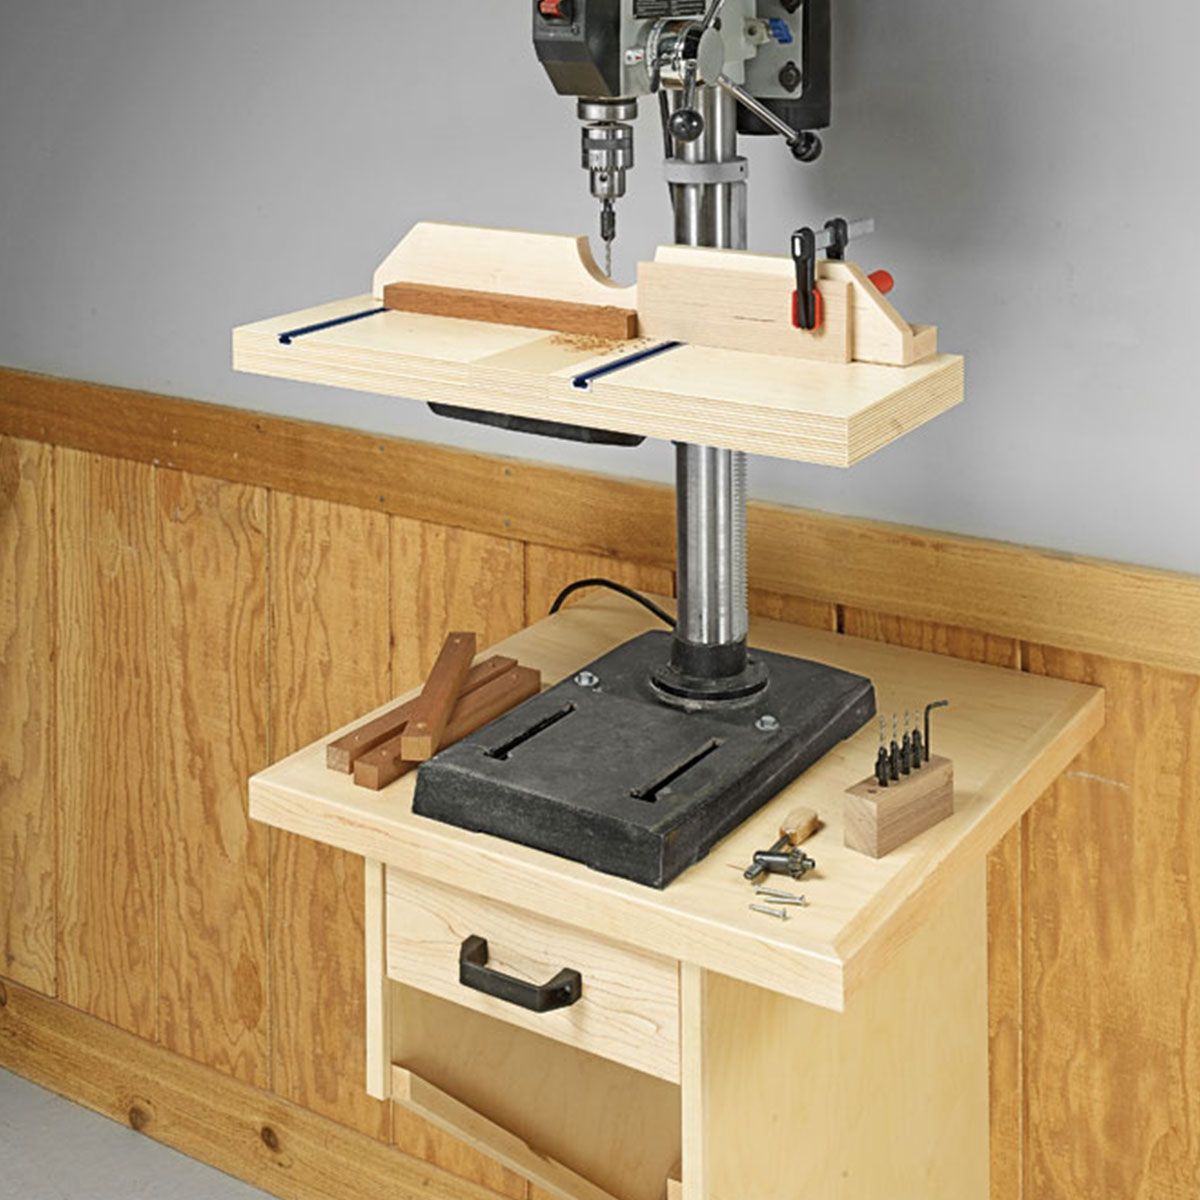
Credit: www.woodpeck.com
Measuring And Planning
Measuring and planning are the first steps in making a drill press table. These steps help ensure your table fits your drill press perfectly. Careful measuring also makes sure the table is strong and safe to use. Planning helps avoid mistakes and saves time during building.
Determining Table Size
Start by measuring the base of your drill press. Note the width and depth to find a good table size. The table should be larger than the drill press base. This extra space lets you work on bigger pieces of wood or metal. Aim for a table that is sturdy but not too heavy to move.
Think about the type of projects you will do. If you work with large materials, make the table bigger. For small projects, a compact table works better. Write down your measurements and ideas before cutting any wood.
Marking Drill And Clamp Positions
Mark where the drill press will attach to the table. Use a pencil to trace the drill base on the table surface. This outline helps you place the drill accurately.
Next, plan clamp positions. Clamps hold your workpieces steady while drilling. Mark spots around the table edges for clamps. Make sure clamps will not block the drill or your hands. Proper clamp placement improves safety and precision.
Double-check all marks before drilling holes or assembling parts. Good marks mean an easier build and better final table.
Cutting And Assembling Parts
Cutting and assembling parts is the next step in making your drill press table. This stage shapes the main pieces that create a strong and stable table. Proper cutting ensures parts fit well together. Careful assembly builds a reliable structure for safe drilling.
Cutting The Base And Fence
Start by cutting the base from a sturdy piece of wood. The base holds the entire table steady. Measure twice, cut once. Use a saw to make straight, clean cuts. Next, cut the fence. The fence guides your drill work. It must be straight and smooth. Sand edges to avoid splinters. Accurate cuts make assembly easier and improve safety.
Attaching Supports And Braces
Supports keep the table firm and prevent wobbling. Cut supports to fit between the base and top. Braces add extra strength at corners and joints. Attach supports and braces using screws or nails. Check that everything stays square during assembly. Tighten screws well but avoid splitting the wood. Strong supports make your drill press table last longer.
Installing The Table On The Drill Press
Installing the table on the drill press is a key step. It ensures stability and accuracy during drilling. A well-installed table helps keep your workpiece steady. It also makes your work safer and easier. Follow these steps carefully to position and secure the table correctly.
Aligning The Table
Start by placing the table on the drill press column. Adjust its height to match your project needs. Make sure the table is level and flat. Use a small level tool for precision. Align the table so the center hole matches the drill bit. This ensures your drill goes straight through the workpiece.
Check the table’s position from different angles. The table should not tilt or wobble. Tighten any adjustment knobs lightly to hold the position. Keep checking alignment before final tightening. Proper alignment improves drilling accuracy and safety.
Securing With Bolts And Clamps
Use bolts or clamps to secure the table firmly. Bolts offer strong, lasting hold. Find the bolt holes on the drill press column. Insert bolts and tighten with a wrench. Do not overtighten to avoid damage. Clamps provide quick adjustment options. Place clamps around the column and table bracket. Tighten clamps enough to hold the table steady. Double-check the table does not move after securing. A stable table reduces errors and improves your drill press work.
Adding Features For Precision
Adding features to your drill press table can greatly improve precision. It helps you make cleaner, more accurate cuts. Small upgrades can make a big difference in your work quality. Focus on parts that guide and support your material well.
Incorporating A Fence For Accuracy
A fence is a straight edge fixed to the table. It helps keep your workpiece steady and aligned. You can make a fence from wood or metal strips. Attach it parallel to the drill bit for consistent spacing. It stops your material from moving side to side. This leads to more exact holes and safer drilling.
Using Inserts And Bushings
Inserts and bushings fit into the table’s hole. They guide the drill bit and protect the table surface. Use inserts that match the drill bit size for tight fits. Bushings help center the bit and prevent wobbling. Changing inserts allows you to work with different drill bit sizes. These small parts improve drill control and extend table life.
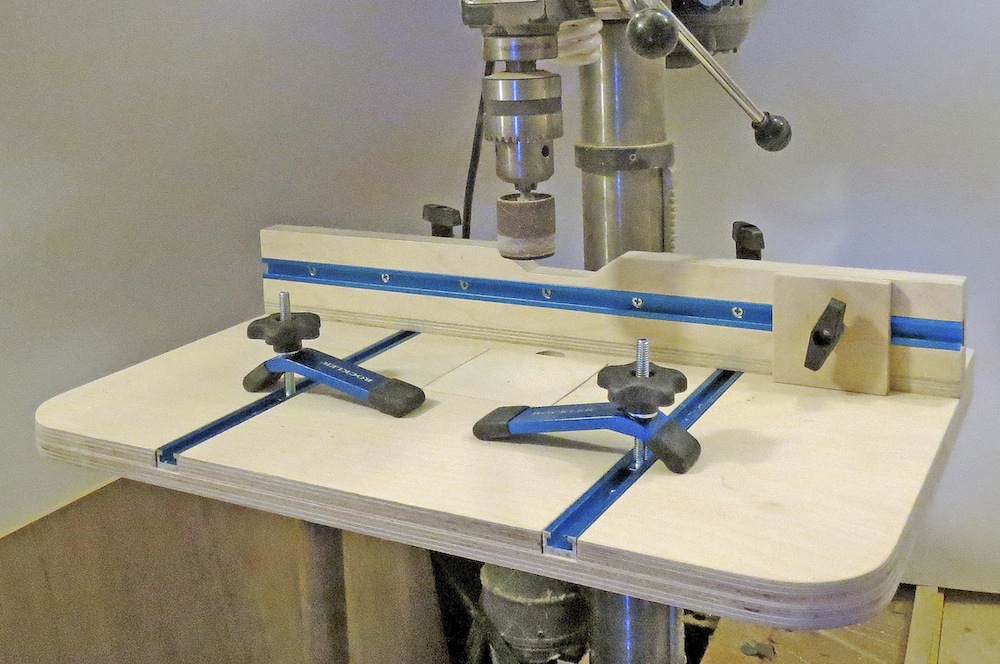
Credit: www.wwgoa.com
Finishing Touches
Finishing touches make your drill press table strong and neat. They improve safety and help the table last longer. Careful finishing also ensures your work is precise and smooth. Spend time on these steps for the best results.
Sanding And Sealing
Start by sanding the table surface with fine-grit sandpaper. This removes rough spots and splinters. Sand edges and corners to prevent scratches and cuts. After sanding, clean the dust well with a cloth.
Apply a wood sealer or varnish to protect the surface. Use a brush or cloth to spread it evenly. Let it dry fully before using the table. Sealing stops moisture from damaging the wood. It also makes cleaning easier.
Testing For Stability And Accuracy
Check the table for any wobbling or loose parts. Tighten screws and bolts firmly. Place a level on the table surface to test flatness. Adjust the legs or supports if the table tilts.
Test the drill press by making a few sample holes. Use a scrap piece of wood to check hole accuracy. Make sure the drill moves smoothly and stays steady. Fix any issues before starting real work.
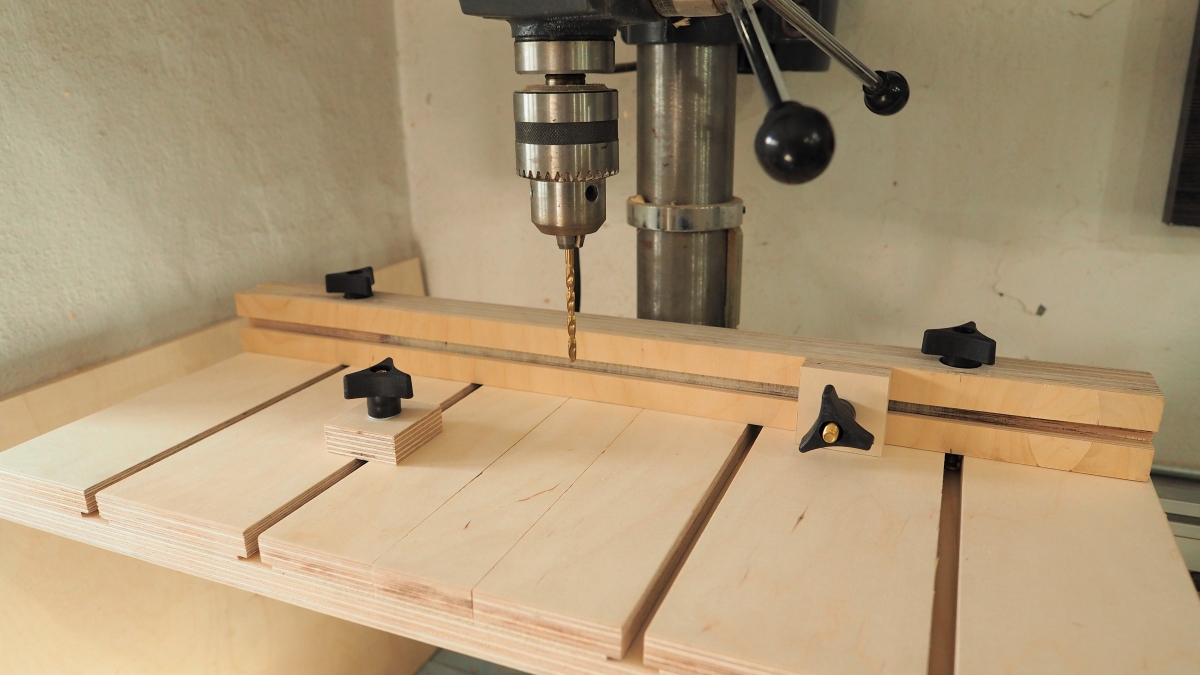
Credit: www.diymontreal.com
Frequently Asked Questions
What Materials Are Needed To Build A Drill Press Table?
You need plywood or MDF for the top, 2×4 lumber for the frame, screws, and clamps. A measuring tape and drill are also essential.
How Do I Ensure Drill Press Table Stability?
Use sturdy wood, secure joints with screws, and add support braces. Attach the table firmly to the drill press base for extra stability.
Can I Customize The Size Of The Drill Press Table?
Yes, customize the table size based on your drill press and workspace. Measure your drill press base and adjust dimensions accordingly.
How Do I Add A Fence To The Drill Press Table?
Attach a straight wooden fence using clamps or screws. This helps guide material for precise drilling and improves safety.
Conclusion
Building a drill press table can make your work easier and safer. You only need simple tools and materials to start. Follow the steps carefully and take your time. A sturdy table helps you drill with better control and precision.
It also protects your drill press and workpieces. Keep your workspace clean and organized for best results. This project saves money and adds value to your workshop. Now, you are ready to create a practical drill press table yourself. Give it a try and enjoy your improved drilling experience.