
Have you ever wished your drill press could do more than just drill holes? What if you could turn it into a simple lathe and open up a whole new world of woodworking or metalworking?
You’re about to discover how to transform your drill press into a basic lathe with easy steps and minimal tools. This isn’t just a cool trick—it’s a way to save money, space, and time while boosting your workshop’s versatility. Keep reading, and by the end, you’ll know exactly how to make your drill press work like a lathe, unlocking new projects you never thought possible.

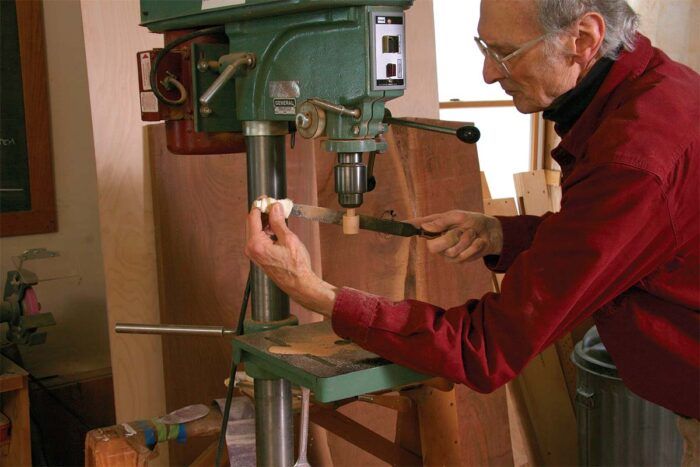
Credit: www.youtube.com
Choosing The Right Drill Press
Choosing the right drill press is the first step to make a lathe work properly. Not all drill presses fit this task well. The right one gives stability and control for your project. It handles the pressure and speed needed for lathe work. Here are important factors to consider when selecting a drill press for lathe conversion.
Key Features To Look For
Look for a drill press with a strong, sturdy frame. Stability reduces vibration and improves accuracy. A drill press with adjustable speed settings is essential. It allows you to control the turning speed. Check for a reliable spindle and chuck size. These parts hold your workpiece firmly. A drill press with a smooth, easy-to-use feed lever is best.
Power And Speed Considerations
Power affects how well the drill press can handle different materials. Choose a motor with enough horsepower for your projects. Variable speed control lets you adjust the rotation speed. Low speeds suit larger pieces and harder materials. High speeds work well for smaller, softer pieces. Ensure the drill press can maintain speed under load.
Size And Capacity Factors
Size matters for the workpieces you want to turn. The drill press table should be large and adjustable. It must hold your workpiece securely and allow easy positioning. Check the throat distance—the space between the spindle and column. A larger throat distance lets you work on bigger parts. Consider the maximum spindle travel for depth capacity. Choose a drill press that fits your workspace comfortably.
Tools And Materials Needed
To make a lathe work on a drill press, you need the right tools and materials. These items help you set up your project safely and correctly. Having the necessary components ensures smooth operation and better results.
Some tools are essential for the lathe setup. Others are optional but can improve your work. Safety gear protects you from accidents and injuries. Each part plays an important role in the process.
Essential Components
- Drill press with a sturdy base and adjustable speed
- Lathe attachment or a homemade jig to hold the workpiece
- Chuck or collet to grip the material firmly
- Tool rest for steady hand support during cutting
- Calipers or measuring tools for precise dimensions
- Basic hand tools like screwdrivers and wrenches
Optional Accessories
- Faceplate for mounting irregular shapes
- Live center or tailstock for extra support
- Sharpened lathe tools for cleaner cuts
- Depth gauge to control cutting depth
- Work light to improve visibility
- Dust collection system to keep the area clean
Safety Gear
- Safety glasses to protect your eyes from flying debris
- Hearing protection to reduce noise exposure
- Dust mask or respirator to avoid inhaling particles
- Gloves that fit well but do not interfere with controls
- Close-fitting clothing to prevent snagging
Preparing The Drill Press
Preparing the drill press is the first step to make a lathe work on it. This process ensures safety and accuracy. Taking time to prepare helps avoid mistakes and damage. Three main tasks require attention: cleaning and inspection, adjusting the table and spindle, and securing the drill press.
Cleaning And Inspection
Start by cleaning the drill press thoroughly. Remove dust, dirt, and old grease. Check all moving parts for wear or damage. Look at the spindle, chuck, and motor carefully. Replace or repair any faulty parts. Clean tools work better and last longer. This step keeps your work safe and smooth.
Adjusting The Table And Spindle
Adjust the table height and angle to fit your project. The table must be flat and stable. Make sure the spindle moves freely up and down. Check that the spindle speed matches lathe work needs. Set the spindle to the correct position before use. Proper adjustment helps achieve precise cuts and shapes.
Securing The Drill Press
Secure the drill press firmly to the workbench. Use bolts or clamps to stop any movement. A stable drill press prevents accidents and errors. Double-check all fasteners are tight. Stability is key to effective lathe work on a drill press.
Credit: www.finewoodworking.com
Building The Lathe Attachment
Building the lathe attachment for a drill press turns your tool into a versatile machine. This process involves creating parts that fit well and work smoothly. Each component plays a key role in shaping and holding your workpiece. Careful planning and simple materials help you craft a reliable lathe setup.
Designing The Lathe Bed
The lathe bed acts as the base. It must be strong and straight. Use a flat metal or wooden board. The length depends on the size of your projects. Drill holes for mounting the headstock and tailstock firmly. Ensure the bed stays level during use.
Constructing The Headstock
The headstock holds the drill press chuck or spindle. Build it from a solid block of metal or wood. Attach bearings for smooth rotation. Fix the drill chuck securely on the spindle. This part drives the turning motion of the lathe.
Making The Tailstock
The tailstock supports the opposite end of your workpiece. It slides along the lathe bed to adjust length. Use a sturdy block with a pointed center or live center. Add a locking mechanism to hold it in place. This helps keep the work steady during turning.
Crafting The Tool Rest
The tool rest guides your cutting tools. It must be adjustable and strong. Shape a metal or wooden bar to fit above the bed. Create a clamp to move it closer or farther from the workpiece. A good tool rest improves control and safety while shaping.
Installing The Lathe On The Drill Press
Installing a lathe on a drill press lets you use one tool for two jobs. It saves space and money. The process needs care to ensure safety and precision. The lathe must fit well and work smoothly on the drill press.
Mounting Techniques
Start by selecting a strong base for the lathe. Use clamps or brackets to hold it firmly. Drill holes carefully to match the lathe and drill press parts. Secure bolts tight to avoid movement during work. Check that the lathe sits flat and steady on the drill press table.
Aligning Components
Align the lathe spindle with the drill press motor shaft. Use a straight edge or laser level for accuracy. Make sure the lathe’s tailstock lines up with the headstock. Proper alignment prevents wobbling and uneven cuts. Adjust parts slowly until everything fits perfectly.
Testing Stability
Test the setup by running the drill press at low speed. Look for any shaking or unusual noise. Tighten bolts again if you see movement. Try turning the lathe parts by hand to feel smooth motion. Only start cutting after confirming the lathe is stable and safe.
Operating The Drill Press Lathe
Operating a drill press lathe requires attention to detail and careful handling. This tool lets you shape materials by spinning them against a cutting tool. Proper operation improves the quality of your work and keeps you safe.
Start by understanding the machine’s functions and controls. This knowledge helps you work efficiently and avoid mistakes. Follow best practices for speed, technique, and safety to get the best results.
Setting Speeds For Different Materials
Choose the right speed based on the material’s hardness. Soft materials like wood need higher speeds. Hard metals require slower speeds to prevent damage. Adjust the drill press speed dial before starting. Match speed with the tool size too. Smaller tools spin faster safely. Always check manufacturer guidelines for speed recommendations.
Using Proper Turning Techniques
Hold the cutting tool steady and apply light pressure. Move the tool slowly along the material’s surface. Avoid forcing the tool to prevent slips or breaks. Keep the workpiece secured firmly in place. Use smooth, even strokes for the best finish. Regularly clear away chips to avoid clogging. Practice steady hand movements to improve control.
Maintaining Safety During Use
Wear safety glasses and protective gloves at all times. Keep loose clothing and hair away from moving parts. Ensure the drill press is on a stable surface. Check all guards and safety features before use. Turn off the machine before making adjustments. Never leave the machine running unattended. Keep your workspace clean to reduce hazards.
Troubleshooting Common Issues
Troubleshooting is key when making a lathe work on a drill press. Many common problems can stop your project or damage tools. Fixing these issues early keeps your work safe and smooth. This section covers common problems and quick solutions.
Vibration And Noise Problems
Vibration can ruin your work and cause noise. Check if the drill press is on a solid surface. Tighten all bolts and screws. Loose parts cause shaking and sound. Use rubber pads to reduce vibration. Balance the workpiece carefully. An uneven load increases noise and vibration.
Alignment And Accuracy Fixes
Proper alignment ensures your cuts are straight and precise. Check the drill press spindle and lathe tool for parallel alignment. Use a dial indicator for exact measurement. Adjust the tool rest to keep the workpiece steady. Small shifts in alignment cause big errors. Recheck alignment after each setup change.
Motor And Power Challenges
The motor must run smoothly and provide enough power. Inspect the motor for dust or debris. Clean the vents to prevent overheating. Check the power cord and connections for damage. Low power causes slow or uneven rotation. Use a motor with suitable speed settings for your lathe work.
Maintenance Tips For Longevity
Keeping your lathe attachment for a drill press in good shape is key for long use. Regular care helps avoid breakdowns and keeps the tool working smoothly. Small efforts in maintenance can save time and money later. Here are some simple tips to follow.
Regular Cleaning
Dust and metal shavings build up fast on a lathe setup. Clean the tool after each use to stop damage. Use a brush or cloth to remove dirt from all parts. Avoid water; use a dry or slightly oiled cloth instead. This keeps rust away and parts moving freely.
Lubrication Points
Moving parts need oil to reduce wear and tear. Check the manufacturer’s guide for oil spots on the lathe. Apply light machine oil regularly to gears and bearings. Do not over-oil; too much can attract dust and grime. Proper lubrication keeps the lathe running quietly and smoothly.
Checking Fasteners And Parts
Vibrations can loosen screws and bolts over time. Inspect all fasteners before each use to ensure tightness. Look for worn or cracked parts and replace them quickly. Secure components prevent accidents and improve tool accuracy. Regular checks keep the lathe safe and precise.
Creative Project Ideas
Using a drill press as a lathe opens many creative project ideas. It allows hobbyists and beginners to try various crafts without buying a separate lathe. This setup expands the tool’s use and helps save money. Explore projects that match different skill levels and materials.
Simple Woodturning Projects
Start with small wooden items to build confidence. Make pens, small bowls, or wooden knobs easily. These projects need basic shaping and sanding skills. They also let you practice controlling speed and pressure on the drill press lathe. Simple woodturning improves your hand coordination and tool handling.
Metalworking Possibilities
The drill press lathe can shape soft metals like aluminum or brass. Create custom metal parts or decorative pieces. This work requires proper safety gear and slower speeds. Metal projects teach precision and patience. You can also try making small gears or rings as metal items.
Customization And Upgrades
Improve your drill press lathe with small upgrades. Add a tool rest for better control during cutting. Use different chucks to hold various materials securely. Customize speed settings to match project needs. These upgrades make your work easier and more accurate. Personalize the tool to fit your style and projects.

Credit: makezine.com
Frequently Asked Questions
How Can I Convert A Drill Press Into A Lathe?
You can convert a drill press into a lathe by attaching a lathe tool rest and spindle adapter. This setup allows rotational motion for turning wood or metal. Ensure proper alignment and secure mounting for safe and effective operation.
What Tools Are Needed For A Drill Press Lathe Conversion?
Essential tools include a lathe tool rest, spindle adapter, faceplate, and live center. These components help hold and rotate the workpiece, enabling precise cutting and shaping on your drill press.
Is A Drill Press Lathe Suitable For Woodworking?
Yes, a drill press lathe can handle small woodworking projects. It works well for turning small spindles, dowels, and decorative pieces with proper setup and safety precautions.
What Safety Tips Should I Follow Using A Drill Press Lathe?
Always wear safety goggles and keep loose clothing away. Secure the workpiece firmly and check for stability before starting. Use sharp tools and maintain controlled speeds to prevent accidents.
Conclusion
Converting a drill press into a lathe saves space and money. It allows you to do simple turning tasks at home. Remember to secure all parts tightly for safety. Take your time and follow the steps carefully. This method is great for small projects and learning new skills.
Keep practicing to improve your results each time. Using a drill press this way adds value to your tools. Try it out and see how it works for you.