
Is your cordless drill losing power or refusing to hold a charge? Instead of buying a new battery pack, you can save money and extend your tool’s life by rebuilding your cordless drill battery pack yourself.
It’s easier than you might think, and with the right steps, you’ll have your drill running like new again. You’ll discover clear, simple instructions to bring your battery pack back to life. Ready to get your drill buzzing with power again?
Let’s dive in.
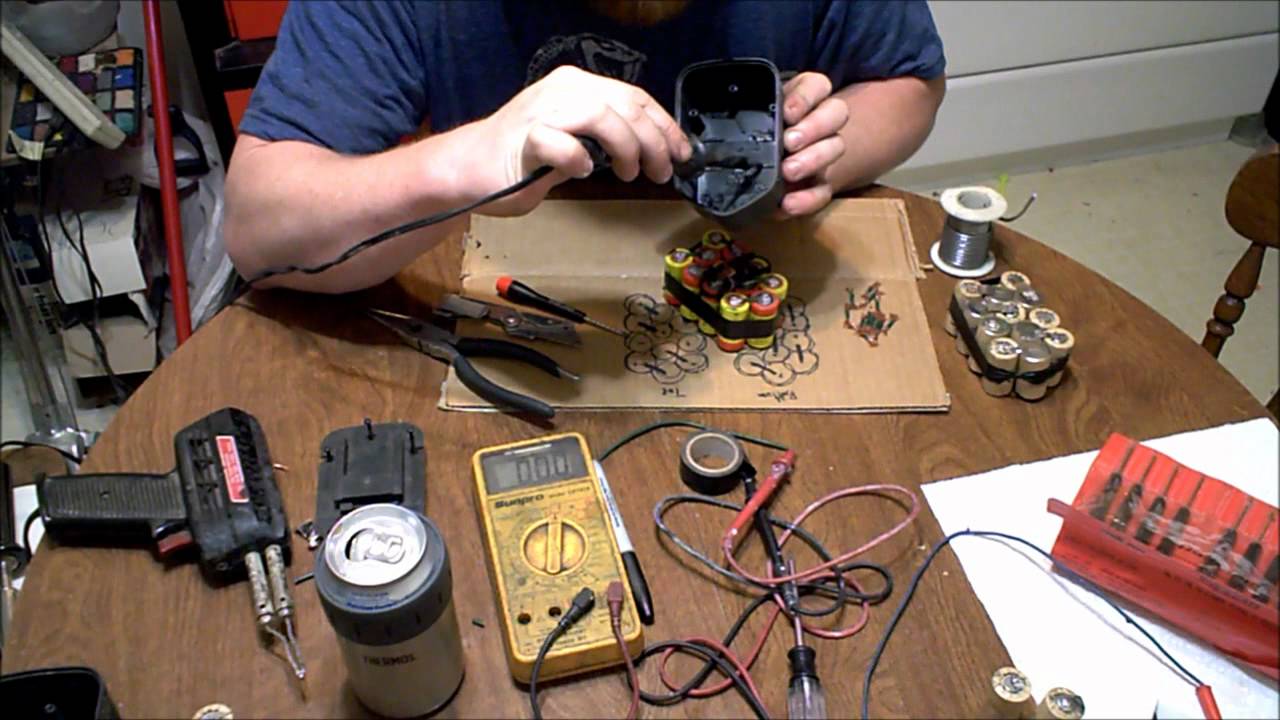
Credit: www.youtube.com
Tools And Materials Needed
Rebuilding a cordless drill battery pack requires specific tools and materials. Having the right items makes the process safe and effective. This section lists everything needed for a successful rebuild.
Safety Gear
Start with safety gear. Use gloves to protect your hands from sharp edges. Wear safety glasses to shield your eyes from sparks or debris. These items keep you safe during the rebuild.
Replacement Battery Cells
High-quality replacement cells are essential. Choose cells that match the original battery’s voltage and size. Using proper cells ensures the drill works well after rebuilding.
Soldering Kit
A soldering iron and solder are necessary. These help connect battery cells securely. Make sure the soldering iron has a fine tip for precision work.
Multimeter
A multimeter tests battery voltage and connection quality. It helps find faulty cells and check the pack after assembly. This tool ensures the pack functions correctly.
Battery Spot Welder Or Nickel Strips
Use a battery spot welder to join cells safely. If unavailable, nickel strips and soldering can work. These materials connect cells to form the battery pack.
Heat Shrink Tubing And Electrical Tape
Heat shrink tubing protects connections from short circuits. Electrical tape adds extra insulation and keeps parts secure. Both prevent damage and improve safety.
Screwdrivers And Pliers
Screwdrivers remove and reassemble the battery casing. Pliers help handle small parts and wires. These simple tools assist in the rebuild process.
Safety Tips Before Starting
Rebuilding cordless drill battery packs can save money and reduce waste. Before starting, focus on safety. Batteries store energy and can be dangerous if handled wrong. Taking precautions protects you and your tools.
Follow these safety tips to avoid accidents. Work in a clean, dry space. Keep metal objects away to stop short circuits. Use tools with insulated handles.
Wear Protective Gear
Always wear safety glasses to protect your eyes. Gloves help prevent electric shocks and cuts. Use a mask if you deal with dust or fumes.
Disconnect And Power Down
Remove the battery pack from the drill. Ensure the drill is off and unplugged. Do not work on a battery that is charging.
Check For Damage
Inspect the battery pack for cracks or leaks. Do not rebuild if you see damage. Damaged batteries can leak harmful chemicals.
Handle Cells Carefully
Battery cells are fragile and can short easily. Avoid dropping or bending them. Use tools designed for battery work only.
Work In A Well-ventilated Area
Batteries can release gases when opened. Good airflow reduces inhaling harmful fumes. Avoid enclosed spaces during the rebuild.
Identifying Battery Type
Identifying the battery type is the first step to rebuild a cordless drill battery pack. Knowing the battery chemistry helps you choose the right replacement cells. It also ensures safety and better performance of your drill.
Batteries come in different types. Each has unique features and needs different care. Recognizing these types prevents damage and extends battery life.
Common Cordless Drill Battery Types
The most common battery types include Nickel-Cadmium (NiCd), Nickel-Metal Hydride (NiMH), and Lithium-Ion (Li-ion). NiCd batteries are older but durable. NiMH batteries hold more charge than NiCd. Li-ion batteries are lighter and have higher energy density.
How To Check Your Battery Type
Look at the label on the battery pack. It usually shows the battery chemistry. If the label is missing, check the drill manual. Another way is to open the battery case carefully and inspect the cells inside.
Why Battery Type Matters In Rebuilding
Each battery type needs different replacement cells. NiCd and NiMH use cylindrical cells. Li-ion packs often use flat or pouch cells. Using the wrong cell can cause poor performance or safety risks.
Disassembling The Battery Pack
Disassembling the battery pack is the first step in rebuilding a cordless drill battery. It involves opening the case safely to access the cells inside. This process requires care and patience to avoid damage to the battery or injury.
Each battery pack model can be different. Some use screws, while others snap together. Identifying the type helps prepare the right tools and method for opening the pack.
Prepare Your Workspace And Tools
Clear a flat surface to work on. Gather tools like screwdrivers, pliers, and a plastic prying tool. Use gloves to protect your hands from chemicals or sharp parts.
Remove The Outer Casing
Look for screws or clips holding the battery case. Unscrew all fasteners carefully. Use a prying tool to gently open snap-fit cases without breaking them.
Take Out The Battery Cells
Inside, you will see the battery cells connected by wires or metal strips. Note the position and wiring before removing them. Carefully disconnect the cells to avoid short circuits.
Inspect The Internal Components
Check for any leaks, corrosion, or damage on the cells and connections. Clean any dirt or residue using a dry cloth. This step helps identify which parts need replacement.
Testing Individual Cells
Testing individual cells is a key step in rebuilding cordless drill battery packs. Each cell holds a small part of the total power. A weak or dead cell can cause the whole pack to fail.
By testing cells, you find which ones still work and which need replacing. This saves money and improves battery life. Testing is simple and needs only a few tools.
Preparing Cells For Testing
First, remove the battery pack from the drill. Carefully open the pack casing without damaging cells. Separate each cell to test them one by one. Handle cells gently to avoid short circuits.
Using A Multimeter To Check Voltage
Set the multimeter to measure DC voltage. Place the red probe on the positive end of the cell. Put the black probe on the negative end. A healthy cell shows about 3.6 to 3.7 volts for lithium-ion types.
Identifying Bad Cells By Voltage
Cells with voltage below 3.0 volts often need replacement. Check each cell’s voltage carefully. Mark cells with low voltage for removal. This prevents poor cells from reducing battery power.
Testing Cell Capacity With A Load
Voltage alone does not show full cell health. Use a small load resistor to test capacity. Connect the load and measure voltage drop over time. Cells that quickly lose voltage have low capacity.
Recording Test Results
Write down voltage and capacity for each cell. Keep this record for reference during rebuilding. Clear notes help avoid mistakes and improve pack performance.

Credit: www.youtube.com
Selecting Replacement Cells
Selecting the right replacement cells is key to rebuilding a cordless drill battery pack. The battery’s performance and safety depend on the quality of these cells. Choosing suitable cells means your drill will run longer and stay reliable.
Focus on cells that match the original pack’s voltage and size. This ensures the new pack fits and works properly with your drill. Using cells with incorrect voltage can damage the drill or reduce its power.
Check Cell Chemistry
Most cordless drills use lithium-ion or nickel-cadmium cells. Lithium-ion cells offer better energy density and last longer. Nickel-cadmium cells are older but still work for some models. Match the chemistry of the original cells to keep your drill safe.
Match Cell Size And Shape
Replacement cells must fit inside the pack housing. Measure the original cells or check the pack’s label for size details. Using cells that are too big or small can cause poor contact or damage the pack.
Choose High-quality Cells
Buy cells from trusted brands. Low-quality cells may fail quickly or cause safety risks. Look for cells with good reviews and proper certifications. This choice protects your drill and your safety during use.
Check Cell Capacity And Current Rating
Capacity is how much energy a cell stores, shown in milliampere-hours (mAh). Higher capacity means longer run time. Current rating tells how much power the cell can safely provide. Match these numbers to the original cells for best results.
Assembling New Battery Pack
Assembling a new battery pack for your cordless drill requires careful steps. This process ensures the battery works well and lasts long. Use the right tools and parts for safety and efficiency.
Follow each step closely. Small mistakes can cause problems later. Take your time and double-check your work.
Preparing The Battery Cells
Start by checking the new battery cells. Make sure all cells have the same voltage and capacity. This balance prevents damage and improves performance. Clean the terminals to ensure good connections.
Connecting The Cells In Series Or Parallel
Arrange the cells based on the drill’s voltage needs. Connect cells in series to increase voltage. Connect in parallel to increase capacity. Use spot welding or soldering carefully to avoid heat damage.
Installing The Battery Management System (bms)
A BMS protects the battery from overcharge and over-discharge. Connect the BMS to the battery pack following the wiring diagram. Secure all connections tightly to avoid loose contacts.
Securing The Battery Pack
Place the assembled cells and BMS inside the battery case. Use insulation materials to prevent shorts. Close the case firmly to keep parts safe and stable during use.

Credit: www.ebay.com
Soldering And Connecting Cells
Soldering and connecting cells is a key step in rebuilding cordless drill battery packs. This process joins the individual battery cells into a working unit. Proper soldering creates strong electrical connections. Good connections help the battery work well and last longer.
Safety matters during soldering. Always wear safety glasses and work in a well-ventilated area. Use the right tools to avoid damage to cells or yourself.
Soldering Tools And Materials
Use a soldering iron with a fine tip for precise work. Lead-free solder is best for a cleaner, safer bond. Keep a damp sponge handy to clean the iron tip often. Heat shrink tubing can protect connections from short circuits.
Preparing Battery Cells
Clean the metal tabs on each cell with fine sandpaper. Remove any dirt or oxidation for better solder adhesion. Arrange the cells in the correct order for your battery pack design. Make sure the positive and negative ends line up properly.
Techniques For Soldering Cells
Heat the soldering iron before starting. Touch the iron tip to the cell tab and solder wire together. Apply solder quickly to avoid heating the cell too much. Work fast but carefully to make a solid joint. Avoid moving the parts until the solder cools and hardens.
Connecting Cells In Series Or Parallel
Connect cells in series to increase voltage. Connect cells in parallel to increase capacity. Use metal strips or nickel connectors to join cells. Solder the strips securely to each cell tab. Double check all connections for correct polarity before finishing.
Sealing And Reassembling The Pack
Sealing and reassembling the cordless drill battery pack is the last step. It protects the new cells and keeps everything in place. Proper sealing stops dirt and moisture from entering the pack. This helps the battery last longer and work safely.
Take your time to align the parts correctly. A good reassembly ensures the battery fits well in the drill. It also prevents loose connections that can cause problems later.
Cleaning The Battery Case Before Sealing
Wipe the inside of the battery case with a dry cloth. Remove dust, dirt, and any leftover adhesive. Clean surfaces help the sealant stick better. Avoid using liquids that can damage the battery cells.
Applying Sealant Or Tape For Protection
Use electrical tape or a plastic-safe sealant to close the case. Cover all gaps and edges carefully. This stops moisture and dust from entering the pack. Make sure the sealant does not block any vents or contacts.
Aligning And Closing The Battery Case
Fit the case halves together exactly as before. Check that all wires and parts are inside. Press the case firmly to snap it shut. Use screws if the pack had them originally. Tighten screws evenly to avoid cracks or gaps.
Testing The Reassembled Battery Pack
After sealing, test the battery in your cordless drill. Check for a proper fit and connection. Turn on the drill to see if it powers up. A well-sealed pack should work without issues. If problems appear, reopen and check the assembly.
Charging And Testing The Rebuilt Battery
Charging and testing the rebuilt battery is the final step. It shows if the battery works well and is safe to use. Proper charging helps the battery reach full power. Testing checks the battery’s health and performance.
Do not rush this step. Careful charging and testing ensure the battery lasts longer. It also prevents damage to your drill and keeps you safe.
Charging The Rebuilt Battery Pack
Use the correct charger for your battery type. Connect the battery to the charger firmly. Charge the battery on a flat, fireproof surface. Avoid charging near water or heat sources. Let the battery charge fully until the charger light shows completion. Do not overcharge the battery. Overcharging can reduce battery life and cause damage.
Testing Battery Voltage
Use a multimeter to check voltage after charging. Set the multimeter to DC voltage mode. Place the probes on the battery terminals carefully. Compare the reading to the battery’s rated voltage. A good battery shows close to the rated voltage. Low voltage means the battery may need recharging or cell replacement.
Testing Battery Capacity
Capacity testing shows how long the battery holds power. Use a battery analyzer or a load tester for this. Discharge the battery at a steady rate. Measure how long it takes to reach a low voltage cutoff. A rebuilt battery should hold most of its original capacity. If capacity is low, check cells or connections again.
Troubleshooting Common Issues
Troubleshooting common issues helps keep your cordless drill battery pack working well. Problems can stop your drill from running or reduce its power. Finding the cause is the first step to fixing it. Simple checks often solve most problems quickly.
Checking Battery Charge Level
Test the battery with a voltage meter. Low voltage means the battery needs charging or replacement. A fully charged battery should match the voltage on its label. If voltage is very low, cells may be dead or damaged.
Inspecting Battery Contacts
Dirty or corroded contacts stop power flow. Clean contacts with a small brush or cloth. Use rubbing alcohol for tough dirt. Make sure contacts are dry before use. Good contact helps the drill get full power.
Testing Individual Battery Cells
Open the battery pack carefully to access cells. Use a multimeter to check each cell voltage. A weak or dead cell lowers overall battery performance. Replace bad cells with new ones of the same type and size.
Checking Battery Pack Wiring
Look for loose or broken wires inside the battery pack. Wires may disconnect from drops or impacts. Secure loose wires with solder or tape. Proper wiring ensures smooth power flow to the drill motor.
Examining Battery Temperature
Overheating can damage the battery pack. Let the battery cool if it feels hot. Avoid charging or using the battery in extreme heat. Keep the pack away from direct sunlight or heat sources during use and storage.
Tips For Extending Battery Life
Extending the life of your cordless drill battery saves money and reduces waste. Proper care and simple habits keep batteries working longer. Small changes make a big difference in battery health.
These tips help you get the most out of every charge. Follow them to keep your battery strong and reliable.
Charge Batteries Properly
Use the charger made for your battery model. Avoid overcharging by removing the battery once fully charged. Charge batteries in a cool, dry place. Never let the battery completely drain before recharging.
Store Batteries Correctly
Keep batteries in a cool, dry spot away from sunlight. Store them at about 40-60% charge for best results. Avoid extreme heat or cold that can damage cells. Remove batteries from the drill if not used for weeks.
Use Batteries Regularly
Use your cordless drill often to keep batteries active. Long periods of inactivity can lower battery capacity. Rotate multiple batteries to balance their use. Regular use helps maintain battery performance.
Avoid Excessive Heat
Heat breaks down battery cells faster. Keep your drill and battery out of hot environments. Avoid charging batteries in direct sunlight. Let batteries cool down after heavy use before charging.
Clean Battery Contacts
Dirty contacts reduce battery efficiency. Wipe contacts with a dry cloth to remove dust. Check for corrosion and clean gently if needed. Good connections improve charging and power output.
Frequently Asked Questions
How Do I Rebuild A Cordless Drill Battery Pack Safely?
Always disconnect the battery before starting. Use protective gloves and eye gear. Work in a well-ventilated area. Follow manufacturer guidelines for battery type and wiring. Proper safety prevents accidents during battery pack rebuilding.
What Tools Are Needed To Rebuild A Cordless Drill Battery?
You need a soldering iron, multimeter, wire cutters, and replacement cells. Also, have heat shrink tubing and a battery spot welder. These tools ensure precise and safe battery pack assembly.
Can I Use Different Battery Cells To Rebuild My Pack?
Use only the same type and voltage cells recommended. Mixing cells can cause poor performance or damage. Matching ensures safety and longevity of your cordless drill battery pack.
How Do I Test A Rebuilt Cordless Drill Battery Pack?
Use a multimeter to check voltage and continuity. Test under load to ensure stable power output. Proper testing confirms the battery pack works correctly before use.
Conclusion
Rebuilding cordless drill battery packs saves money and reduces waste. It helps extend the life of your tools. You only need basic tools and some patience. Follow safety steps carefully to avoid accidents. Testing the new pack ensures good performance.
This process is simple and rewarding. Keep your drill ready for any job. Try it yourself and see the difference.