
If you own a Makita cordless drill, knowing how to change the drill bit quickly and safely is a skill you’ll use often. Whether you’re tackling a home project or working on something bigger, the right drill bit makes all the difference.
But if you’re unsure how to swap bits without wasting time or damaging your tool, this guide is for you. Keep reading, and you’ll learn simple steps to change your Makita cordless drill bit like a pro—saving you frustration and getting your job done faster.

Credit: www.youtube.com
Tools Needed
Changing the drill bit on a Makita cordless drill is simple with the right tools. Having these tools ready makes the process quick and safe. You do not need many items, just a few basic tools that help you work effectively.
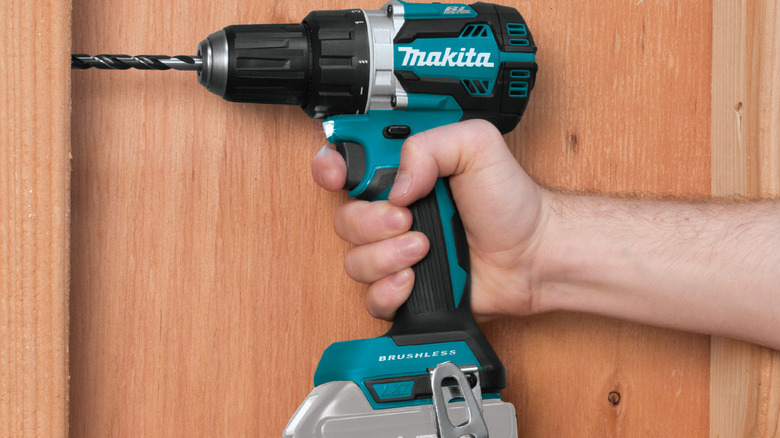
Makita Cordless Drill
The drill itself is the main tool. Ensure it is turned off and the battery is removed before changing bits. This prevents accidents and keeps you safe.
New Drill Bit
Choose the correct drill bit for your project. Different jobs need different sizes and types of bits. Make sure the bit fits the chuck of your Makita drill.
Chuck Key (if Needed)
Some Makita cordless drills use a chuck key to tighten or loosen the chuck. Check your drill model. If it uses a key, keep it handy for easy bit changes.
Gloves
Wear gloves to protect your hands from sharp bits. Gloves help you hold the bit firmly and avoid cuts during the change.
Credit: vixencomposites.com
Safety Tips
Safety is the top priority when changing a drill bit on a Makita cordless drill. Taking simple precautions prevents accidents and keeps you safe. Always prepare your workspace and equipment before starting.
Never rush the process. Careful steps protect your hands and eyes from injury. Use the right tools and follow instructions closely.
Turn Off And Remove The Battery
Always switch off the drill before changing the bit. Remove the battery to stop any accidental start. This step is crucial for your safety.
Wear Safety Glasses
Protect your eyes from flying debris. Safety glasses shield your eyes during the bit change. Use them every time you handle the drill.
Use Proper Hand Position
Hold the drill firmly with one hand. Use the other hand to loosen or tighten the chuck. Keep your fingers away from the bit area.
Check The Drill Bit Condition
Inspect the drill bit for damage or wear. Using a broken bit can cause accidents. Replace dull or cracked bits immediately.
Secure The Drill On A Stable Surface
Place the drill on a flat surface before changing the bit. Stability helps prevent slips and accidents. Avoid changing bits while holding the drill in mid-air.
Identify Your Drill Model
Start by checking the label or manual to find your Makita drill model. Knowing the exact model helps you choose the right bit and change it safely. Each model may have a different way to release and secure the drill bit.
Locate The Model Number
Start by finding the model number on your Makita cordless drill. This number is usually on a label or stamped on the drill body. It helps identify the exact type and features of your drill. Knowing the model number ensures you follow the right steps to change the drill bit safely.
Check The Drill’s Manual
The manual contains detailed information about your drill model. It shows diagrams and instructions specific to your tool. If you do not have a physical copy, search online using the model number. The manual guides you on removing and inserting drill bits correctly.
Understand Drill Variations
Makita cordless drills come in different designs and chuck types. Some models use keyless chucks, others need a chuck key. Identifying your drill model reveals the type of chuck it uses. This helps you know how to open and tighten the chuck to change bits.
Credit: www.slashgear.com
Remove Old Drill Bit
Removing the old drill bit from your Makita cordless drill is the first step in changing it. This step is simple but important. Doing it right keeps your drill working well and safe to use.
Release The Chuck
The chuck holds the drill bit tightly. To remove the bit, you must first release the chuck. Hold the drill firmly. Turn the chuck counterclockwise. This loosens its grip on the drill bit. Keep turning until you can move the bit freely.
Pull Out The Bit
Once the chuck is loose, pull the drill bit straight out. Use a steady hand. Do not wiggle the bit too much. This prevents damage to the chuck and the bit. If the bit feels stuck, try loosening the chuck a little more. After removing the bit, clean the chuck before inserting a new bit.
Choose The Right New Bit
Choosing the right new drill bit is important for your Makita cordless drill. The right bit helps you work better and keeps your drill safe. Different tasks need different bits. Picking the right one saves time and effort.
Understanding Drill Bit Types
Drill bits come in many types. Twist bits are common for wood and metal. Masonry bits work best for concrete and brick. Spade bits create large holes in wood. Choose the bit type that fits your job.
Selecting The Correct Size
Drill bits come in various sizes. The size must match the hole you want. Too big or too small bits cause poor results. Check the project requirements before picking your bit size.
Checking The Bit Material
Drill bits are made from different materials. High-speed steel (HSS) is good for wood and soft metals. Carbide-tipped bits last longer on hard materials. Pick a material that suits your work surface.
Considering The Shank Type
The shank fits into the drill chuck. Most Makita cordless drills use round or hex shanks. Hex shanks give a better grip and prevent slipping. Make sure the shank fits your drill perfectly.
Insert New Drill Bit
Inserting a new drill bit into your Makita cordless drill is simple. Follow clear steps to ensure the bit fits securely. This helps the drill work smoothly and safely. Take your time and handle the parts carefully.
Align The Bit
Hold the new drill bit by its shank. Line it up straight with the drill’s chuck. Make sure the bit goes in evenly. A crooked bit can cause problems while drilling. Push it gently into the chuck until it stops.
Tighten The Chuck
Turn the chuck collar clockwise to tighten. Keep turning until the bit feels firm. Use both hands if needed for a tight grip. Check the bit by pulling lightly. It should not move or slip out. This secures the bit for safe use.
Test The New Bit
Testing the new drill bit is an important step after changing it on your Makita cordless drill. This step ensures the bit is secured properly and works well. It helps avoid damage to your project or the tool itself.
By testing the bit, you confirm it spins smoothly and grips tightly. This quick check saves time and effort during your work.
Secure The Drill Bit Firmly
Hold your drill firmly with one hand. Use the other hand to gently try to wiggle the drill bit. The bit should not move or feel loose. If it moves, tighten the chuck again.
Start With Low Speed
Switch your drill to low speed mode. This reduces the risk of mistakes or accidents. Turn on the drill and watch the bit rotate. It should spin straight without wobbling.
Listen For Unusual Sounds
Pay attention to the sound of the drill. A smooth and steady noise means the bit is installed correctly. Strange noises or grinding sounds mean you need to adjust the bit.
Try A Test Drill
Use a scrap piece of wood or metal. Drill a small hole to check the bit’s performance. The bit should cut cleanly without slipping or stalling. If it struggles, check the bit’s tightness and condition.
Maintenance Tips
Changing a drill bit on a Makita cordless drill is simple and quick. Start by loosening the chuck, remove the old bit, and insert the new one firmly. Tighten the chuck to secure the bit before use.
Keep The Chuck Clean
Dust and debris can build up inside the chuck. Clean it often to keep the drill working well. Use a small brush or a cloth to remove dirt. Avoid using water or harsh chemicals. A clean chuck holds the drill bit tightly.
Lubricate Moving Parts
Lubrication helps the drill run smoothly. Apply a drop of machine oil to the chuck and other moving parts. Wipe off any extra oil to stop dirt from sticking. Proper lubrication reduces wear and extends tool life.
Check For Wear And Damage
Look at the drill bit and chuck for signs of wear. Replace any damaged parts right away. Worn parts can cause poor performance or injury. Regular checks keep your drill safe and effective.
Store Properly
Store your Makita cordless drill in a dry, cool place. Avoid leaving it in damp or hot areas. Use the case that comes with the drill for extra protection. Proper storage prevents rust and battery damage.
Charge The Battery Correctly
Use the charger made for your Makita drill battery. Avoid overcharging or letting the battery fully drain. Charge in a cool, dry place for best results. Good battery care helps your drill last longer.
Frequently Asked Questions
How Do I Remove A Drill Bit From A Makita Cordless Drill?
To remove a drill bit, first power off the drill. Hold the chuck and rotate it counterclockwise. This loosens the bit for easy removal. Always ensure the drill is unplugged or battery removed for safety.
How To Insert A Drill Bit In Makita Cordless Drill?
Insert the drill bit into the chuck firmly. Hold the chuck and rotate it clockwise to tighten. Make sure the bit is centered and secure before use to avoid slipping during drilling.
What Type Of Drill Bit Fits Makita Cordless Drills?
Makita cordless drills typically use standard hex or round-shank bits. Check your drill’s chuck size, usually 10mm or 13mm, for compatibility. Use bits designed for cordless drills for best performance and durability.
How Tight Should The Chuck Be When Changing Bits?
Tighten the chuck firmly but avoid over-tightening. A secure chuck prevents the bit from slipping. Use hand force or the drill’s clutch to secure the bit properly without damaging the chuck.
Conclusion
Changing a drill bit on a Makita cordless drill is simple and quick. Always make sure the drill is off before starting. Use the chuck to loosen and remove the old bit. Insert the new bit firmly and tighten the chuck.
This ensures a safe and strong hold. Practice these steps to work with confidence. Your drill will be ready for any task. Keep your tools in good shape for better results. A little care goes a long way.