
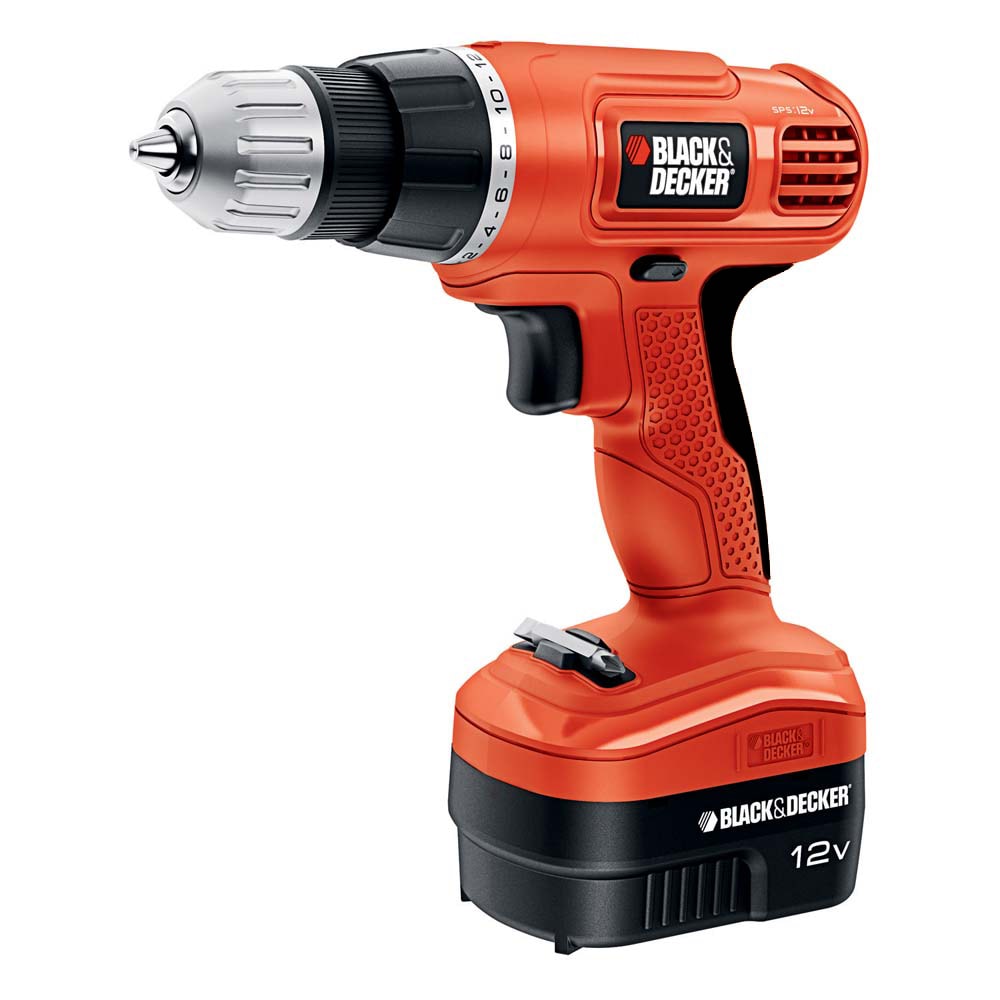
Is your cordless drill battery charger not working, leaving you stuck in the middle of a project? Don’t worry—you don’t have to buy a new one just yet.
Fixing your charger can save you time, money, and frustration. In this guide, you’ll learn simple, step-by-step tips to repair your cordless drill battery charger quickly and safely. By the end, you’ll feel confident tackling the problem yourself and getting back to work without delay.
Keep reading to discover how easy it can be to bring your charger back to life!
Common Charger Issues
Cordless drill battery chargers can face several common issues. These problems often stop the charger from working correctly. Understanding these issues helps you fix them faster. Below are some frequent charger problems and their signs.
No Power Indicator
The power indicator light should turn on when plugged in. If it stays off, the charger may not get power. Check the wall outlet and the charger plug. Sometimes, the internal fuse or circuit board is damaged. This prevents the light from showing.
Overheating Problems
Chargers get warm during use, but too much heat is a sign of trouble. Overheating can damage the charger and battery. Dust, blocked vents, or a faulty component often cause this. Stop using the charger if it feels very hot.
Slow Charging
Slow charging means the battery takes too long to fill up. This could be due to a weak charger or old battery. Loose connections or dirty contacts also slow charging. Clean the contacts and check all plugs for a tight fit.
Intermittent Charging
The charger starts and stops charging repeatedly. This issue can confuse the battery and reduce its life. Loose wires or a broken switch inside the charger often cause this. Wiggle the cord gently to find loose spots.
Safety Precautions
Safety is the top priority when repairing a cordless drill battery charger. Working with electricity and batteries can be risky without proper care. Taking the right precautions helps avoid accidents and damage.
Follow safety steps carefully. Protect yourself and your tools. Stay alert and work in a safe environment.
Unplugging And Discharging
Always unplug the charger from the power outlet before starting repairs. This stops electrical current flow and reduces shock risk.
Discharge the battery fully. Remove it from the charger and let it drain completely. This prevents accidental power surges during repair.
Using Protective Gear
Wear safety goggles to protect your eyes from sparks or debris. Gloves help protect your hands from sharp parts and electric shocks.
Avoid loose clothing or jewelry that can get caught in tools or wires. Keep your workspace clean and organized to reduce hazards.
Handling Electrical Components
Use insulated tools to handle wires and electrical parts. This lowers the chance of electric shock.
Do not touch exposed wires or terminals with bare hands. Check for damaged wires and replace them before repair.
Work slowly and carefully. Double-check connections before powering the charger again.
Tools And Materials Needed
Repairing a cordless drill battery charger requires the right tools and materials. Having these ready makes the job easier and safer. This section lists what you need for a successful repair.
Basic Hand Tools
Start with simple hand tools. A screwdriver set is essential. Both flathead and Phillips screwdrivers help open the charger case. Needle-nose pliers assist in handling small parts. Wire cutters and strippers are useful for fixing or replacing wires. A small flashlight can help see inside tight spaces.
Multimeter And Testers
A multimeter is vital for checking electrical parts. It measures voltage, current, and resistance. This tool helps find faulty components in the charger. Test leads and probes come with the multimeter. You can also use a continuity tester to check wire connections. These tools save time by pinpointing problems quickly.
Replacement Parts
Some parts may need replacing during repair. Common parts include fuses, wires, and connectors. You might need a new power cord if the old one is damaged. Look for replacement circuit boards or charging modules if needed. Always choose parts that match the original specifications. This ensures the charger works safely and well.
Credit: hackaday.com
Diagnosing The Charger
Diagnosing the charger is the first step to fix a cordless drill battery charger. It helps to find out what part causes the problem. Careful checking saves time and money. Follow simple steps to identify the issue clearly.
Checking Power Supply
Start by checking the power source. Make sure the outlet has electricity. Use a lamp or another device to test the socket. No power means the charger cannot work. Try a different outlet if needed.
Inspecting Cords And Plugs
Look closely at the charger’s cord and plug. Check for cuts, bends, or frays. Broken wires stop the charger from working. Also, make sure the plug fits tightly in the socket. Loose plugs cause poor connection.
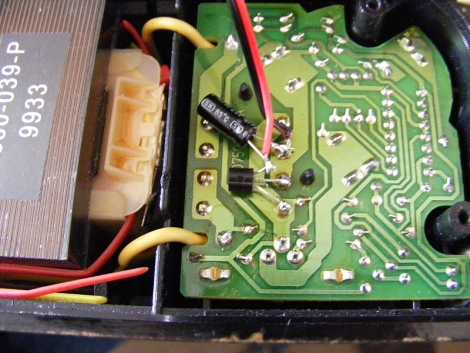
Testing Internal Components
Open the charger carefully to inspect inside parts. Use a multimeter to test fuses and circuits. Look for burnt or damaged parts. Faulty components need replacing to fix the charger. Handle internal parts with care to avoid damage.
Fixing Common Problems
Fixing common problems in a cordless drill battery charger can save money and time. Many issues are simple and easy to repair. Knowing how to check and fix these problems helps keep your charger working well.
Replacing Blown Fuses
A blown fuse stops the charger from working. Find the fuse inside the charger case. Use a screwdriver to open the case carefully. Check the fuse for any signs of damage or a broken wire. Replace it with a fuse of the same type and rating. Make sure the new fuse fits tightly to avoid loose connections.
Repairing Damaged Wires
Wires can wear out or break over time. Look for cuts, frays, or loose ends on the wires. Use wire strippers to remove damaged parts. Twist the wires tightly and solder them if possible. Cover the repair with electrical tape or heat shrink tubing. This prevents short circuits and keeps the charger safe.
Cleaning Corroded Contacts
Corroded contacts stop electricity from flowing properly. Open the charger and inspect the metal contacts. Use a small brush or fine sandpaper to remove corrosion gently. Clean the contacts with rubbing alcohol to remove dirt and oil. Let the parts dry before reassembling the charger. Clean contacts improve charging speed and efficiency.

Credit: www.youtube.com
Testing After Repair
After fixing your cordless drill battery charger, testing is crucial. It helps confirm the repair success and ensures safe operation. Skipping this step can lead to further damage or safety risks. Follow clear methods to test the charger carefully.
Verifying Output Voltage
Check the charger’s output voltage using a multimeter. Connect the meter probes to the charger terminals. The reading must match the charger’s specifications. A correct voltage means the charger can power the battery properly. If the voltage is too low or too high, the charger may not work safely.
Monitoring Charging Performance
Test the charger by charging the battery fully. Observe the charging time and heat levels. The battery should charge steadily without overheating. A slow charge or excessive heat suggests a problem. Keep an eye on the charger during this process to ensure it runs smoothly.
Maintenance Tips
Maintaining your cordless drill battery charger is key to keeping it working well. Simple care steps can help avoid damage and extend its life. Follow these easy tips to keep your charger in top shape.
Regular Cleaning
Dust and dirt can block the charger vents. Use a dry cloth to wipe the surface often. Avoid water or harsh cleaners. Keep the charging contacts clean with a soft brush. This helps good power flow to the battery.
Proper Storage
Store the charger in a cool, dry place. Avoid spots with high heat or moisture. Do not leave it in direct sunlight. Keep it away from metal objects that may cause shorts. Proper storage prevents damage and keeps the charger safe.
Avoiding Overuse
Do not use the charger nonstop for long hours. Let it cool down between uses. Overuse can cause overheating and shorten its life. Give it breaks to maintain good performance. Using the charger wisely keeps it working longer.
Credit: www.acquetech.com
Frequently Asked Questions
How Do I Fix A Cordless Drill Battery Charger?
First, check the power source and cable for damage. Clean charger contacts and ensure proper connection. Replace faulty fuses or internal components if needed. Always follow safety guidelines when repairing electrical parts.
Why Is My Cordless Drill Charger Not Charging?
This could be due to a dead battery, faulty charger, or damaged power cord. Test the charger output with a multimeter. Replace or repair damaged parts to restore charging functionality.
Can I Repair A Cordless Drill Charger Myself?
Yes, simple issues like loose wires or dirty contacts can be fixed at home. Complex problems may require professional help. Always unplug the charger before attempting repairs for safety.
How To Test If A Cordless Drill Charger Is Working?
Use a multimeter to measure the output voltage. Compare it with the charger’s rated voltage. No or low voltage indicates a faulty charger needing repair or replacement.
Conclusion
Fixing a cordless drill battery charger can save money and time. Follow the steps carefully and check each part. Use the right tools and stay safe while working. Small problems like loose wires or dirt often cause charger issues. Testing the charger after repair helps ensure it works well.
Regular care can help your charger last longer. Keep your drill ready for the next project with a working charger. Simple repairs can bring your tools back to life quickly.